
Dog clutch - differential lock (page 4 of 4)
- Make
- Land Rover
- Model
- Discovery II
- Section
- OVERHAUL
TRANSFER BOX - LT230SE
OVERHAUL
41-67
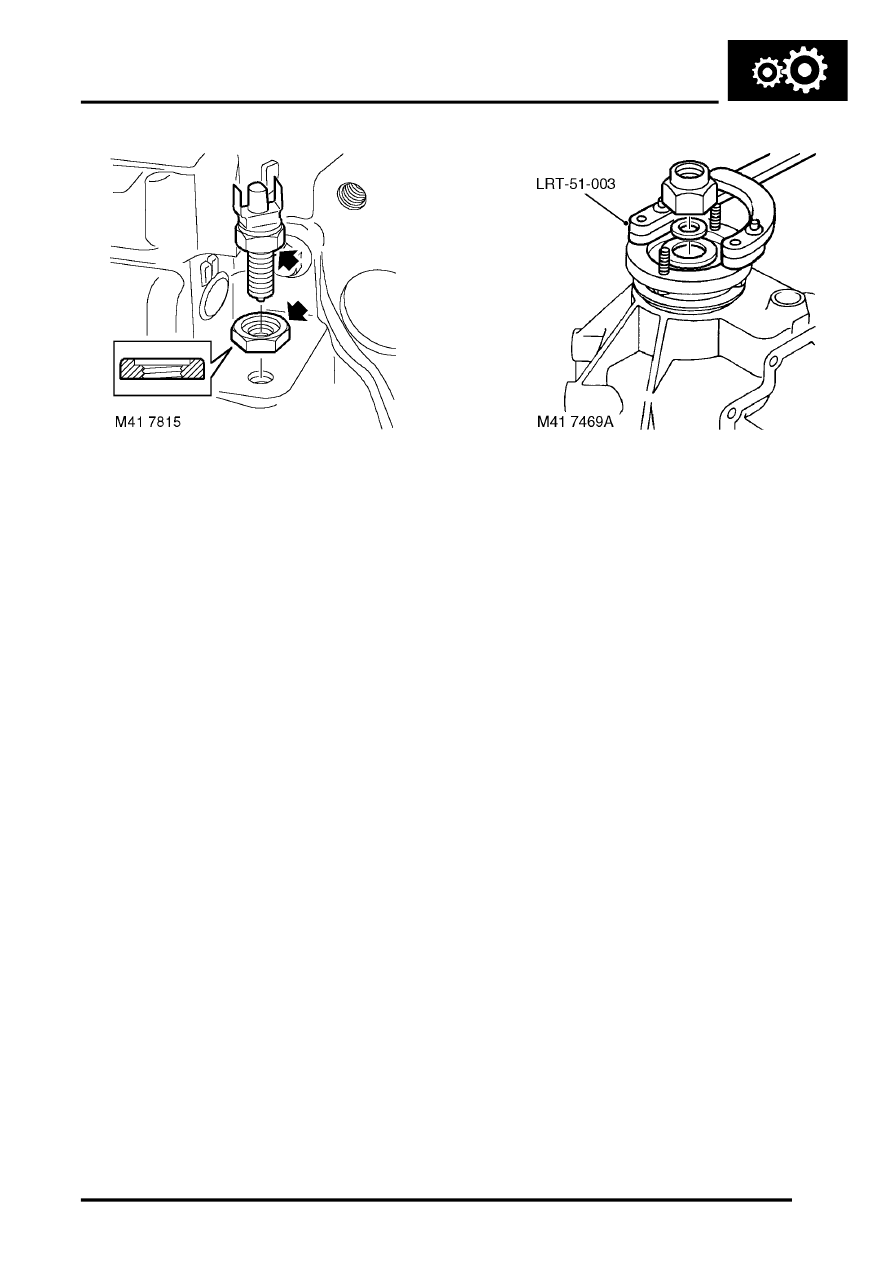
31. Clean threads of differential lock warning lamp
switch(es).
32. Uo to 03 Model year: Fit nut to switch head
with counterbore positioned towards switch
head. The nut acts as a spacer to ensure
that switch setting is correct. Always
ensure that nut is fully tightened to switch
head (no gap).
33. Uo to 03 Model year: Apply sealant, Part No.
STC 50552 to threads of differential warning
lamp switch.
34. Uo to 03 Model year: Position switch into front
output housing until nut bottoms out on
housing, tighten nut to 11 Nm (8 lbf.ft).
35. 03 Model Year onwards: Fit new aluminium
sealing washers to differential lock warning
lamp switches.
CAUTION: Ensure that replacement
washers are the same thickness as the
originals.
36. 03 Model Year onwards: Apply sealant, Part
No. STC 50552 to threads of both switches.
37. 03 Model Year onwards: Fit switches and
tighten to 25 Nm (18 lbf.ft).
38. If fitted: Operate differential lock selector lever
and check that detent ball can be felt to
positively engage/disengage with grooves in
shaft.
39. Up to 03 Model Year: Screw plug in or out until
setting is correct
40. Apply sealant, Part No. STC 4600 to mating
face of differential lock selector side cover.
41. Apply sealant, Part No. STC 50552 to threads
of side cover bolts.
42. Position differential lock selector side cover to
front output shaft housing, fit bolts and tighten
25 Nm (18 lbf.ft).
43. Fit output flange, new felt and steel washers
and new retaining nut.
44. Using tool LRT-51-003 to restrain flange,
tighten output flange nut to 162 Nm (119 lbf.ft).
Parts & tools for this job Staging For Land Rover Discovery
- PARTClutch kitSearch: Land Rover Discovery clutch kit
- TOOLClutch alignment toolSearch: clutch alignment tool
- FLUIDGear oilSearch: Land Rover Discovery manual gearbox oil
Links open Amazon search results in a new tab. As an Amazon Associate I earn from qualifying purchases.