
Road spring - front
- Make
- Land Rover
- Model
- Discovery II
- Section
- REPAIRS › Road spring - front
FRONT SUSPENSION
60-32
REPAIRS
Road spring - front
$% 60.20.11
Remove
1. Raise front of vehicle.
WARNING: Do not work on or under a
vehicle supported only by a jack. Always
support the vehicle on safety stands.
2. Support vehicle under chassis.
3. Remove front road wheels.
4. Support weight of front axle.
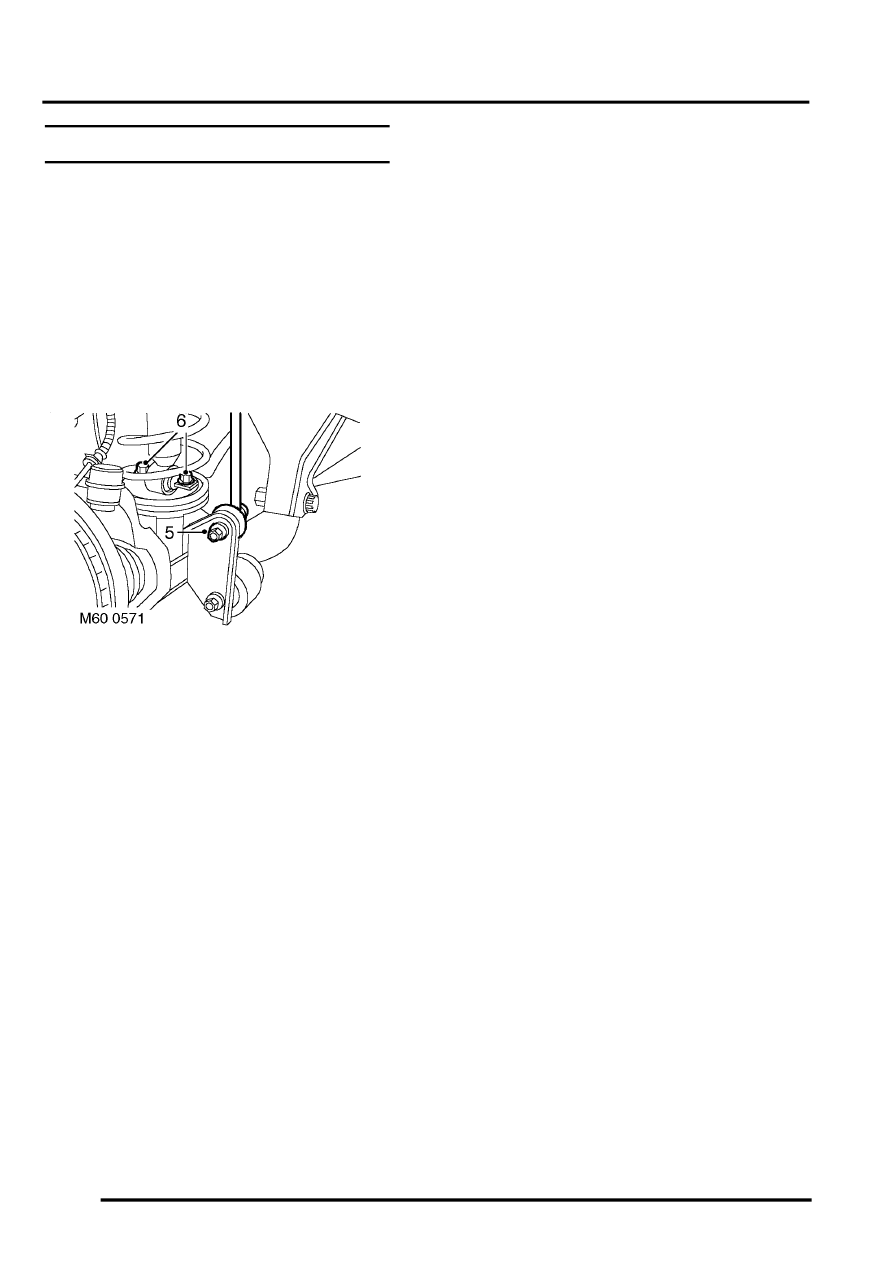
5. Remove 2 nuts securing anti-roll bar links to
front axle and disconnect links from axle.
6. Remove 2 bolts securing each damper to front
axle.
WARNING: Make sure the axle cannot move
when the damper is disconnected. The
damper limits the downward movement of
the axle. If the axle is not restrained,
disconnecting the damper will allow
unrestricted movement which may cause
personal injury or damage to equipment.
7. Lower front axle.
CAUTION: Ensure brake hoses and ABS
sensor harnesses are not damaged when
lowering front axle.
8. Release and remove front spring from damper.
Refit
1. Clean front spring seats.
2. Position front spring, with close coil uppermost,
over damper and locate in cut out in lower
spring seat.
3. Ensure both front springs are correctly located
in spring seats and raise front axle. Fit bolts
securing both dampers to front axle and tighten
to 45 Nm (33 lbf.ft).
4. Ensure washer is in place on lower ball joint of
each anti-roll bar link, then connect lower ball
joints to axle. Tighten nuts to 100 Nm (74 lbf.ft).
5. Fit front road wheels and tighten nuts to 140
Nm (103 lbf.ft).
6. Remove stands and lower vehicle.
Parts & tools for this job Staging For Land Rover Discovery
- TOOLCoil spring compressorSearch: coil spring compressor
- TOOLBall joint separatorSearch: ball joint separator
- PARTFront shock absorbersSearch: Land Rover Discovery front shock absorbers
Links open Amazon search results in a new tab. As an Amazon Associate I earn from qualifying purchases.