
CD autochanger
- Make
- Land Rover
- Model
- Discovery II
- Section
- REPAIRS › CD autochanger
IN CAR ENTERTAINMENT
86-6-36 REPAIRS
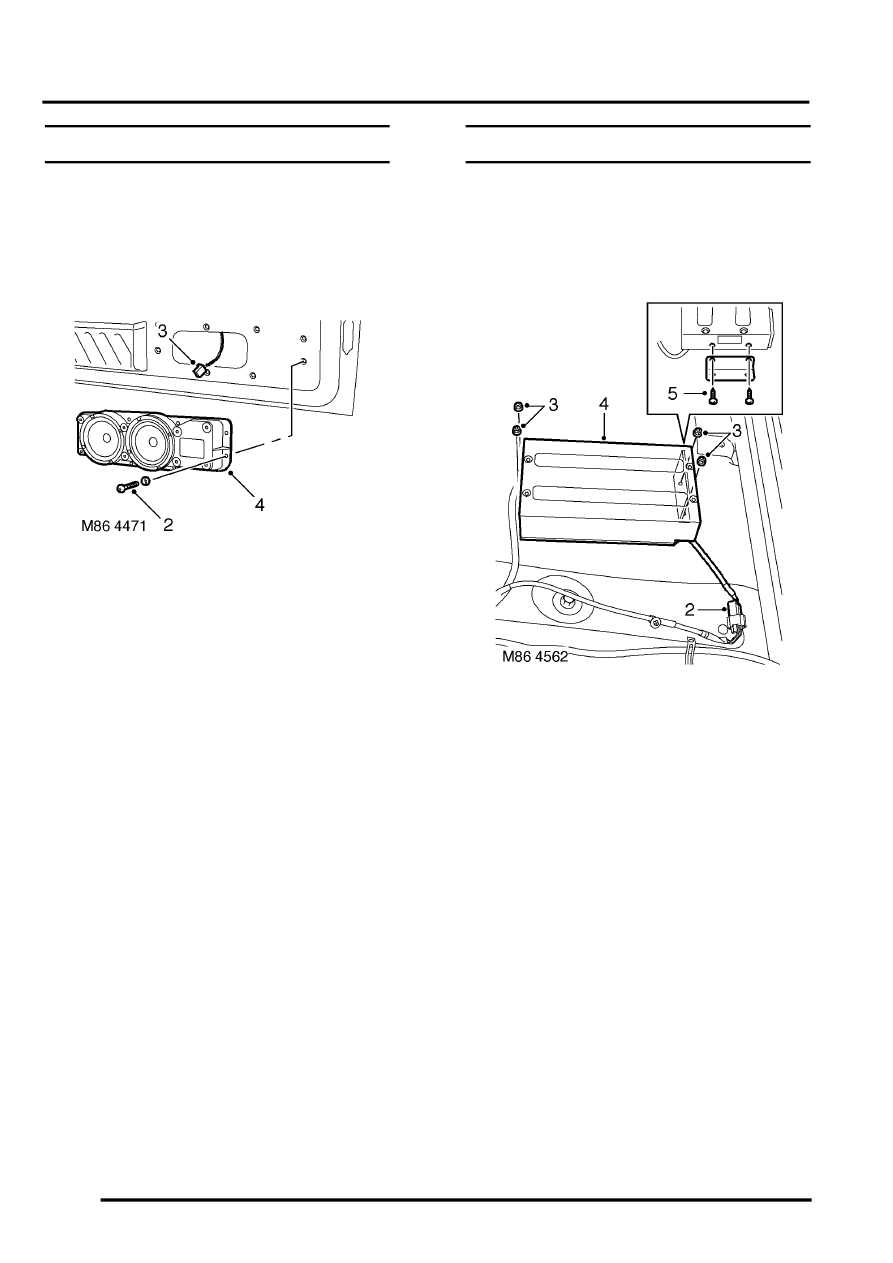
Speaker - tail door
$% 86.50.42
Remove
1. Remove tail door speaker trim casing.
REPAIRS, Trim casing - tail door speaker.
2. Remove 8 screws securing tail door speaker to
tail door trim casing.
3. Disconnect tail door speaker multiplug.
4. Remove tail door speaker.
Refit
1. Position tail door speaker to tail door and
connect multiplug.
2. Fit screws securing tail door speaker to tail door
trim casing.
3. Fit tail door speaker trim casing.
REPAIRS, Trim casing - tail door speaker.
CD autochanger
$% 86.50.60
Remove
1. Remove RH front seat.
2. Disconnect multiplug from CD autochanger.
3. Remove 4 nuts securing CD autochanger to
floor.
4. Remove CD autochanger.
5. Remove 4 screws securing mounting brackets
to CD autochanger and remove mounting
brackets.
Refit
1. Position mounting brackets to CD autochanger
and secure with screws.
2. Position CD autochanger to floor and secure
with nuts.
3. Connect multiplug to CD autochanger.
4. Fit RH front seat.
Parts & tools for this job Staging For Land Rover Discovery
- TOOLTorque wrenchSearch: 3/8 inch torque wrench
- TOOLSocket setSearch: socket set metric
- BOOKHaynes manualSearch: Haynes manual Land Rover Discovery
Links open Amazon search results in a new tab. As an Amazon Associate I earn from qualifying purchases.