
Harness - link - CD/DVD switch box
- Make
- Land Rover
- Model
- Discovery II
- Section
- REPAIRS › Harness - link - CD/DVD switch box
HARNESSES
86-7-32 REPAIRS
Harness - link - CD/DVD switch box
$% 86.70.26
Remove
1. Remove battery cover and disconnect the
battery earth lead.
2. Remove centre console.
REPAIRS, Console - centre - automatic
models.
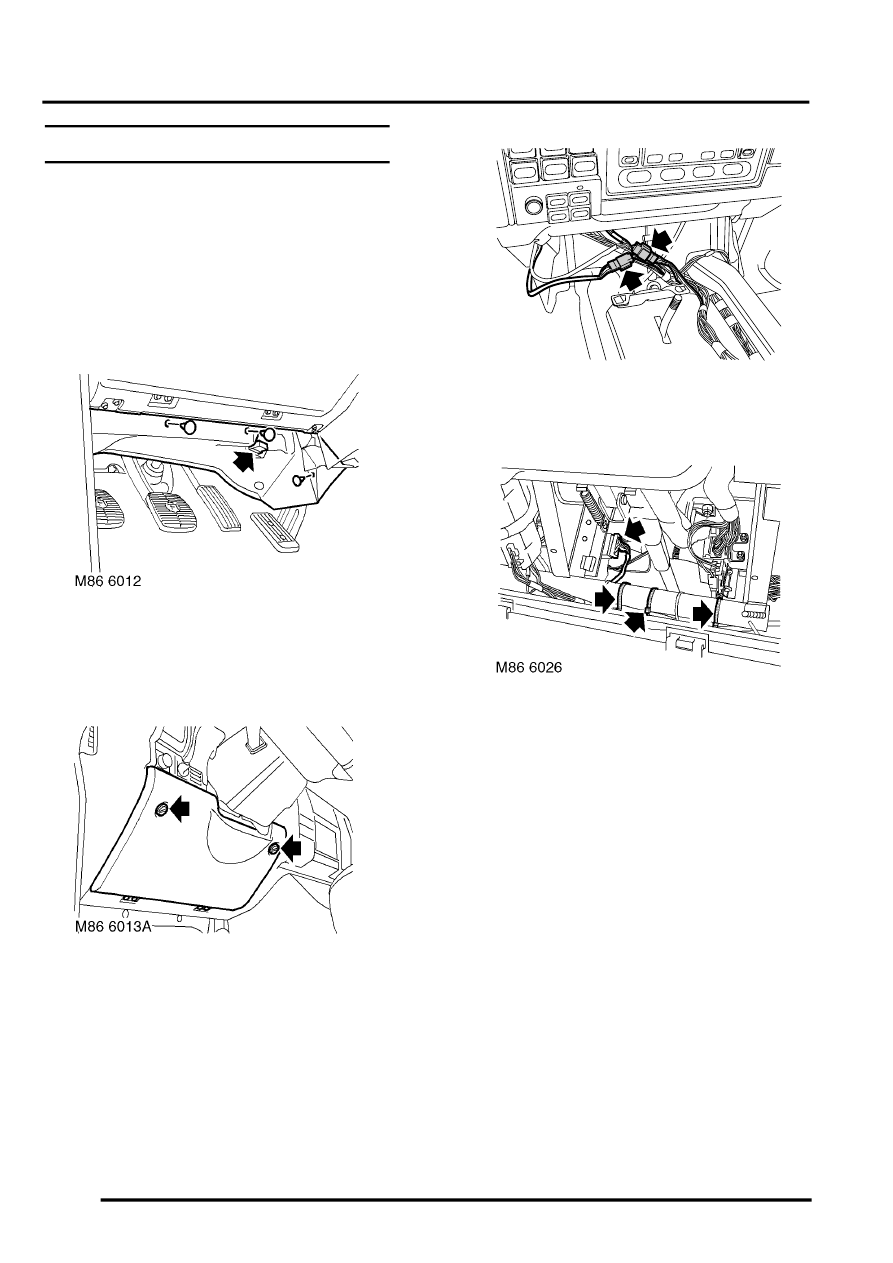
3. Remove 3 fasteners and release drivers side
lower closing panel.
4. Release diagnostic socket and remove closing
panel.
5. Rotate turnbuckles and lower fuse box access
panel.
6. Disconnect 2 CD switch box link harness
multiplugs from vehicle main harness.
7. Disconnect link harness multiplug from CD
switch box.
8. Remove 3 cable ties securing CD switch box
link harness to fascia support bracket and
remove harness.
Refit
1. Fit CD switch box link harness and connect
multiplugs to vehicle main harness.
2. Connect link harness multiplug to CD switch
box.
3. Align CD switch box link harness to fascia
support bracket and secure with cable ties.
4. Close and secure fuse box access panel.
5. Position fascia closing panel and fit diagnostic
socket.
6. Fit closing panel and secure with fasteners.
7. Fit centre console.
REPAIRS, Console - centre - automatic
models.
8. Connect battery earth lead, fit and secure
battery cover.
M86 6027
Parts & tools for this job Staging For Land Rover Discovery
- TOOLOBD2 scannerSearch: OBD2 scanner
- TOOLDigital multimeterSearch: automotive digital multimeter
- TOOLBack-probe test leadsSearch: back probe test leads
Links open Amazon search results in a new tab. As an Amazon Associate I earn from qualifying purchases.