
Filler tube - fuel
- Make
- Land Rover
- Model
- Discovery II
- Section
- REPAIRS › Filler tube - fuel
FUEL DELIVERY SYSTEM - V8
19-2-16 REPAIRS
Filler tube - fuel
$% 19.55.07
Remove
1. Raise rear of vehicle.
WARNING: Do not work on or under a
vehicle supported only by a jack. Always
support the vehicle on safety stands.
2. Ensure fuel tank is less than half full. If not,
drain fuel tank to less than half full.
ADJUSTMENTS, Fuel tank - drain.
3. Remove filler cap.
Non NAS installation
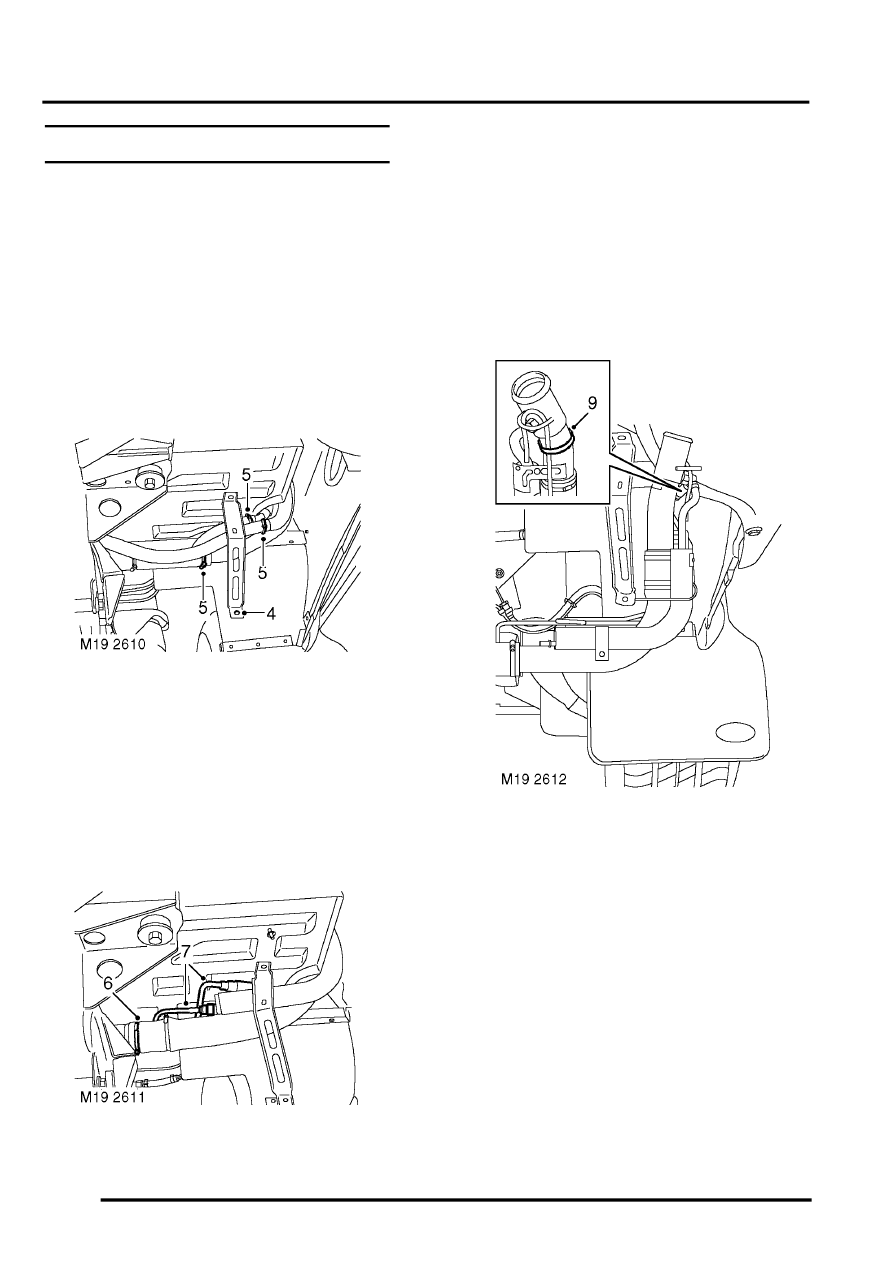
4. Drill out rivet securing lower part of mud flap
support bracket and release bracket .
5. All except NAS models: Position suitable
container beneath filler tube and disconnect
filler hose, breather hose and vent pipe from
filler tube.
WARNING: TAKE ALL NECESSARY
PRECAUTIONS AGAINST FIRE AND
EXPLOSION.
NAS installation
6. NAS models: Position suitable container
beneath filler tube to tank connection , loosen
securing clip and release filler tube from fuel
tank.
WARNING: TAKE ALL NECESSARY
PRECAUTIONS AGAINST FIRE AND
EXPLOSION.
7. NAS models: Disconnect vent pipes from filler
tube.
8. Release filler tube from grommet in body and
remove from under rear wing. Collect grommet.
9. NAS models: Remove cable tie securing
pressure sensor pipe to filler tube and remove
filler tube.
Refit
1. NAS models: Position filler tube to pressure
sensor pipe and secure with new cable tie.
2. Fit grommet to body, position filler tube under
rear wing and secure in grommet.
3. NAS models: Connect filler tube to fuel tank
and secure with clip. Connect vent pipes to filler
tube.
4. All except NAS models: Connect filler hose
and breather hose to filler tube and secure with
clips. Connect vent pipe to filler tube.
5. Position support bracket to mud flap and
secure with new rivet.
6. If applicable, refill fuel tank with extracted fuel.
7. Fit filler cap.
8. Remove stand(s) and lower vehicle.
Parts & tools for this job Staging For Land Rover Discovery
- PARTFuel filterSearch: Land Rover Discovery fuel filter
- TOOLFuel pressure test kitSearch: fuel pressure test kit
- TOOLFuel line disconnect toolSearch: fuel line disconnect tool
Links open Amazon search results in a new tab. As an Amazon Associate I earn from qualifying purchases.