
Plate - drive - automatic (page 2 of 2)
- Make
- Land Rover
- Model
- Discovery II (NAS)
- Section
- REPAIRS
ENGINE - V8
REPAIRS 12-2-33
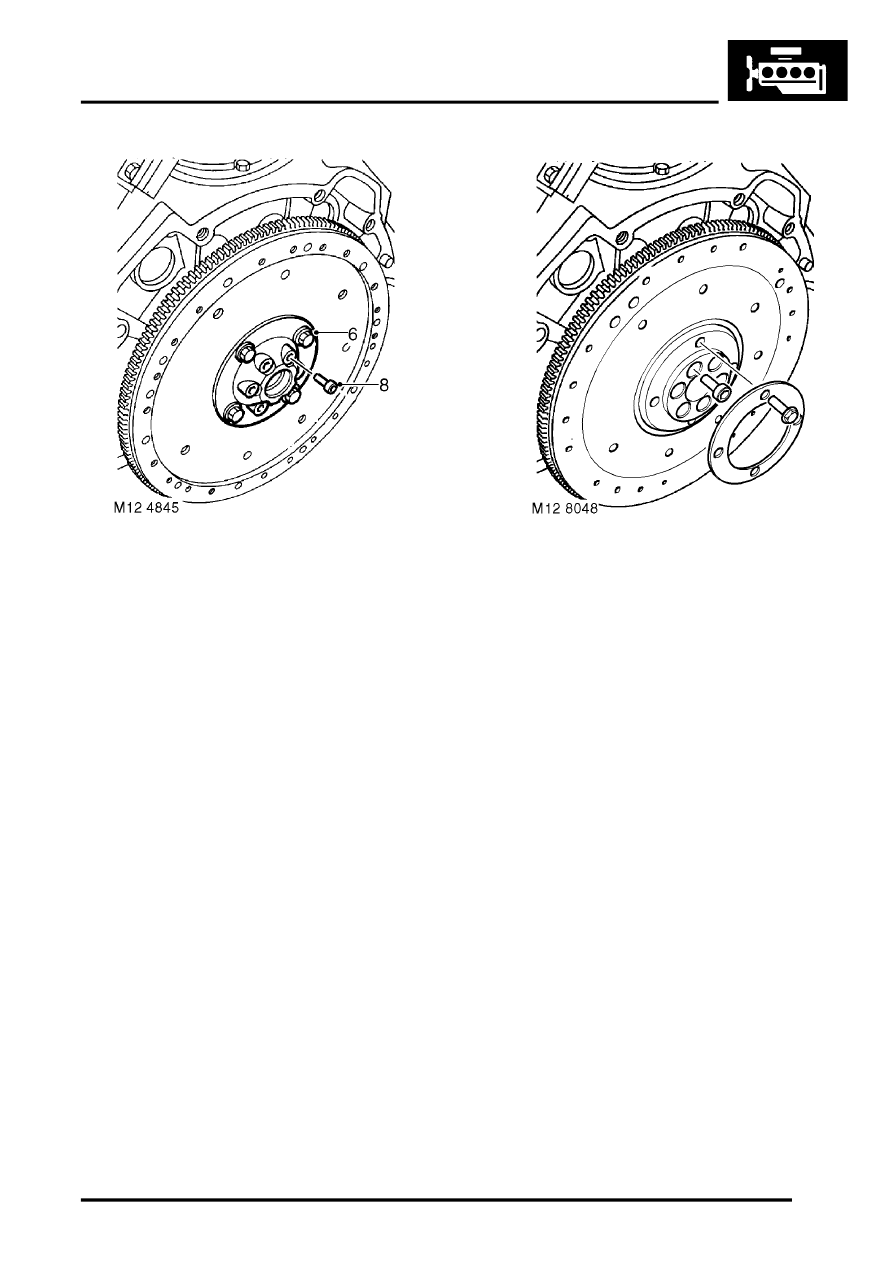
6. Early engines: Remove 4 bolts securing drive
plate clamp ring and remove ring.
7. Early engines: Remove drive plate from hub.
8. Early engines: Remove 6 Allen bolts securing
hub and starter ring gear, remove hub, starter
ring gear and collect spacer.
On early engines, balance weights are on
engine side of drive plate; replacement drive
plates will have balance weights on torque
converter side of drive plate.
9. Later engines: Remove 4 bolts securing drive
plate clamp ring and remove ring.
10. Later engines: Remove drive plate.
11. Later engines: Remove 6 Allen bolts securing
starter ring gear to crankshaft; remove starter
ring gear.
Refit
1. All engines: Ensure bolt holes in crankshaft
are clean and dry.
2. All engines: Clean all components
3. All engines: Check that drive plate is free from
cracks and distortion.
4. Early engines: Fit hub, starter ring gear and
spacer to crankshaft, fit Allen bolts and tighten
to 78 Nm (58 lbf.ft).
5. Early engines: Fit drive plate and clamp ring,
fit bolts and tighten to 45 Nm (33 lbf.ft).
6. Later engines: Fit starter ring gear, fit Allen
bolts and tighten to 85 Nm (63 lbf.ft).
7. Later engines: Fit drive plate and clamp ring,
fit bolts and tighten to 45 Nm (33 lbf.ft).
8. Clean CKP sensor and mating face.
9. Fit crankshaft sensor and tighten nuts to 6 Nm
(5 lbf.ft).
10. Fit CKP sensor cover and tighten bolts to 6 Nm
(5 lbf.ft).
11. Fit CKP sensor multiplug to bracket.
12. Fit automatic gearbox.
- 24, REPAIRS, Gearbox - convertor and
transfer gearbox - V8.
Parts & tools for this job Staging For Land Rover Discovery
- PARTEngine gasket setSearch: Land Rover Discovery engine gasket set
- TOOLTorque wrenchSearch: 3/8 inch torque wrench
- TOOLFeeler gauge setSearch: feeler gauge set
Links open Amazon search results in a new tab. As an Amazon Associate I earn from qualifying purchases.