
Electronic control unit - automatic transmission
- Make
- Land Rover
- Model
- Discovery II
- Section
- REPAIRS › Electronic control unit - automatic transmission
AUTOMATIC GEARBOX - ZF4HP22 - 24
44-58
REPAIRS
Electronic control unit - automatic
transmission
$% 44.15.46
Remove
1. Release fixings and remove battery cover.
2. Disconnect battery earth lead.
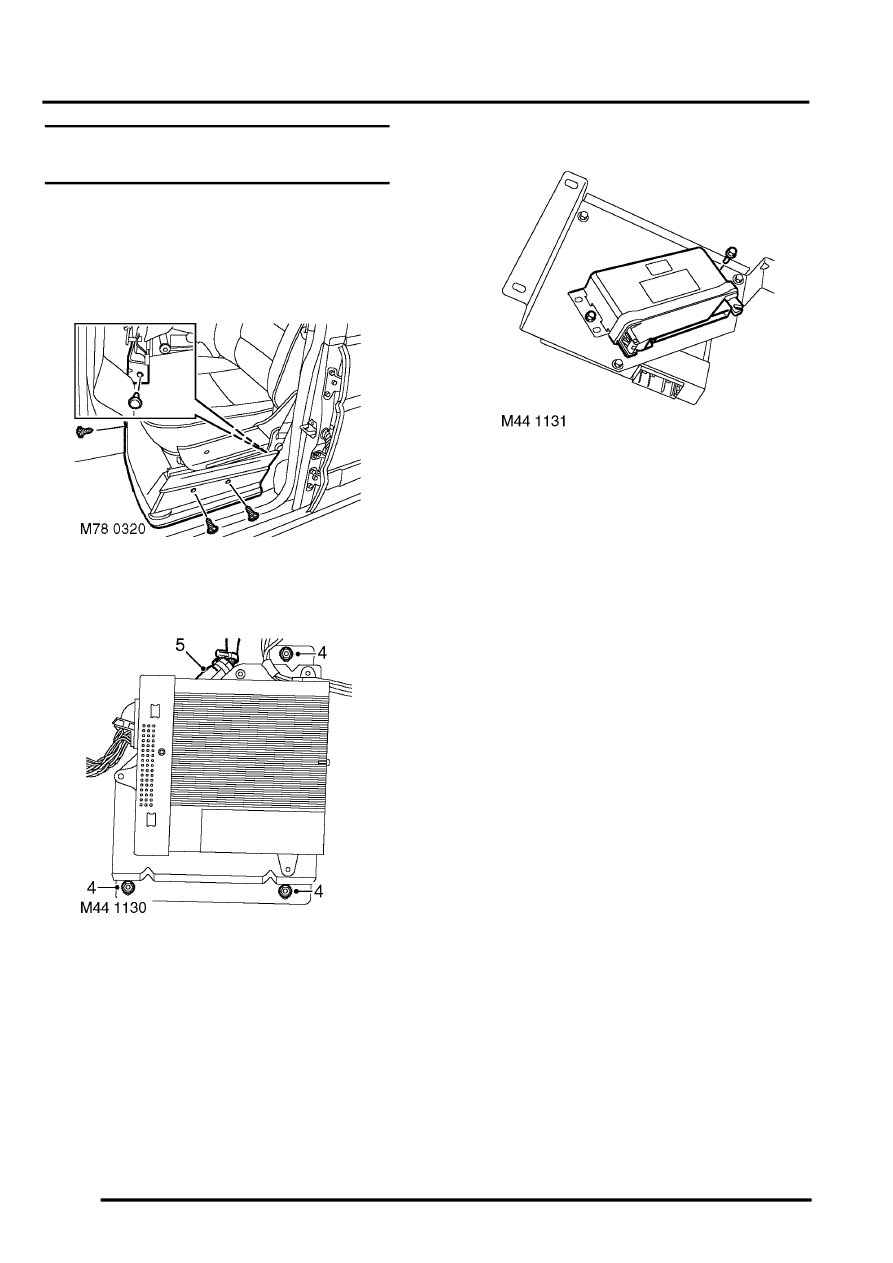
3. Remove 3 screws and trim clip securing lower
trim casing to LH front seat.
4. Remove 3 nuts securing speaker power
amplifier bracket to the body.
5. Disconnect multiplug from automatic
transmission ECU located on underside of
amplifier mounting bracket.
6. Remove 2 nuts securing ECU to mounting
bracket and remove ECU.
Refit
1. Position ECU to mounting bracket and secure
with nuts.
2. Connect multiplug to ECU.
3. Position speaker power amplifier mounting
bracket to body and secure with nuts.
4. Position lower trim casing to seat and secure
with screws and trim clip.
5. Connect battery earth lead.
6. Fit battery cover and secure fixings.
Parts & tools for this job Staging For Land Rover Discovery
- PARTTransmission filter kitSearch: Land Rover Discovery transmission filter kit
- FLUIDAutomatic transmission fluidSearch: Land Rover automatic transmission fluid
- TOOLFluid transfer pumpSearch: fluid transfer pump
Links open Amazon search results in a new tab. As an Amazon Associate I earn from qualifying purchases.