
Bushes - radius arm
- Make
- Land Rover
- Model
- Discovery II
- Section
- REPAIRS › Bushes - radius arm
REAR SUSPENSION
REPAIRS
64-31
Damper - rear
$% 64.30.02
Remove
1. Raise rear of vehicle and support under
chassis.
WARNING: Do not work on or under a
vehicle supported only by a jack. Always
support the vehicle on safety stands.
2. Remove road wheel.
3. Support weight of axle on a jack.
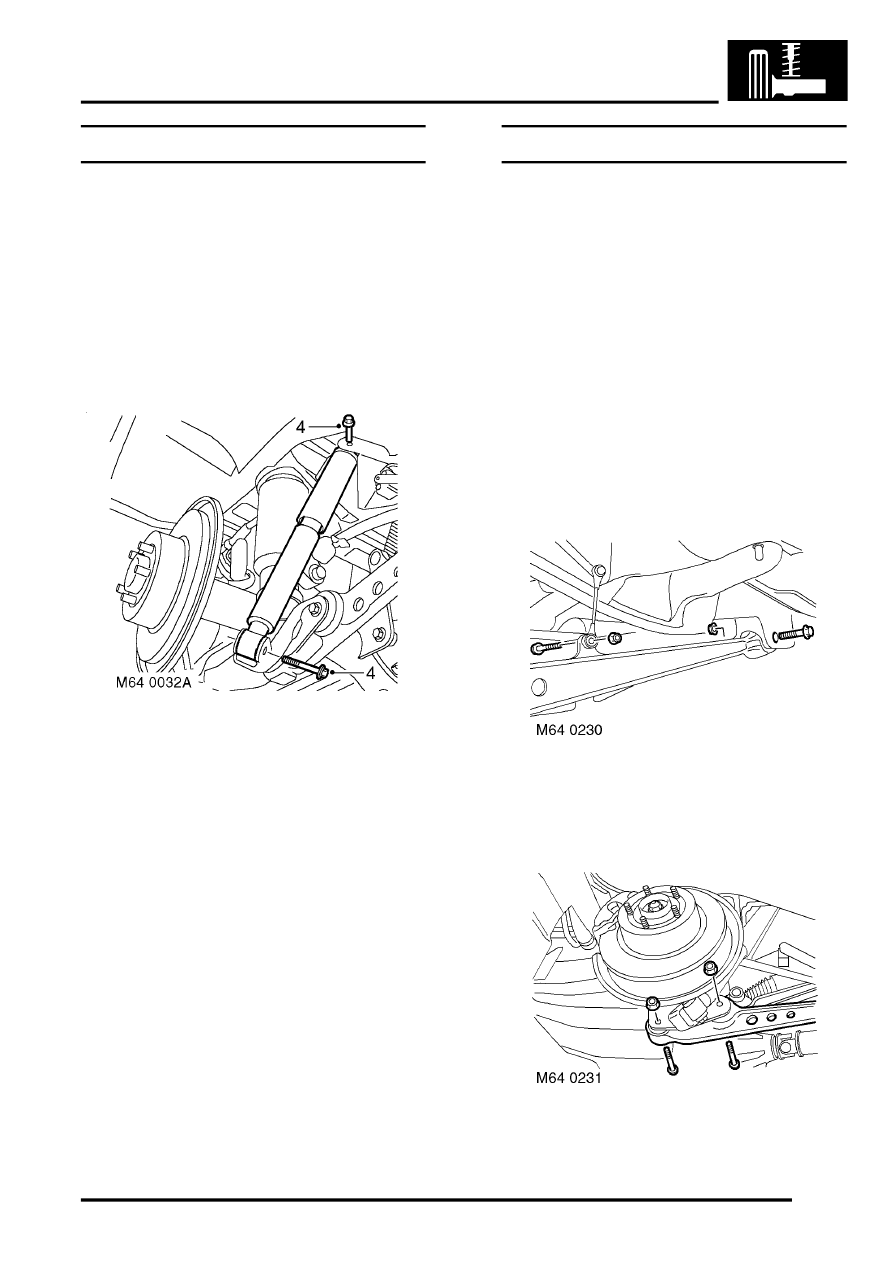
4. Remove 2 bolts securing damper to axle and
chassis.
WARNING: Make sure the axle cannot move
when the damper is disconnected. The
damper limits the downward movement of
the axle. If the axle is not restrained,
disconnecting the damper will allow
unrestricted movement which may cause
personal injury or damage to equipment.
5. Compress damper and remove from vehicle.
Refit
1. Locate damper in axle and fit lower bolt, extend
damper to chassis and fit top bolt.
2. Tighten damper bolts to 125 Nm (92 lbf.ft).
3. Lower axle and remove jack.
4. Fit road wheel and tighten nuts to 140 Nm (103
lbf.ft).
5. Remove stand(s) and lower vehicle.
Bushes - radius arm
$% 64.35.29
Models with SLS:
WARNING: Ensure the air suspension system is
made safe before commencing work. Otherwise
the chassis may lower onto the bump stops
during repair.
Remove
1. Raise rear of vehicle.
WARNING: Do not work on or under a
vehicle supported only by a jack. Always
support the vehicle on safety stands.
2. Remove road wheel(s).
3. Models with SLS: Remove nut and bolt
securing height sensor link to radius arm.
4. Remove nut and bolt securing radius arm to
chassis.
5. Remove 2 nuts securing radius arm to axle.
6. Remove rear bolt and lower radius arm.
Parts & tools for this job Staging For Land Rover Discovery
- TOOLCoil spring compressorSearch: coil spring compressor
- TOOLBall joint separatorSearch: ball joint separator
- PARTRear shock absorbersSearch: Land Rover Discovery rear shock absorbers
Links open Amazon search results in a new tab. As an Amazon Associate I earn from qualifying purchases.