
REPAIRS (page 31 of 34)
- Make
- Land Rover
- Model
- Discovery II
PANEL REPAIRS
REPAIRS 77-2-51
Rear floor complete assembly
Remove
1. Disconnect both battery leads, negative lead
first.
2. Disconnect leads/multiplug from alternator.
3. Remove loadspace carpet.
4. Remove rear seats.
5. Remove rear carpet.
6. Remove rear bumper assembly.
Bumper assembly - rear - up to 03MY.
7. Remove RH and LH mud flap and brackets.
8. Remove exhaust tail pipe heatshields.
9. Remove tread plates from rear door apertures.
10. Remove rear door aperture seal.
11. Remove tail door tread plate.
12. Remove loadspace carpet retainer.
13. Remove head lining rear trim finisher.
14. Remove tail door aperture seal.
15. Remove bolts securing body to chassis.
16. Remove relevant wiring from floor area.
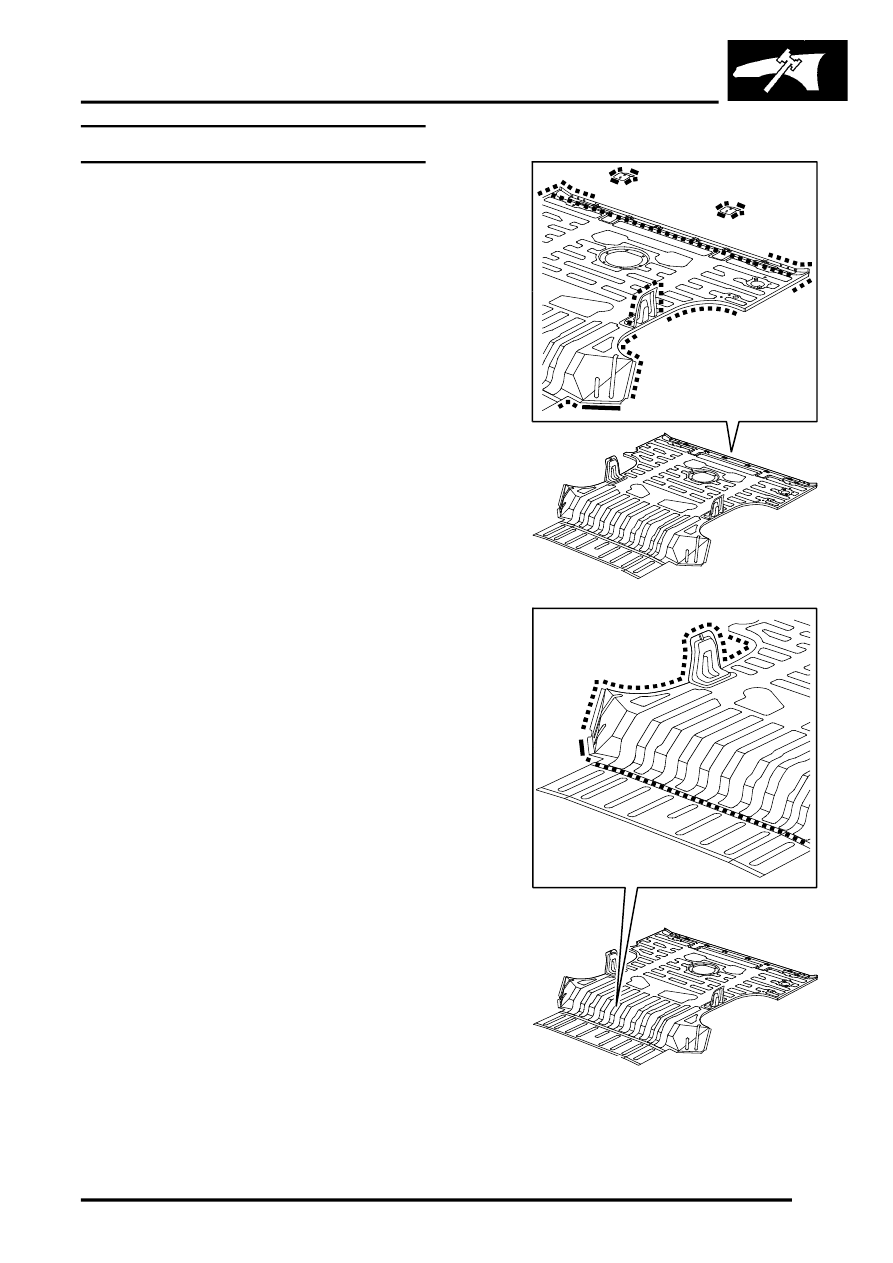
Repair
1. Remove existing panel(s), prepare panel joint
faces and install new panel(s) in accordance
with Panel Replacement Procedure. Punch or
drill holes in new panel for plug welding as
shown.
M77 1712A
M77 1721A
Parts & tools for this job Staging For Land Rover Discovery
- TOOLTorque wrenchSearch: 3/8 inch torque wrench
- TOOLSocket setSearch: socket set metric
- BOOKHaynes manualSearch: Haynes manual Land Rover Discovery
Links open Amazon search results in a new tab. As an Amazon Associate I earn from qualifying purchases.