Workshop Manuals Factory service & repair Land Rover
01 Discovery Series II - Workshop Manual - 1999MY ON - 6th Edition - NAS02 03 04 05 06 07 08 09 10 11 12 13 14 15 16 17 18 19 20 21 22 23 24 25 26 27 28 29 30 31 INTRODUCTION32 33 GENERAL INFORMATION34 35 GENERAL DATA36 IDENTIFICATION NUMBERS37 38 TORQUE WRENCH SETTINGS39 40 LIFTING AND TOWING41 CAPACITIES, FLUIDS, LUBRICANTS AND SEALANTS42 43 44 MAINTENANCE45 46 ENGINE - V847 48 EMISSION CONTROL - V849 50 ENGINE MANAGEMENT SYSTEM - V851 FUEL DELIVERY SYSTEM - V852 53 COOLING SYSTEM - V854 55 MANIFOLDS AND EXHAUST SYSTEMS - V856 57 58 59 CLUTCH - V860 61 MANUAL GEARBOX - R38062 63 TRANSFER BOX - LT230SE64 65 66 AUTOMATIC GEARBOX - ZF4HP22 - 2467 PROPELLER SHAFTS68 69 REAR AXLE70 71 72 73 74 75 FRONT AXLE76 77 78 79 STEERING80 FRONT SUSPENSION81 82 83 REAR SUSPENSION84 85 86 87 BRAKES88 RESTRAINT SYSTEMS89 90 DOORS91 EXTERIOR FITTINGS92 93 INTERIOR TRIM COMPONENTS94 SCREENS95 96 97 SEATS98 99 SUNROOF100 CHASSIS AND BODY DIMENSIONS101 102 103 104 PANEL REPAIRS105 106 107 108 BODY SEALING MATERIALS109 110 111 112 113 CORROSION PREVENTION AND SEALING114 PAINTING115 HEATING AND VENTILATION116 117 AIR CONDITIONING118 119 WIPERS AND WASHERS120 CHARGING AND STARTING121 122 LIGHTING123 BODY CONTROL UNIT124 125 126 ALARM SYSTEM AND HORN127 128 WINDOWS129 IN CAR ENTERTAINMENT130 HARNESSES131 DRIVING AIDS132 NAVIGATION SYSTEM133 INSTRUMENTS
Land Rover Discovery II104 · PANEL REPAIRS
104 · General

REPAIRS (page 5 of 34)

Make
Land Rover
Model
Discovery II
PANEL REPAIRSREPAIRS · page 5 of 34
background image

PANEL REPAIRS

REPAIRS 77-2-25

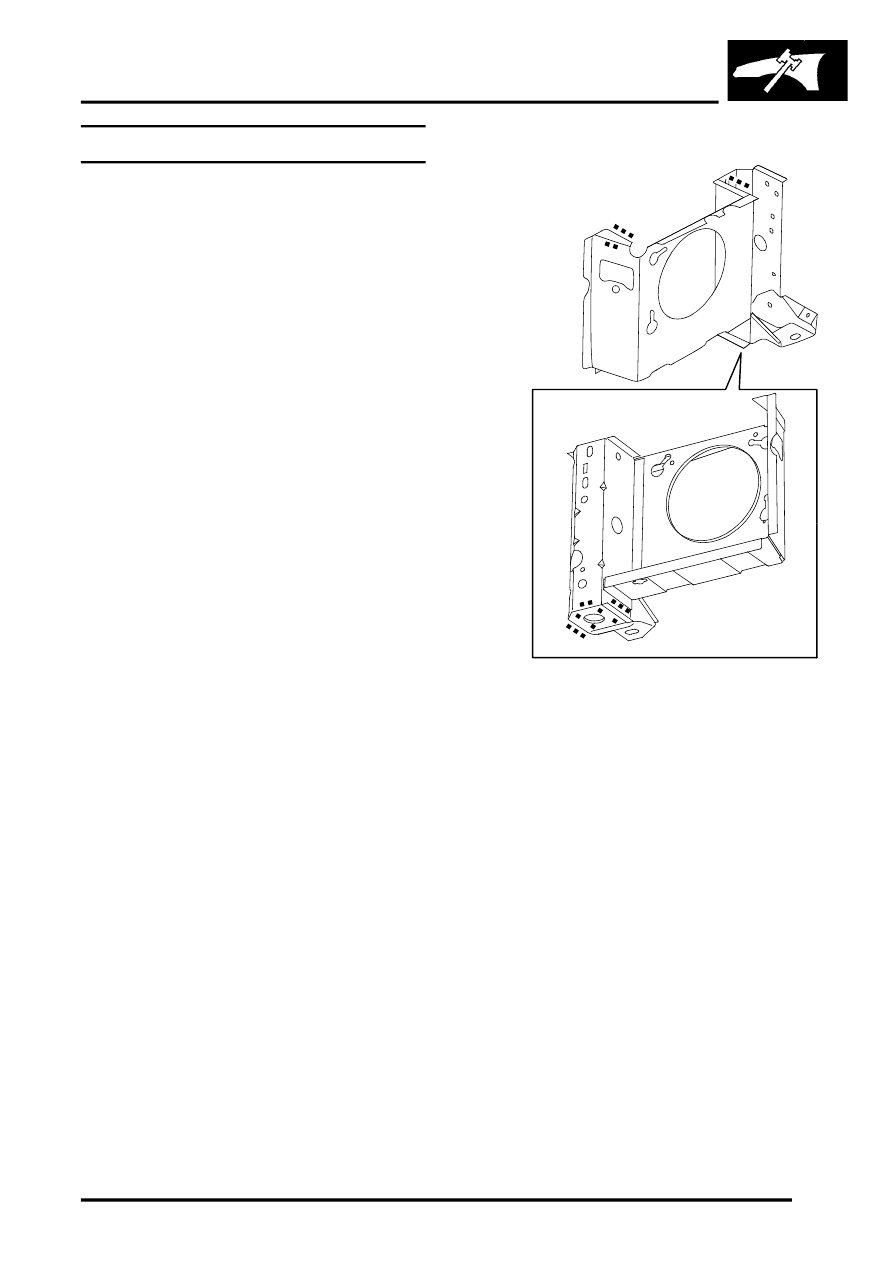
Headlamp mounting panel - RH

Remove

1. Disconnect both battery leads, negative lead 

first.

2. Disconnect leads/multiplug from alternator. 
3. Remove front bumper assembly.


 + 

 EXTERIOR FITTINGS, REPAIRS, 

Bumper assembly - front.

4. Models with A/C: Remove condensor.


 + 

 AIR CONDITIONING, REPAIRS, 

Condenser.

5. Diesel models: Remove gearbox fluid cooler.
6. Remove RH headlamp.


 + 

 LIGHTING, REPAIRS, Headlamp - up 

to 03MY.

7. Remove RH repeater lamp.


 + 

 LIGHTING, REPAIRS, Lamp - front 

repeater - up to 03MY.

8. Release headlamp levelling motor and position 

aside.

9. Release headlamp wiring and position aside.

10. Remove battery and battery tray.


 + 

 CHARGING AND STARTING, 

REPAIRS, Battery. 

11. Remove horn. 


 + 

 ALARM SYSTEM AND HORN, 

REPAIR, Vehicle horn.

12. Remove RH crush can.
13. Remove 2 bolts securing front bulkhead 

assembly to chassis.

14. Remove RH centre brace.

Repair

1. Remove existing panel(s), prepare panel joint 

faces and install new panel(s) in accordance 
with Panel Replacement Procedure. Punch or 
drill holes in new panel for plug welding as 
shown.

Refit

1. Fit centre brace.
2. Fit 2 bolts securing bulkhead to chassis and 

tighten bolts to 45 Nm (33 lbf.ft).

3. Fit crush can.
4. Models with A/C: Fit A/C pipes.
5. Fit horn.


 + 

 ALARM SYSTEM AND HORN, 

REPAIR, Vehicle horn. 

6. Fit battery and battery tray. Do not connect 

leads. 
 

 + 

 CHARGING AND STARTING, 

REPAIRS, Battery.

7. Fit headlamp wiring and headlamp levelling 

motors.

8. Fit repeater lamp.


 + 

 LIGHTING, REPAIRS, Lamp - front 

repeater - up to 03MY.

M77 1741A

Parts & tools for this job Staging For Land Rover Discovery

Links open Amazon search results in a new tab. As an Amazon Associate I earn from qualifying purchases.