
Gasket - sump (page 2 of 2)
- Make
- Land Rover
- Model
- Discovery II (NAS)
- Section
- REPAIRS
ENGINE - V8
12-2-38 REPAIRS
16. Remove 12 bolts securing sump flange to
engine.
17. Manoeuvre sump over front axle and remove
sump.
18. Discard sump gasket.
Refit
1. Clean all traces of sealant from the sump and
sump mating faces using a plastic scraper or
solvent.
2. Ensure bolt holes in cylinder block are clean
and dry.
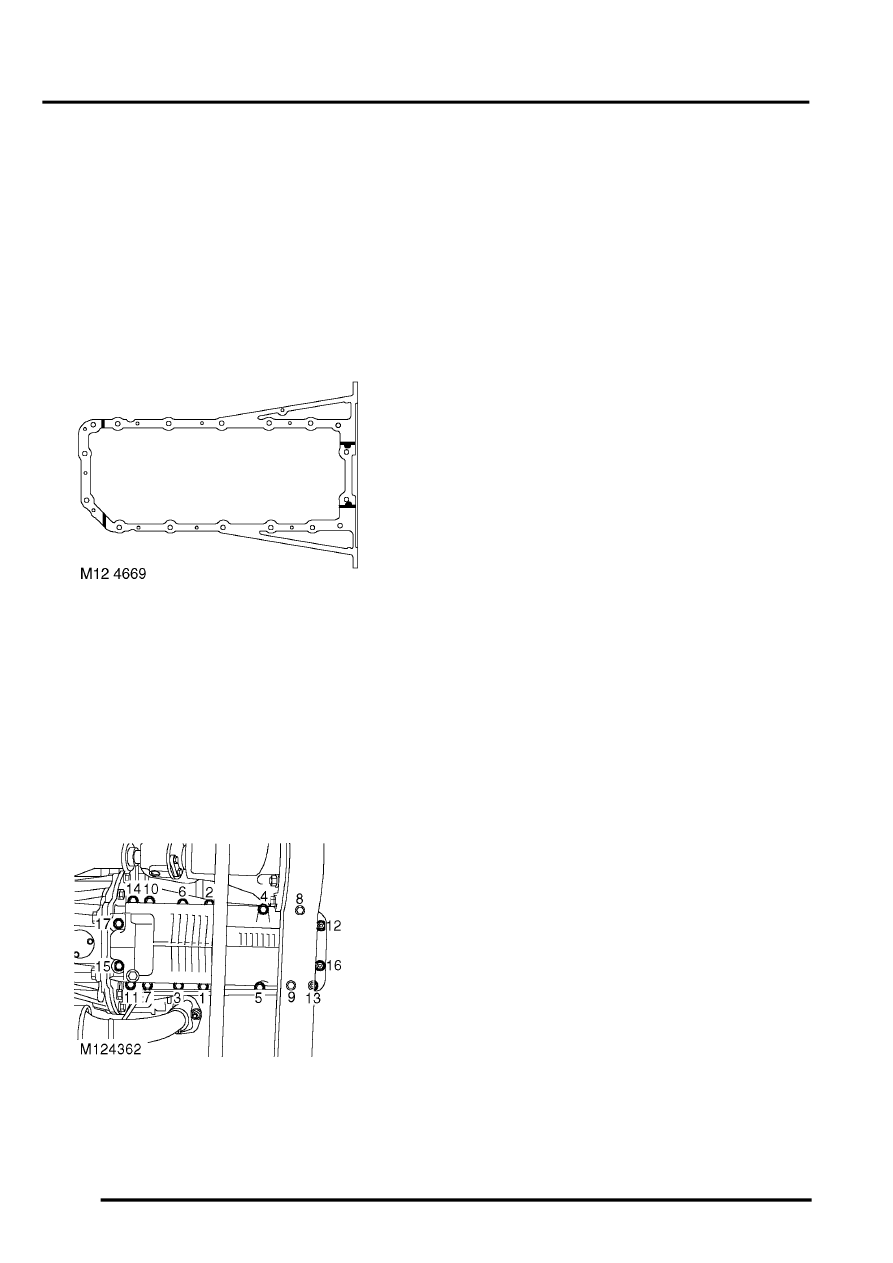
3. Apply a 5 mm (0.2 in) wide bead of sealant, Part
No. STC 50550, across the cylinder block to
front cover joint and across the cylinder block to
rear main bearing joint. Apply a globule of
sealant to cover the ends of the cruciform
seals, (see illustration).
4. Fit new gasket, dry, to sump, ensuring that
locating tags are correctly positioned.
5. Manoeuvre sump into position, fit and lightly
tighten 2 bolts to retain sump in place, then fit
and lightly tighten remainder of bolts.
6. Working in the sequence illustrated, tighten the
sump bolts to 22 Nm (16 lbf.ft).
7. Position side clip bracket, fit and tighten bolt.
8. Position oil cooler pipe clips, fit and tighten
nuts.
9. Clean gearbox oil cooler pipe 'O' ring recess
and mating face.
10. Lubricate and fit new 'O' ring to gearbox oil
cooler pipe.
11. Position pipe and tighten nut.
12. Lower front of vehicle.
13. Position cross member to chassis, fit bolts and
tighten to 25 Nm (18 lbf.ft).
14. Refill engine oil and fit dipstick.
15. Connect battery earth lead.
16. Fit battery cover and retain with fixings.
Parts & tools for this job Staging For Land Rover Discovery
- PARTEngine gasket setSearch: Land Rover Discovery engine gasket set
- TOOLTorque wrenchSearch: 3/8 inch torque wrench
- TOOLFeeler gauge setSearch: feeler gauge set
Links open Amazon search results in a new tab. As an Amazon Associate I earn from qualifying purchases.