
Piston assemblies - engine set (page 3 of 3)
- Make
- Land Rover
- Model
- Range Rover L322 Range Rover Service Procedures
- Section
- OVERHAUL
ENGINE - V8
OVERHAUL 12-2-75
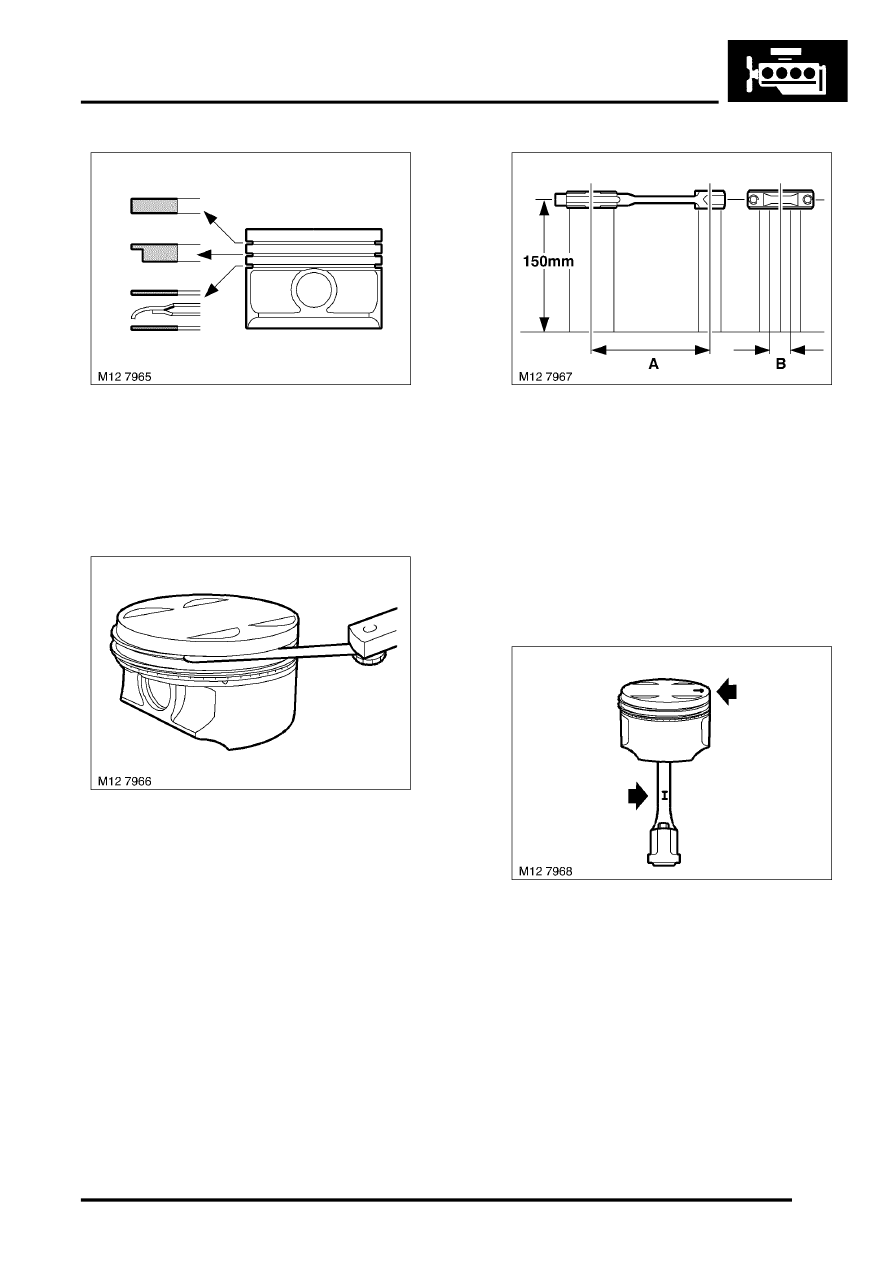
8. Fit oil control ring rails and expander, ensuring
ends butt and do not overlap.
9. Fit 2nd compression ring with 'TOP' marking
upwards.
10. Fit 1st compression ring with 'TOP' marking
upwards.
11. Check piston ring to groove clearance.
12. Check fit of gudgeon pin in piston, pin must be
a tight, sliding fit with no perceptible side play.
13. Check small-end bushes for wear, check that
gudgeon pin is a sliding fit in the bush with no
perceptible side play. Small end bushes
cannot be replaced, a new connecting rod
must be fitted.
14. Check parallelism of connecting rods on both
sides taking the measurement approximately
150 mm from the centre line of the connecting
rod
15. Check for distortion on both sides of connecting
rod.
Reassembly
1. Clean cylinder bores, pistons, piston rings and
connecting rods.
2. Fit each piston to its connecting rod ensuring
that the arrow on the piston which points to the
front of the engine is relative to the mark made
on the connecting rod during disassembly.
3. Lubricate gudgeon pins and bushes with
engine oil, fit gudgeon pins and secure with
new retaining rings ensuring that they are fully
seated in their grooves.
4. Lubricate pistons, piston rings and cylinder
bores with clean engine oil.
5. Check that piston rings are free to rotate,
position ring gaps at 120
°
to each other and
away from the thrust side - LH side of piston -
viewed from front of piston.
Parts & tools for this job Staging For Land Rover Range Rover
- PARTEngine gasket setSearch: Land Rover Range Rover engine gasket set
- TOOLTorque wrenchSearch: 3/8 inch torque wrench
- TOOLFeeler gauge setSearch: feeler gauge set
Links open Amazon search results in a new tab. As an Amazon Associate I earn from qualifying purchases.