
Motor - condenser fan (page 3 of 3)
- Make
- Land Rover
- Model
- Range Rover L322 Range Rover Service Procedures
- Section
- REPAIRS
AIR CONDITIONING
82-12
REPAIRS
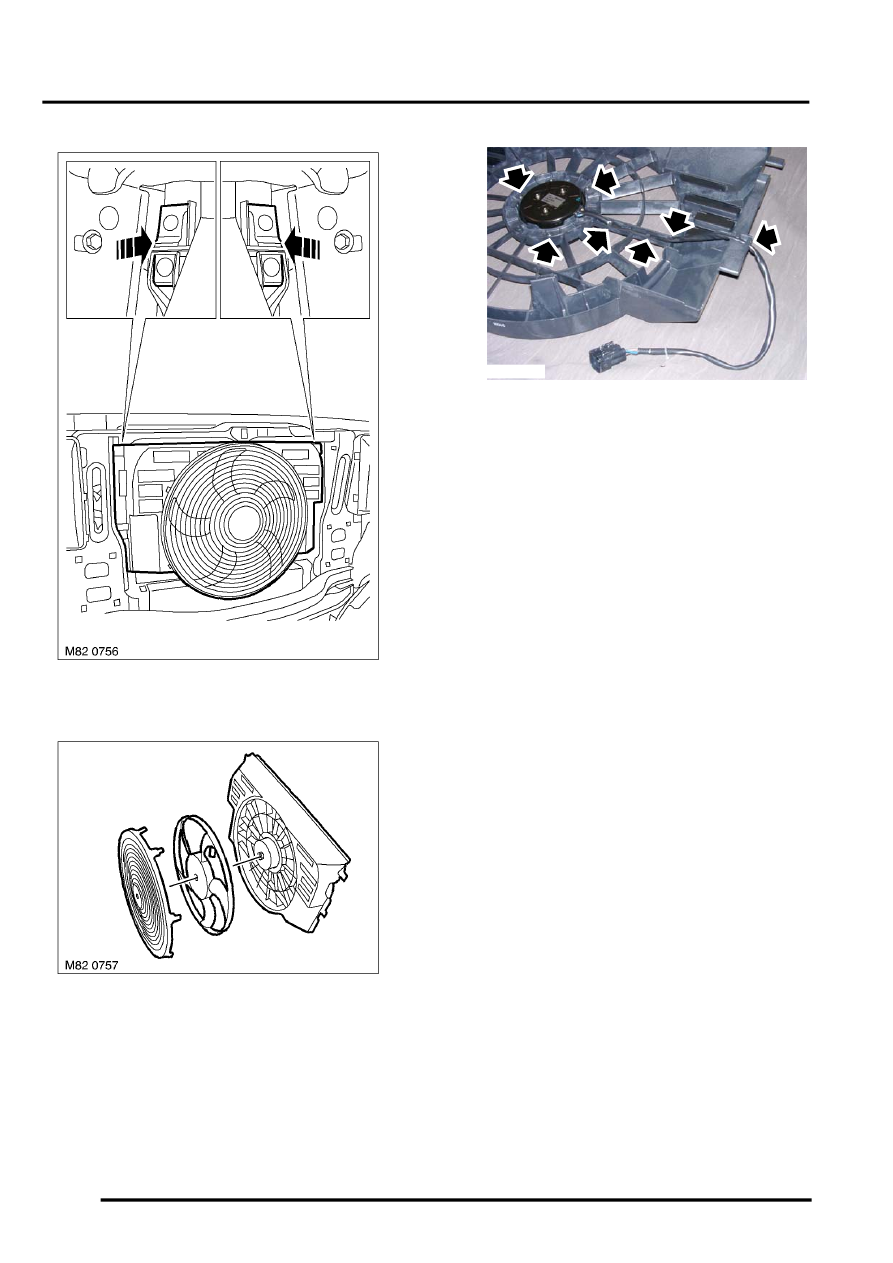
10. Depress clips and remove condenser fan cowl.
11. Depress 7 clips securing fan guard and remove
from cowl.
12. Hold fan assembly, rotate nut anti clockwise
and remove fan from motor.
13. Release fan motor harness from cowl.
14. Remove 3 Torx screws securing fan motor to
condenser cowl, remove motor.
Refit
1. Position fan and motor assembly to fan cowl, fit
and tighten bolts to 5 Nm (3.7 lbf.ft).
2. Secure cooling fan harness in clips on fan cowl.
3. Position fan to motor and align lugs. Hold fan,
rotate centre nut clockwise to secure.
4. Position fan guard and secure clips.
5. Position condenser fan cowl to mounting and
secure clips.
6. Connect fan motor multiplug.
7. Position armature to body fit nuts and bolts,
tighten bolts to 10 Nm (7 lbf.ft), tighten nuts to
45 Nm (33 lbf.ft).
8. Secure harness with cable ties.
9. Fit and secure bumper support brackets,
tighten bolts to 3 Nm (2.2 lbf.ft), fit scrivets.
10. Fit and secure air deflectors.
11. Fit and secure armature extension.
12. Connect horn multiplugs.
13. Position hose to armature and secure with new
cable ties.
14. Fit front bumper.
15. Connect battery earth lead.
M82 0758
Parts & tools for this job Staging For Land Rover Range Rover
- TOOLA/C manifold gauge setSearch: AC manifold gauge set
- TOOLUV leak detection kitSearch: AC UV leak detection kit
- PARTCabin filterSearch: Land Rover Range Rover cabin filter
Links open Amazon search results in a new tab. As an Amazon Associate I earn from qualifying purchases.