
Bushes - rear subframe (page 4 of 4)
- Make
- Land Rover
- Model
- Range Rover L322 Range Rover Service Procedures
- Section
- REPAIRS
REAR SUSPENSION
64-24
REPAIRS
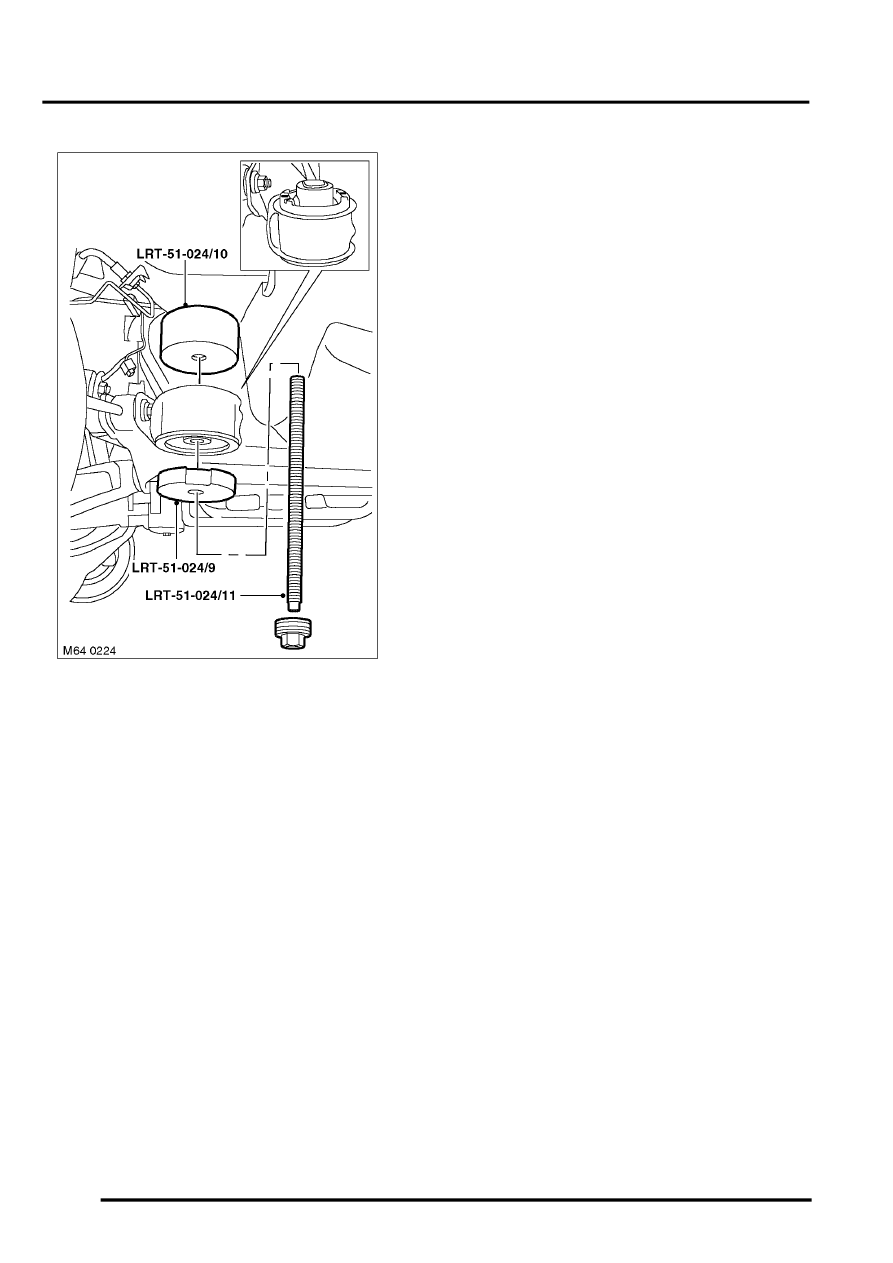
3. Position bush replacer LRT-51-024/10 to sub-
frame.
4. Fit LRT-51-024/9 to LRT-51-024/11, fit new
bush over draw bar.
5. Fit LRT-51-024/11 to LRT-51-024/10.
6. Position bush, align timing mark to paint mark
on sub-frame.
7. Fit bush and remove tool assembly.
8. Repeat procedure on bush diagonally opposite.
9. Raise sub-frame to body remove slave damper
bolts, fit through opposite bushes and finger
tighten.
10. Lower sub-frame.
11. Remove and refit remaining bushes.
12. Fit 2 slotted spacers to available bushes. Raise
sub-frame to body leaving sufficient gap to fit
remaining spacers.
13. Fit 2 subframe mounting bolts with cup washer
and exhaust bracket, do not tighten at this
stage.
14. Remove slave bolts from sub-frame and collect
cup washer and exhaust bracket.
15. Fit cup washer and exhaust mounting bracket
to remaining sub-frame bolts. Locate spacers
on bushes and fit bolts to sub-frame.
16. Locate sub-frame on dowels.
17. Tighten sub-frame bolts to 165 Nm (122 lbf.ft).
Ensure slotted spacers are correctly
located to bushes prior to tightening.
18. Fit and secure FBH pump to mounting.
19. Fit bolts securing dampers to lower arms, do
not tighten at this stage.
20. Fit and secure air suspension pipes to body.
CAUTION: Ensure timing marks on the air
pipes are fitted to clips.
21. Fit and secure ABS and brake sensor leads.
22. Position brake pipes and secure clips.
23. Connect ride height sensor multiplugs.
24. Fit rear propeller shaft.
DRIVESHAFTS, REPAIRS, Propeller
25. Pressurise suspension.
26. Fit rear road wheels and tighten nuts to 140 Nm
(103 lbf.ft).
27. Tighten lower arm damper bolts to 110 Nm (81
lbf.ft).
Parts & tools for this job Staging For Land Rover Range Rover
- TOOLCoil spring compressorSearch: coil spring compressor
- TOOLBall joint separatorSearch: ball joint separator
- PARTRear shock absorbersSearch: Land Rover Range Rover rear shock absorbers
Links open Amazon search results in a new tab. As an Amazon Associate I earn from qualifying purchases.