
Centre console (page 2 of 2)
- Make
- Land Rover
- Model
- Range Rover L322 Range Rover Service Procedures
- Section
- REPAIRS
INTERIOR FITTINGS
REPAIRS
76-3-7
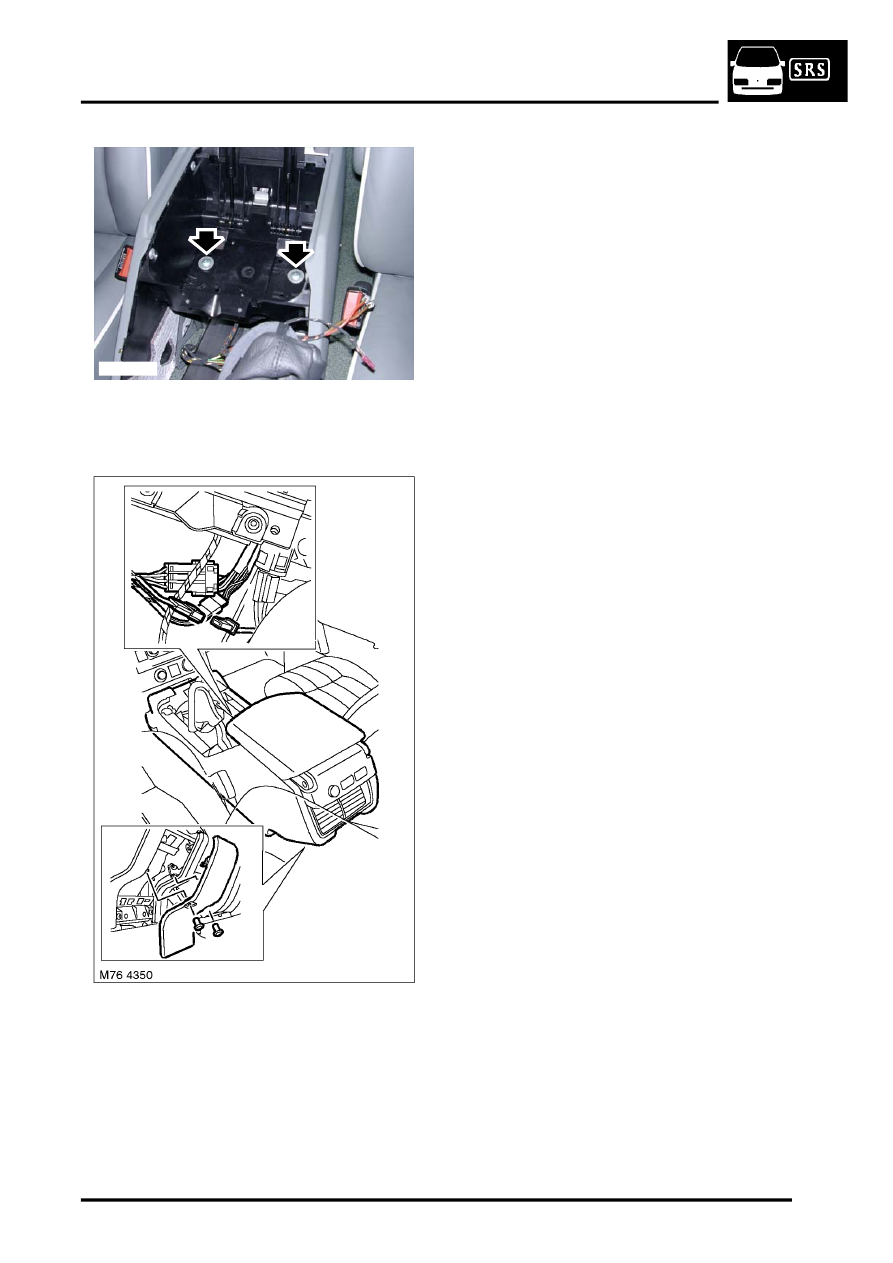
6. Remove 2 Torx screws and collect washers
from base of large cubby box.
7. Remove 2 screws securing centre console rear
closing panel. Release clips and remove panel.
8. Raise rear of centre console, disconnect 3
multiplugs from centre console and collect air
duct adaptor.
9. Disconnect 3 Lucar connectors from accessory
power socket.
10. Carefully remove centre console.
CAUTION: Care must be taken to protect
painted and veneered surfaces.
Refit
1. Position centre console and connect multiplugs
to rear of console. Fit air duct adaptor and align
centre console to mountings.
2. Secure centre console with screws.
3. Fit rear closing panel and secure with clips and
screws.
4. Position ignition switch and secure with screws.
5. Fit cubby box and secure with Torx screws.
6. Fit both centre console closing panels.
Closing panel - centre console.
7. Fit centre console finisher.
M76 4349
Parts & tools for this job Staging For Land Rover Range Rover
- TOOLTorque wrenchSearch: 3/8 inch torque wrench
- TOOLSocket setSearch: socket set metric
- BOOKHaynes manualSearch: Haynes manual Land Rover Range Rover
Links open Amazon search results in a new tab. As an Amazon Associate I earn from qualifying purchases.