
Air spring assembly
- Make
- Land Rover
- Model
- Range Rover L322 Range Rover Service Procedures
- Section
- REPAIRS › Air spring assembly
FRONT SUSPENSION
REPAIRS
60-7
Air spring assembly
$% 60.21.01
Do not depressurise air suspension system before
raising vehicle.
It is not necessary to depressurise the whole system,
only the spring being replaced.
When removing Voss connectors from any air
suspension component the connector must be left
attached to the air pipe being removed. Do not
remove the connector from the air pipe. Removing
the connector from the air pipe could cause the
connector to scratch the pipe and increase the
likelihood of leaks.
Remove
1. Raise front of vehicle and support under body.
WARNING: Do not work on or under a
vehicle supported only by a jack. Always
support the vehicle on safety stands.
2. Remove road wheel(s).
3. Depressurise air spring being replaced.
ADJUSTMENTS, Air suspension system -
depressurise and repressurise.
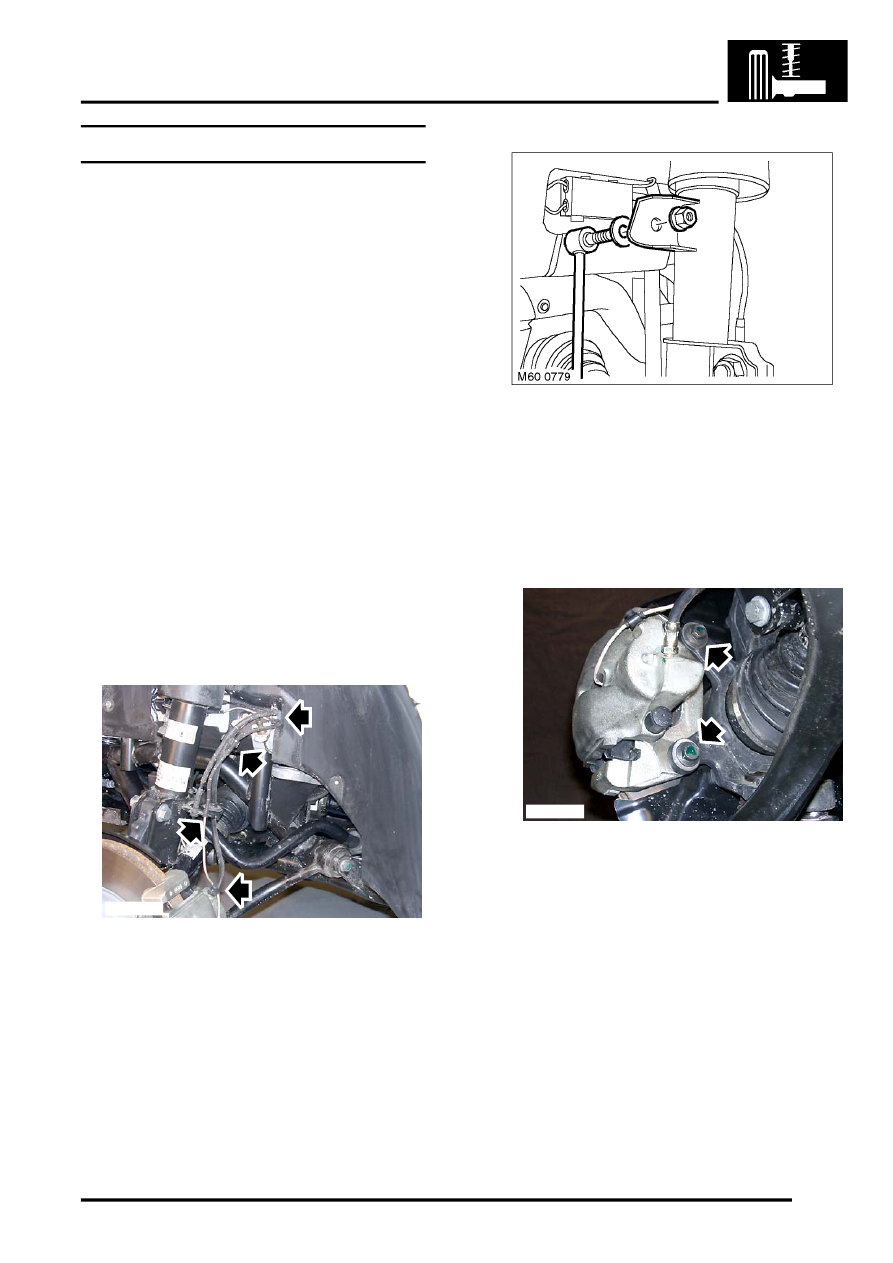
4. Release ABS sensor harness and brake hose
from damper.
5. LH side only: Release brake pad wear sensor
lead from damper.
6. Remove nut securing anti-roll bar link to
damper.
CAUTION: Use an open ended spanner on
flats provided to prevent ball joint rotating.
7. Release anti-roll bar link and collect washer.
CAUTION: Note position of washer for refit.
8. Remove 2 bolts securing brake caliper to hub.
Release caliper from hub and tie aside.
CAUTION: Do not allow caliper to hang on
brake hose.
M70 1119
M70 1124
Parts & tools for this job Staging For Land Rover Range Rover
- TOOLCoil spring compressorSearch: coil spring compressor
- TOOLBall joint separatorSearch: ball joint separator
- PARTFront shock absorbersSearch: Land Rover Range Rover front shock absorbers
Links open Amazon search results in a new tab. As an Amazon Associate I earn from qualifying purchases.