
Servo assembly
- Make
- Land Rover
- Model
- Range Rover L322 Range Rover Service Procedures
- Section
- REPAIRS › Servo assembly
BRAKES
70-22
REPAIRS
Servo assembly
$% 70.50.01
Remove
1. Remove engine compartment bulkhead closing
panel.
2. Remove brake master cylinder.
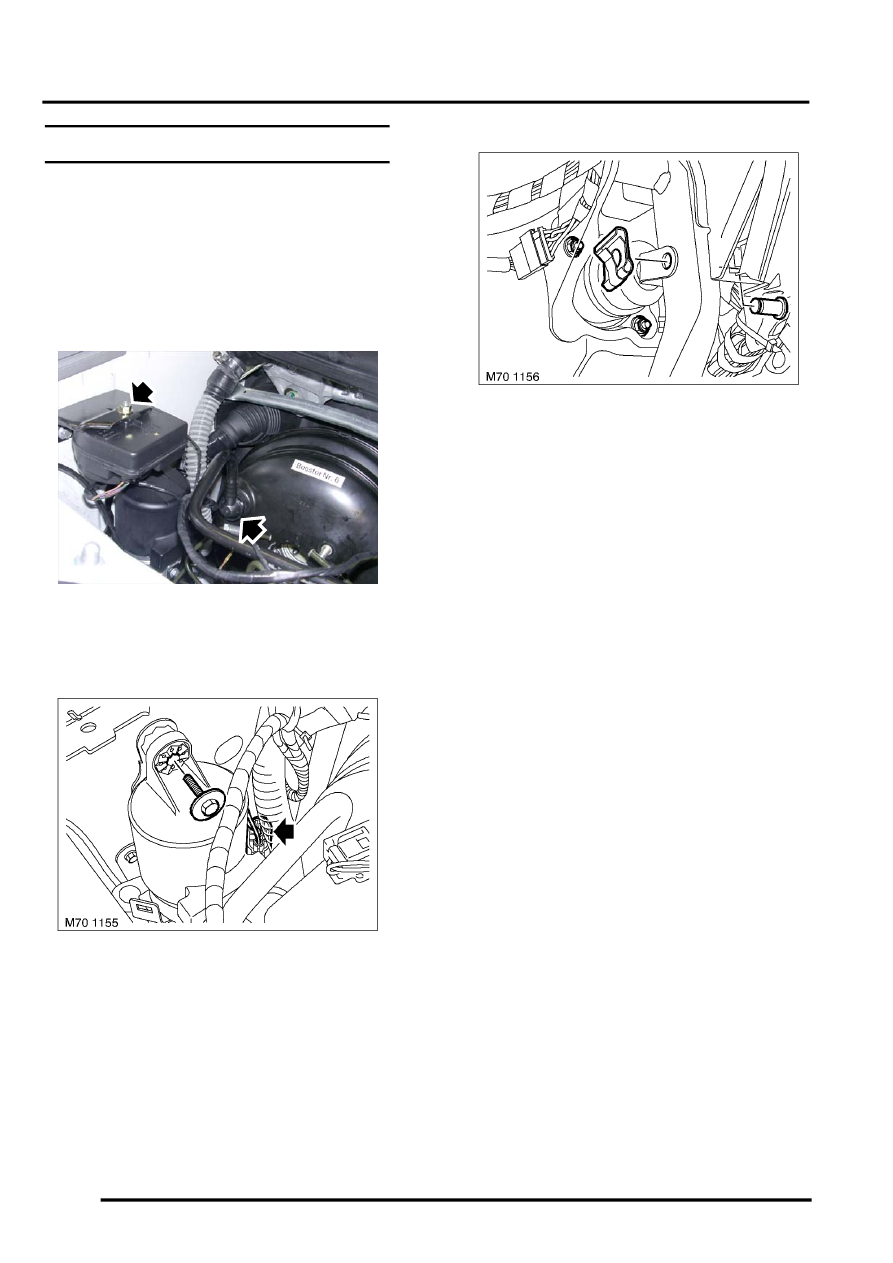
3. Disconnect vacuum pipe from servo.
4. Remove nut securing alarm sounder to
mounting bracket and move aside.
5. Remove bolt securing pre-charge pump
bracket to body.
6. Release pump from rubber mounting.
7. Disconnect multiplug.
8. Remove pump.
9. Remove shroud.
10. Remove clip and clevis pin securing servo push
rod to brake pedal.
11. Remove and discard 2 nuts securing brake
servo.
12. Remove brake servo.
Refit
1. Fit new gasket to brake servo and fit servo.
CAUTION: RHD models: When fitting the
servo, ensure air suspension pipe is not
trapped behind it.
2. Fit new nuts securing brake servo to pedal
bracket and tighten to 26 Nm (19 lbf.ft).
CAUTION: Nuts securing brake servo to
pedal bracket must be re-torqued after 20
minutes have elapsed.
3. Clean clevis pin and smear with grease.
LUBRICANTS AND SEALANTS,
Lubrication.
4. Align push rod, fit clevis pin and secure with
clip.
5. Fit shroud.
6. Locate pre-charge pump to mounting rubbers.
7. Connect multiplug.
8. Fit bolt securing pre-charge pump and tighten
to 8 Nm (6 lbf.ft).
9. Position alarm sounder to bracket, fit nut and
tighten to 8 Nm (6 lbf.ft).
10. Connect vacuum pipe.
11. Fit brake master cylinder.
12. Fit bulkhead closing panel.
M70 1154
Parts & tools for this job Staging For Land Rover Range Rover
- PARTBrake padsSearch: Land Rover Range Rover brake pads
- TOOLBrake bleeder kitSearch: one man brake bleeder kit
- FLUIDBrake fluidSearch: brake fluid
Links open Amazon search results in a new tab. As an Amazon Associate I earn from qualifying purchases.