
Compressor - KV6
- Make
- Land Rover
- Model
- Freelander Service Procedures
- Section
- REPAIRS › Compressor - KV6
AIR CONDITIONING
REPAIRS
82-7
Compressor - KV6
$% 82.10.20
Remove
1. Disconnect battery earth lead.
2. Recover refrigerant from A/C system.
RECOVERY, RECYCLING AND
RECHARGING, Refrigerant recovery -
recycling and recharge.
3. Remove underbelly panel.
4. Remove RH front road wheel.
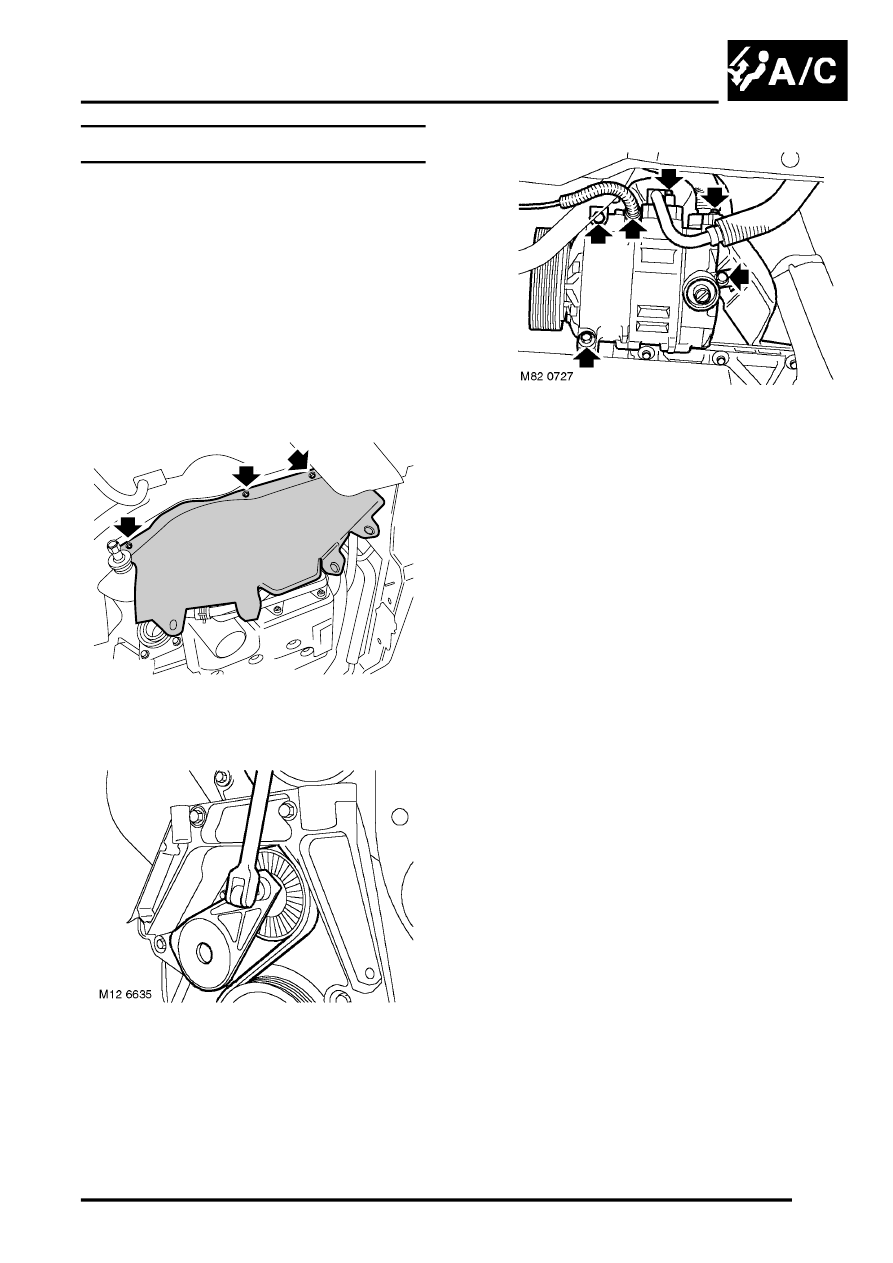
5. Remove 3 bolts securing RH splash shield to
body and remove shield.
6. Using a 3/8” square drive socket bar, raise
ancillary drive belt tensioner and release drive
belt from A/C compressor pulley.
7. Remove 2 bolts securing high and low pressure
pipes to compressor. Release pipes from
compressor, remove and discard 'O' rings.
CAUTION: Before disconnecting or
removing components, ensure the
immediate area around joint faces and
connections are clean. Plug open
connections to prevent contamination.
8. Disconnect multiplug from compressor.
9. Note fitted position of heat shield on
compressor and remove 3 bolts securing
compressor to front mounting plate and
cylinder block. Remove compressor and heat
shield.
M12 6614
Parts & tools for this job Staging For Land Rover Freelander
- TOOLA/C manifold gauge setSearch: AC manifold gauge set
- TOOLUV leak detection kitSearch: AC UV leak detection kit
- PARTCabin filterSearch: Land Rover Freelander cabin filter
Links open Amazon search results in a new tab. As an Amazon Associate I earn from qualifying purchases.