
TRIM CASING - REAR DOOR (page 2 of 2)
- Make
- Land Rover
- Model
- Range Rover P38
- Section
- REPAIR
76
CHASSIS AND BODY
NEW RANGE ROVER
44
REPAIR
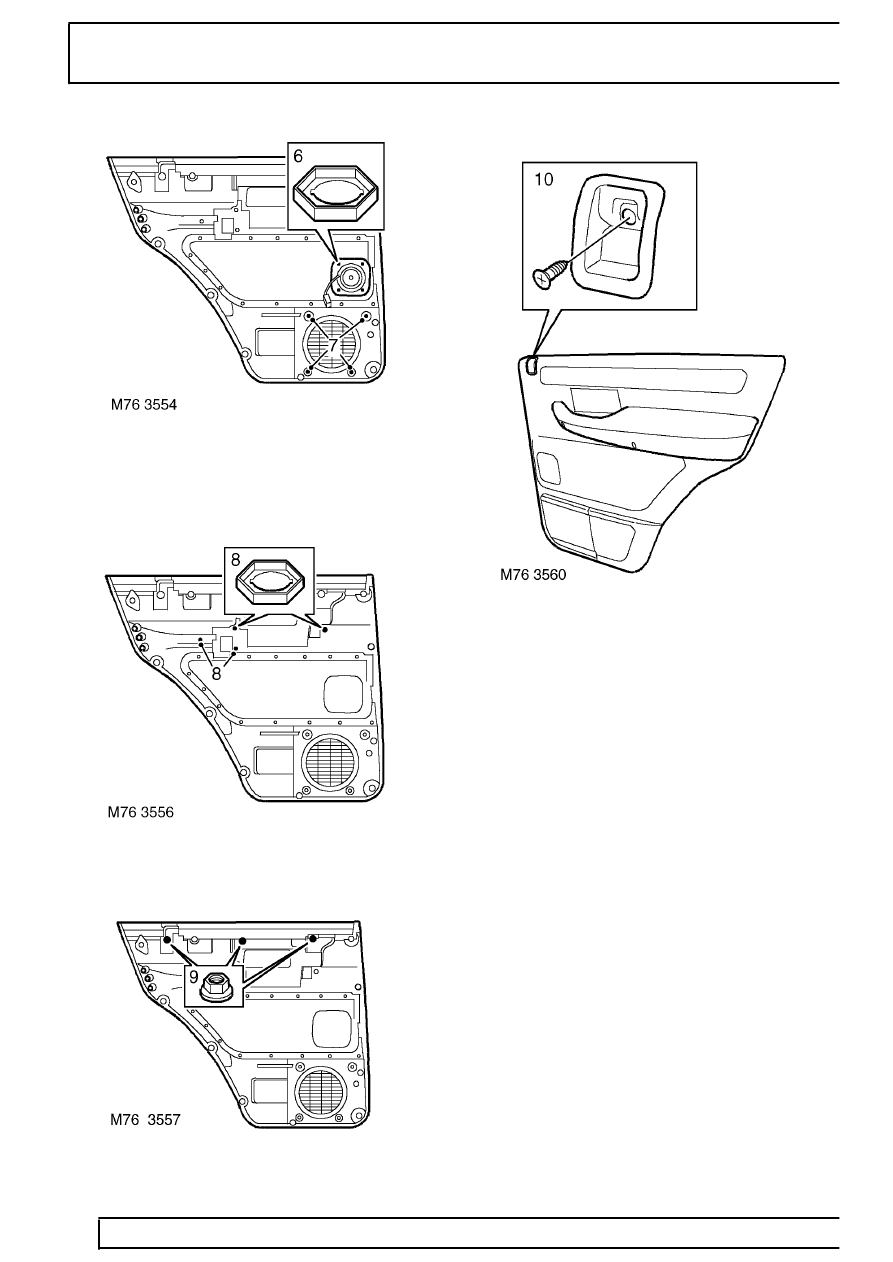
6. Remove 4 speed nuts securing speaker to trim
casing and remove speaker.
7. Remove 4 Torx bolts securing speaker grille to
trim casing and remove grille.
8. Remove 4 speed nuts securing arm rest to trim
casing and remove arm rest.
9. Remove 3 nuts securing door trim finisher to
door trim and remove finisher.
10. Remove screw securing door lock button
escutcheon to door trim and remove
escutcheon.
Refit
11. Fit door lock button escutcheon to door trim and
secure with screw.
12. Fit door trim finisher to door trim and secure with
nuts.
13. Fit arm rest to door trim and secure with speed
nuts.
14. Fit speaker grille to door trim and secure with
Torx bolts.
15. Fit speaker to trim casing and secure with speed
nuts.
16. Fit trim casing retaining studs.
17. Position door trim to rear door and connect
multiplug to speaker.
18. Fit door trim to rear door and secure with screws
and retaining studs.
19. Fit door handle escutcheon to door and secure
with screw.
Parts & tools for this job Staging For Land Rover Range Rover
- TOOLTrim removal tool kitSearch: trim removal tool kit
- PARTTouch-up paintSearch: Land Rover touch up paint
- PARTPanel clip assortmentSearch: Land Rover panel clips assortment
Links open Amazon search results in a new tab. As an Amazon Associate I earn from qualifying purchases.