
Valve assembly - cross link
- Make
- Land Rover
- Model
- Range Rover L322 Range Rover Service Procedures
- Section
- REPAIRS › Valve assembly - cross link
REAR SUSPENSION
64-26
REPAIRS
Valve assembly - cross link
$% 64.50.13
Do not depressurise air suspension system before
raising vehicle
When removing Voss connectors from any air
suspension component, the connector must be left
attached to the air pipe being removed. Do not
remove the connector from the air pipe. Removing
the connector from the air pipe could cause the
connector to scratch the pipe and increase the
likelihood of leaks.
Remove
1. Raise rear of vehicle and support under body.
2. Depressurise rear suspension.
ADJUSTMENTS, Suspension - depressurise
and repressurise.
3. Remove RH rear wheel arch liner.
Liner - rear wheel arch - single.
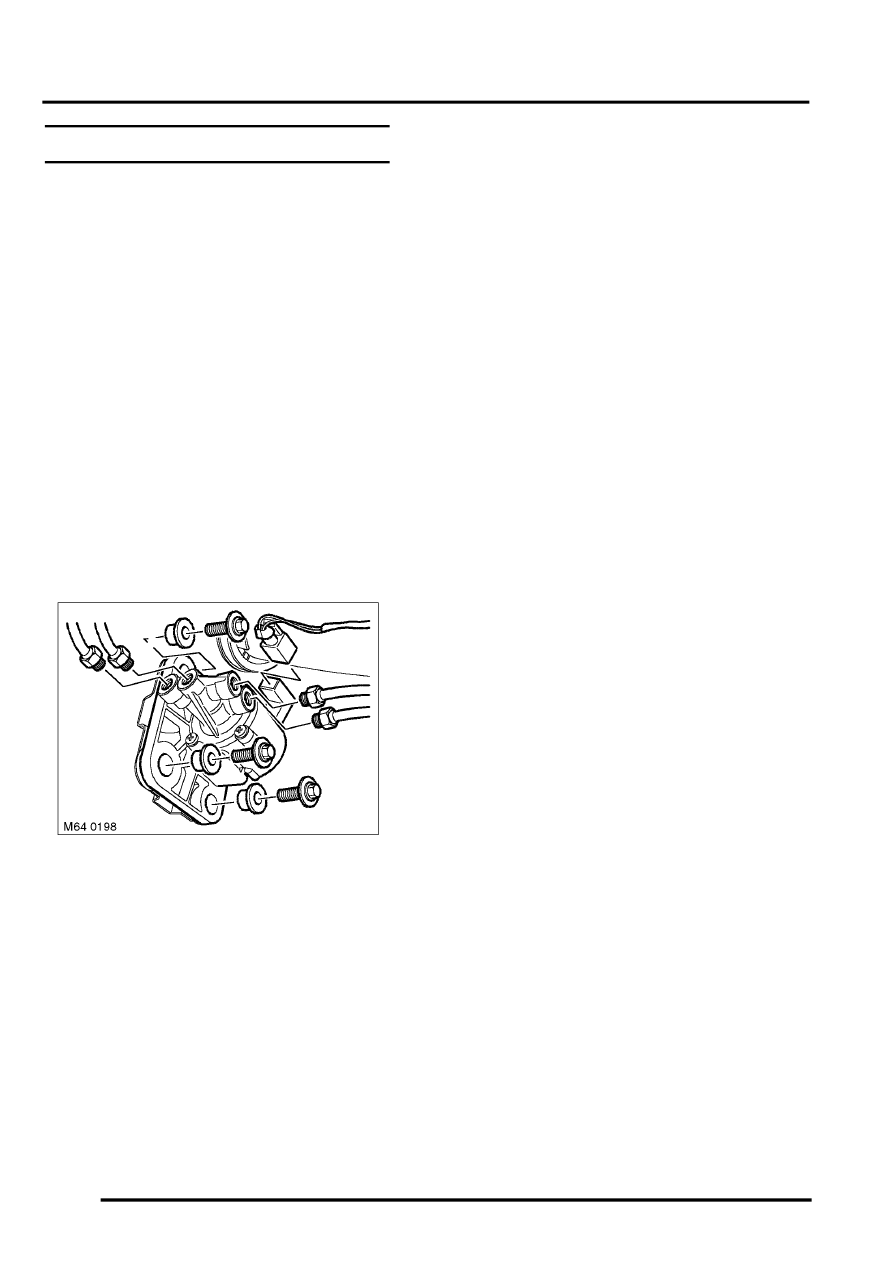
4. Noting their fitted positions, disconnect 4 pipes
from cross link valve.
CAUTION: Before disconnecting or
removing components, ensure the
immediate area around joint faces and
connections are clean. Plug open
connections to prevent contamination.
5. Disconnect multiplug from cross link valve.
6. Remove 3 bolts securing cross link valve to
body.
7. Remove cross link valve assembly.
Refit
1. If fitting a new cross link valve, remove Voss air
connectors from new valve.
2. Position cross link valve, fit bolts and tighten to
8 Nm (6 lbf.ft).
3. Connect multiplug to cross link valve.
4. Connect pipes to cross link valve and tighten
unions to 3.5 Nm (2.6 lbf.ft).
CAUTION: Ensure air pipe connections are
clean.
5. Fit rear wheel arch liner.
Liner - rear wheel arch - single.
6. Pressurise suspension.
ADJUSTMENTS, Suspension - depressurise
and repressurise.
7. Remove stands and lower vehicle.
Parts & tools for this job Staging For Land Rover Range Rover
- PARTEngine gasket setSearch: Land Rover Range Rover engine gasket set
- TOOLTorque wrenchSearch: 3/8 inch torque wrench
- TOOLFeeler gauge setSearch: feeler gauge set
Links open Amazon search results in a new tab. As an Amazon Associate I earn from qualifying purchases.