
Body side panel - 'A' post (page 2 of 2)
- Make
- Land Rover
- Model
- Range Rover L322 Range Rover Service Procedures
- Section
- REPAIRS
PANEL REPAIRS
REPAIRS
-31
Repair
1. Before removing the 'A' post panel, observe the
following precautions.
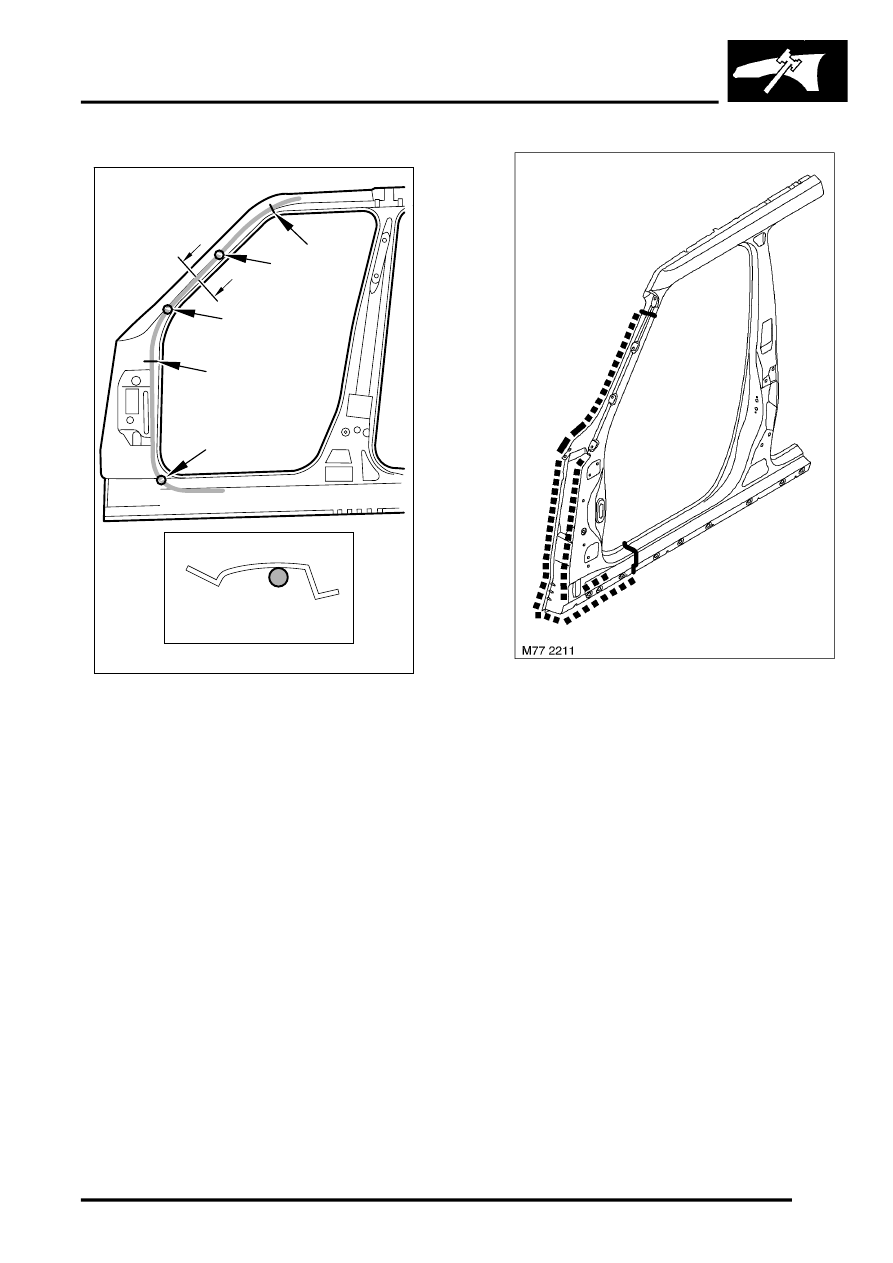
CAUTION: When cutting the 'A' post upper
section do not cut through the
reinforcement panel as a rubber drain tube
is located behind it. The approximate
position of the drain tube is shown in the
illustration.
NOTE: Arrows 'A' and 'B' shown in the
illustration, indicate the approximate position of
the drain tube fixings.
2. Remove existing panel(s), prepare panel joint
faces and install new panel(s) in accordance
with Panel Replacement Procedure. Punch or
drill holes in new panel for plug welding as
shown.
Refit
1. Refit dash insulation pads.
2. Secure front carpet.
3. Fit interior lamp.
4. Fit and secure wiring harness to 'A' post.
5. Fit front door check strap.
6. Fit sill finisher.
Extension - spoiler - front bumper.
7. Fit front and rear door aperture seals.
8. Fit front head airbag.
9. Fit front seat.
10. Fit battery carrier.
M77 2234
A - A
A
A
A
A
B
B
B
Parts & tools for this job Staging For Land Rover Range Rover
- TOOLTrim removal tool kitSearch: trim removal tool kit
- PARTTouch-up paintSearch: Land Rover touch up paint
- PARTPanel clip assortmentSearch: Land Rover panel clips assortment
Links open Amazon search results in a new tab. As an Amazon Associate I earn from qualifying purchases.