
Console - headlining - rear
- Make
- Land Rover
- Model
- Range Rover L322 Range Rover Service Procedures
- Section
- REPAIRS › Console - headlining - rear
INTERIOR FITTINGS
76-3-10 REPAIRS
5. Position centre console finisher and connect
Lucars.
6. Connect multiplug to closing panel lamp
assembly.
7. Fit finisher and secure with Torx screws.
8. Fit handbrake lever grip and secure gaiter.
9. Fit and secure small cubby box finisher.
10. Close cubby box lids.
11. Fit gear selector cover.
Cover - automatic transmission selector.
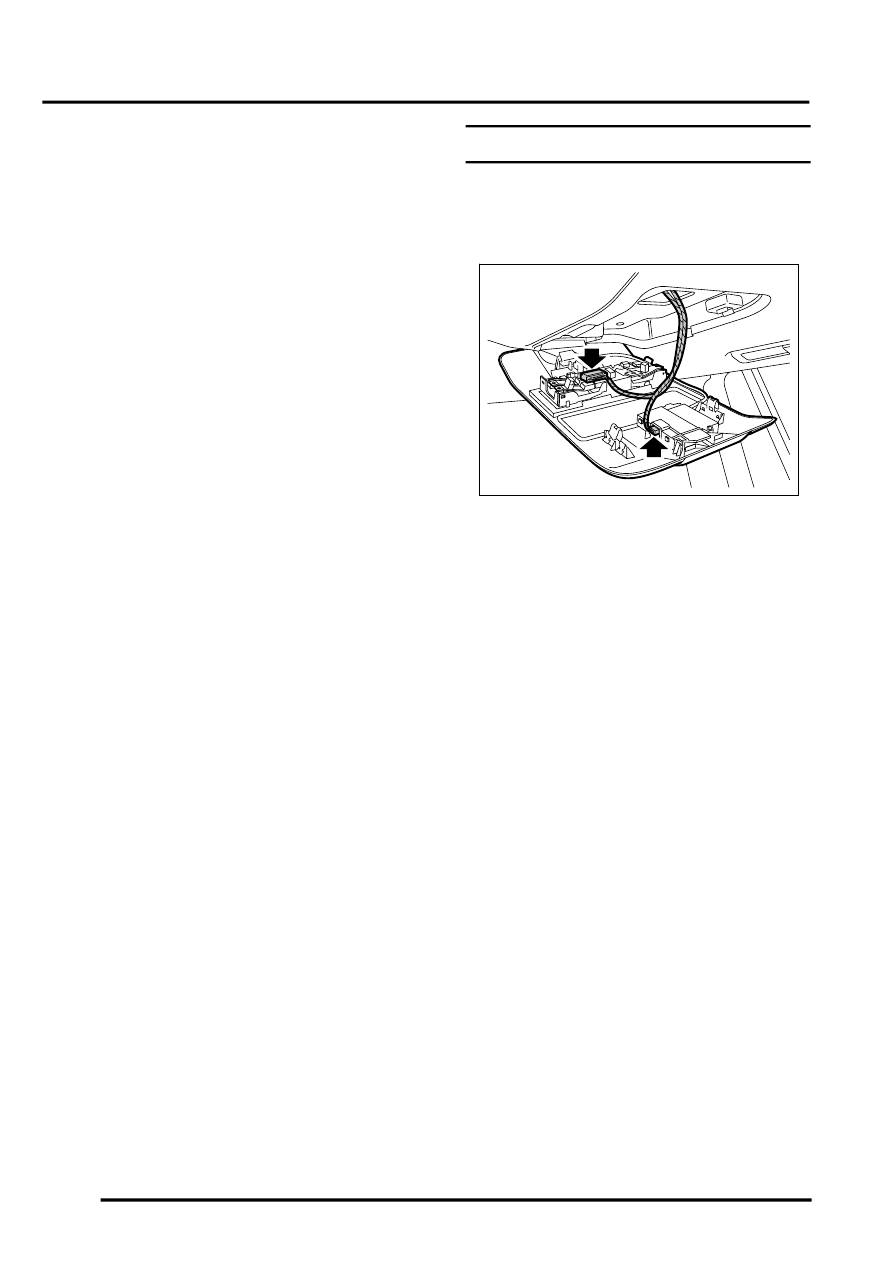
Console - headlining - rear
$% 76.25.08
Remove
1. Carefully release rear console from headlining.
2. Disconnect multiplug from interior lamp.
3. Disconnect multiplug from ultrasonic sensor
and remove console assembly.
NOTE: Do not carry out further dismantling if
component is removed for access only.
4. Carefully release and remove ultrasonic sensor
and module.
5. Remove lamp from console.
Refit
1. Fit lamp to console.
2. Fit module and ultrasonic sensor to console.
3. Position console assembly and connect
multiplugs.
4. Fit rear console to headlining.
M76 4387
Parts & tools for this job Staging For Land Rover Range Rover
- TOOLTorque wrenchSearch: 3/8 inch torque wrench
- TOOLSocket setSearch: socket set metric
- BOOKHaynes manualSearch: Haynes manual Land Rover Range Rover
Links open Amazon search results in a new tab. As an Amazon Associate I earn from qualifying purchases.