
Ventilator(s) - centre
- Make
- Land Rover
- Model
- Range Rover L322 Range Rover Service Procedures
- Section
- REPAIRS › Ventilator(s) - centre
HEATING AND VENTILATION
REPAIRS
80-3
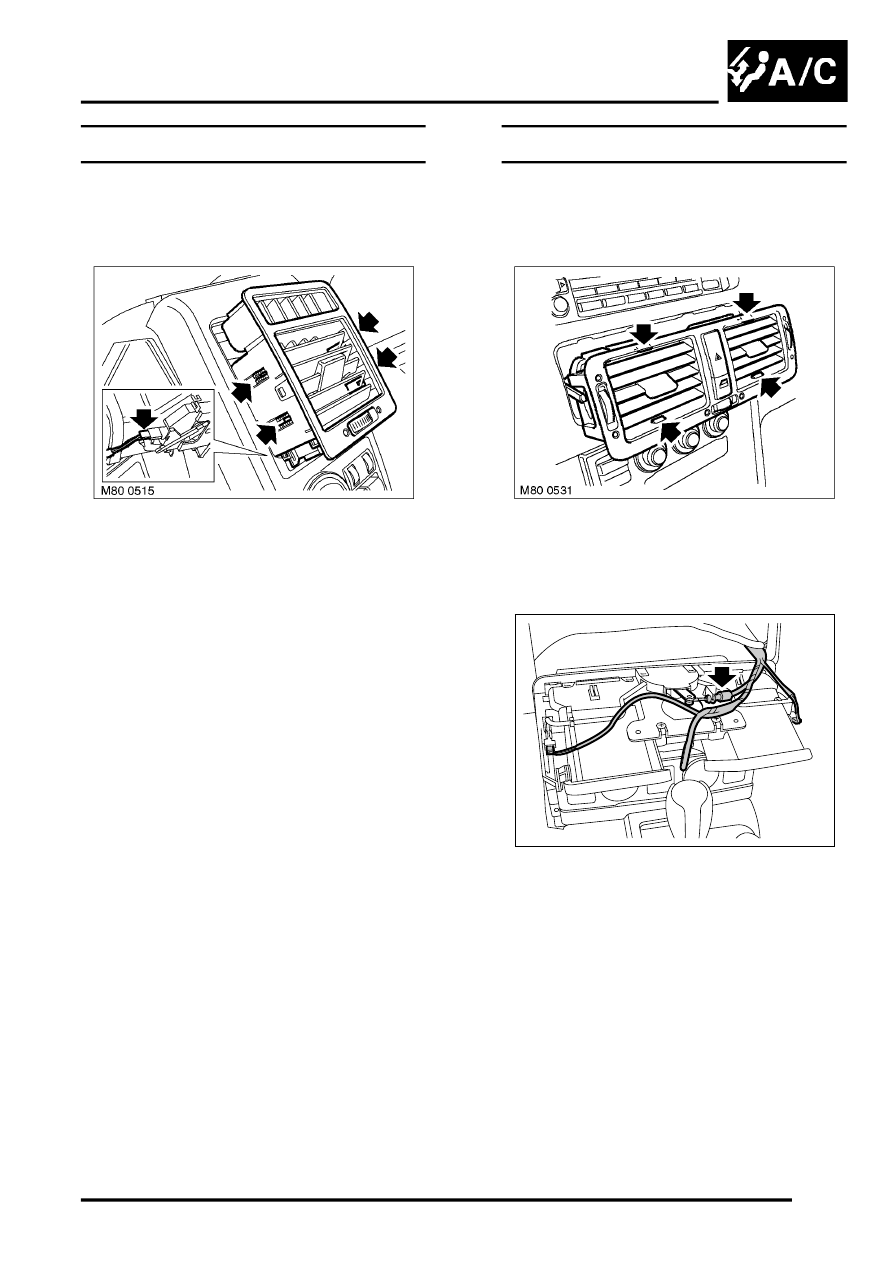
Fresh air vent - face level
$% 80.15.04
Remove
1. Individually release 4 internal clips securing air
vent to finisher, apply an even outward
pressure until the last clip is released. Remove
air vent from finisher.
2. Disconnect air vent multiplug and remove vent
from vehicle.
Refit
1. Connect multiplug.
2. Position air vent to finisher, align, enter and
secure clips.
Ventilator(s) - centre
$% 80.15.24
Remove
1. Individually release 4 internal clips securing air
vent to finisher, apply an even outward
pressure until the last clip is released.
2. Disconnect multiplugs and release harness
from vent.
3. Release air distribution cable from ratchet
assembly and remove vent.
NOTE: Do not carry out further dismantling if
component is removed for access only.
4. Remove hazard warning switch.
Refit
1. Fit hazard warning switch.
2. Position vent to fascia and secure cable.
3. Connect multiplugs and secure harness to
vent.
4. Fit and secure air vent to fascia.
M80 0532
Parts & tools for this job Staging For Land Rover Range Rover
- TOOLA/C manifold gauge setSearch: AC manifold gauge set
- TOOLUV leak detection kitSearch: AC UV leak detection kit
- PARTCabin filterSearch: Land Rover Range Rover cabin filter
Links open Amazon search results in a new tab. As an Amazon Associate I earn from qualifying purchases.