
Height sensor
- Make
- Land Rover
- Model
- Range Rover L322 Range Rover Service Procedures
- Section
- REPAIRS › Height sensor
FRONT SUSPENSION
REPAIRS
60-17
Refit
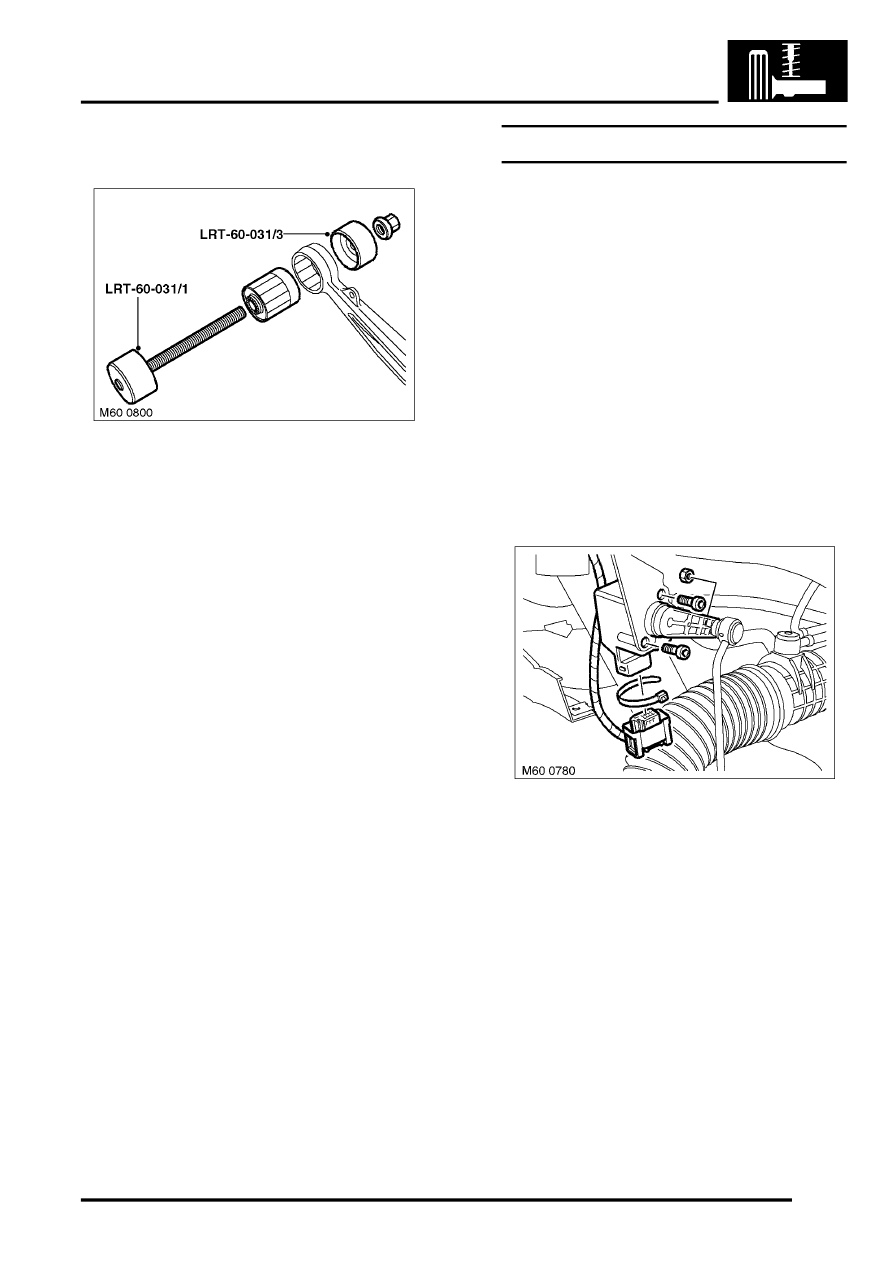
1. Clean bush and bush location in lower arm.
2. Using LRT-60-031/1 and LRT-60-031/3 fit bush
to lower arm.
3. Position lower arm and align to subframe fit
new bolt but do not tighten at this stage.
CAUTION: Nuts and bolts must be tightened
with weight of vehicle on suspension.
4. Connect height sensor link to lower arm, fit nut
and tighten to 8 Nm (6 lbf.ft).
CAUTION: Ensure height sensor arm is
pointing outwards.
5. Fit road wheel and tighten nuts to 140 Nm (103
lbf.ft).
6. Remove stand(s) and lower vehicle.
7. Tighten bolt securing lower arm to subframe to
165 Nm (121 lbf.ft) plus a further 90
°
.
8. Repeat procedure for other side.
9. Check front wheel alignment.
Height sensor
$% 60.36.01
For models fitted with Xenon headlamps, the RH
front and RH rear height sensors are different to
those models with standard headlamps. The Xenon
sensors can be identified by a white stripe on the
back face of the sensor housing. These sensors can
be fitted to models without Xenon headlamps. The
sensors fitted to models without Xenon headlamps
cannot be fitted to those with Xenon headlamps.
Remove
1. Raise front of vehicle.
WARNING: Do not work on or under a
vehicle supported only by a jack. Always
support the vehicle on safety stands.
2. Remove road wheel.
3. Remove cable tie and disconnect multiplug.
4. Remove nut and disconnect link from sensor.
CAUTION: Use an open ended spanner on
flats provided to prevent ball joint rotating.
5. Using a 4mm Allen socket, remove 2 Allen
screws securing height sensor to mounting
bracket and remove height sensor.
Parts & tools for this job Staging For Land Rover Range Rover
- TOOLOBD2 scannerSearch: OBD2 scanner
- TOOLDigital multimeterSearch: automotive digital multimeter
- TOOLBack-probe test leadsSearch: back probe test leads
Links open Amazon search results in a new tab. As an Amazon Associate I earn from qualifying purchases.