
Oil seal - pinion (page 2 of 2)
- Make
- Land Rover
- Model
- Range Rover L322 Range Rover Service Procedures
- Section
- REPAIRS
FINAL DRIVE
REPAIRS
51-11
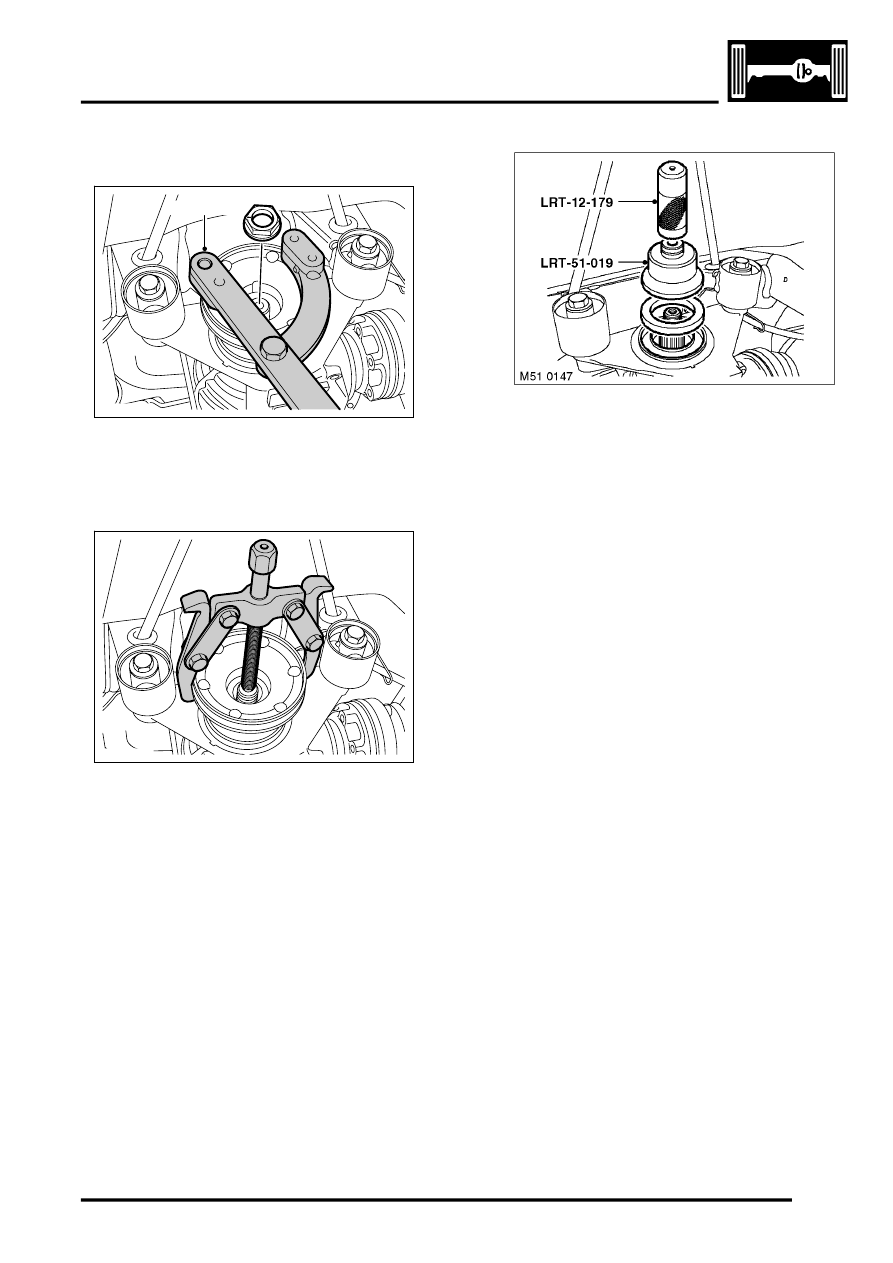
9. Reference mark pinion nut and pinion shaft to
aid reassembly.
10. Using LRT-51-003 restrain pinion flange and
remove nut.
11. Position container to collect oil spillage.
12. Using a two legged puller remove pinion flange.
13. Carefully remove and discard oil seal, take care
not to damage oil seal recess.
Refit
1. Clean oil seal recess.
2. Using LRT-12-179 with adapter LRT-51-019, fit
new oil seal.
3. Clean pinion flange.
4. Fit pinion flange, fit nut, restrain flange using
LRT-51-003 and tighten nut to align reference
marks.
CAUTION: Do not tighten beyond reference
marks.
5. Fit new locking plate.
6. Clean differential and propeller shaft flange
mating faces.
7. Remove nuts securing support bearing,
connect propeller shaft to differential flange and
locate support bearing. Fit nuts securing
support bearing but do not tighten at this stage.
8. Fit nuts securing propeller shaft to differential
flange and tighten to 70 Nm (52 lbf.ft).
9. Tighten nuts securing propeller shaft support
bearing to 21 Nm (15 lbf.ft).
10. Fit fuel tank heat shield and secure with screws.
11. Fit centre heat shield and secure with nuts.
12. Fit exhaust system.
- Td6, REPAIR, Exhaust system and
mountings.
13. Top-up differential with oil.
FINAL DRIVE, ADJUSTMENTS, Rear
differential - drain and refill.
LRT-51-003
M51 0145
M51 0146
Parts & tools for this job Staging For Land Rover Range Rover
- PARTOil filterSearch: Land Rover Range Rover oil filter
- TOOLOil filter wrenchSearch: oil filter wrench
- FLUIDEngine oilSearch: Land Rover Range Rover engine oil
Links open Amazon search results in a new tab. As an Amazon Associate I earn from qualifying purchases.