
Pads - rear
- Make
- Land Rover
- Model
- Range Rover L322 Range Rover Service Procedures
- Section
- REPAIRS › Pads - rear
BRAKES
70-18
REPAIRS
Pads - rear
$% 70.40.03
WARNING: Brake pads must be renewed in axle
sets only, otherwise braking efficiency may be
impaired. If pad wear warning light has been
activated, pad wear sensor must be renewed.
Remove
1. Raise rear of vehicle.
WARNING: Do not work on or under a
vehicle supported only by a jack. Always
support the vehicle on safety stands.
2. Remove road wheels.
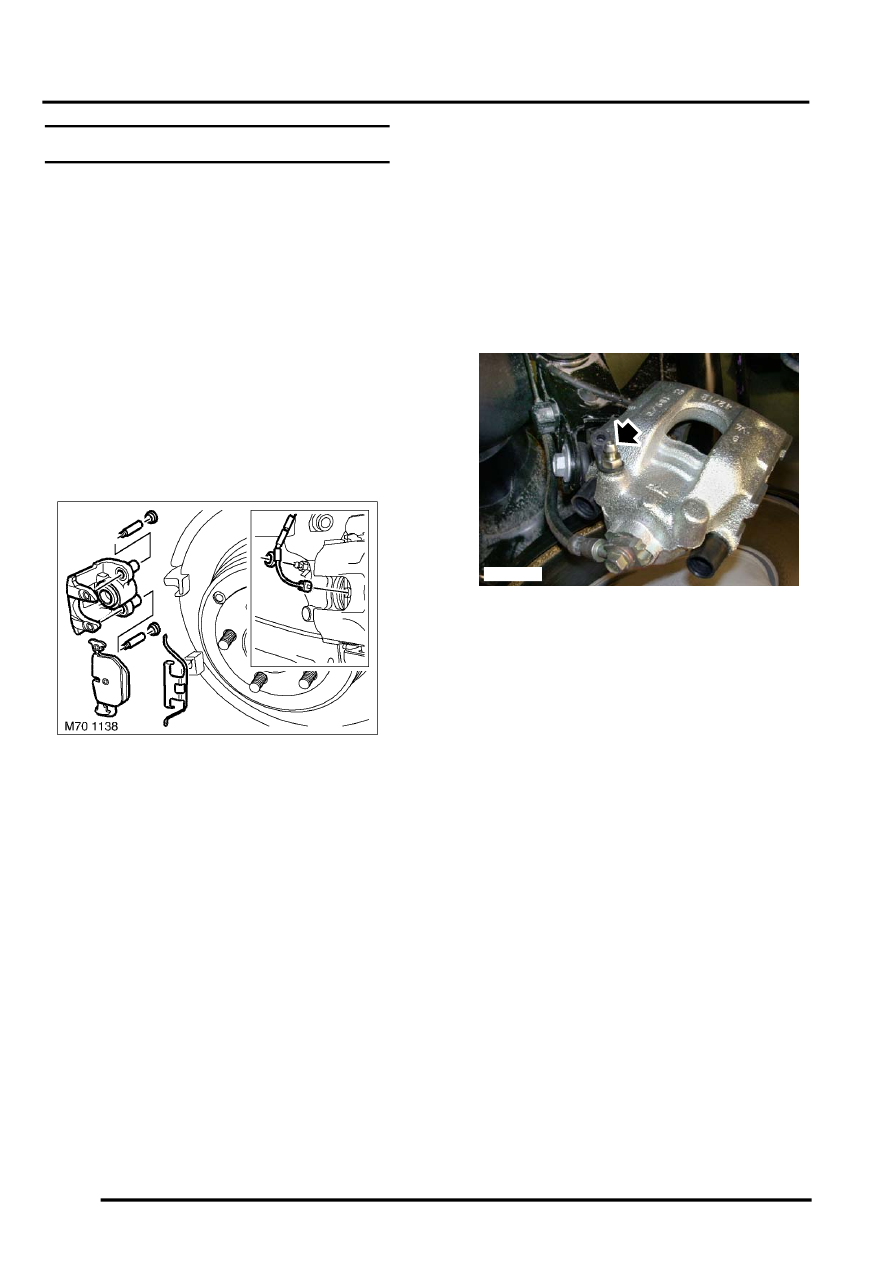
3. RH side only: Release pad wear sensor.
4. Remove anti-rattle spring from caliper housing.
5. Remove 2 caps from guide pin dust covers.
6. Remove 2 guide pins from caliper housing.
7. Release caliper housing from caliper carrier
and tie aside.
CAUTION: Do not allow caliper to hang on
brake hose.
8. Remove brake pads from caliper housing, mark
their fitted position if they are to be refitted.
9. Repeat procedure for other side.
Refit
1. Clean caliper housing and caliper carrier using
brake cleaning fluid.
WARNING: Do not use compressed air to
clean brake components. Dust from friction
materials can be harmful if inhaled.
2. Clean brake pad, caliper housing and carrier
contact areas and apply suitable anti-seize
compound.
3. Inspect caliper and seals for damage.
4. Position bleed bottle, connect bleed hose to
bleed screw and loosen screw.
5. Press piston into caliper housing then tighten
bleed screw to 14 Nm (10 lbf.ft)
6. Disconnect bleed hose and remove bottle.
7. Fit brake pads to caliper housing.
8. Clean and inspect guide pins, replace if
corroded or damaged. Do not lubricate.
9. Position and align caliper housing to carrier, fit
guide pins and tighten to 33 Nm (24 lbf.ft).
10. Fit caps to guide pin dust covers.
11. Fit anti-rattle spring to caliper housing.
12. Repeat procedure for other side.
13. Fit sensor to pad.
14. Depress brake pedal several times to seat
pads.
15. Check and top-up fluid level.
16. Fit road wheel(s) and tighten nuts to 140 Nm
(103 lbf.ft).
17. Remove stands and lower vehicle.
M70 1139
Parts & tools for this job Staging For Land Rover Range Rover
- PARTRear brake padsSearch: Land Rover Range Rover rear brake pads
- TOOLCaliper piston rewind toolSearch: brake caliper piston rewind tool
- FLUIDBrake fluidSearch: brake fluid
Links open Amazon search results in a new tab. As an Amazon Associate I earn from qualifying purchases.