
Column assembly - inner & outer (page 3 of 4)
- Make
- Land Rover
- Model
- Freelander Service Procedures
- Section
- REPAIRS
STEERING
REPAIRS
57-21
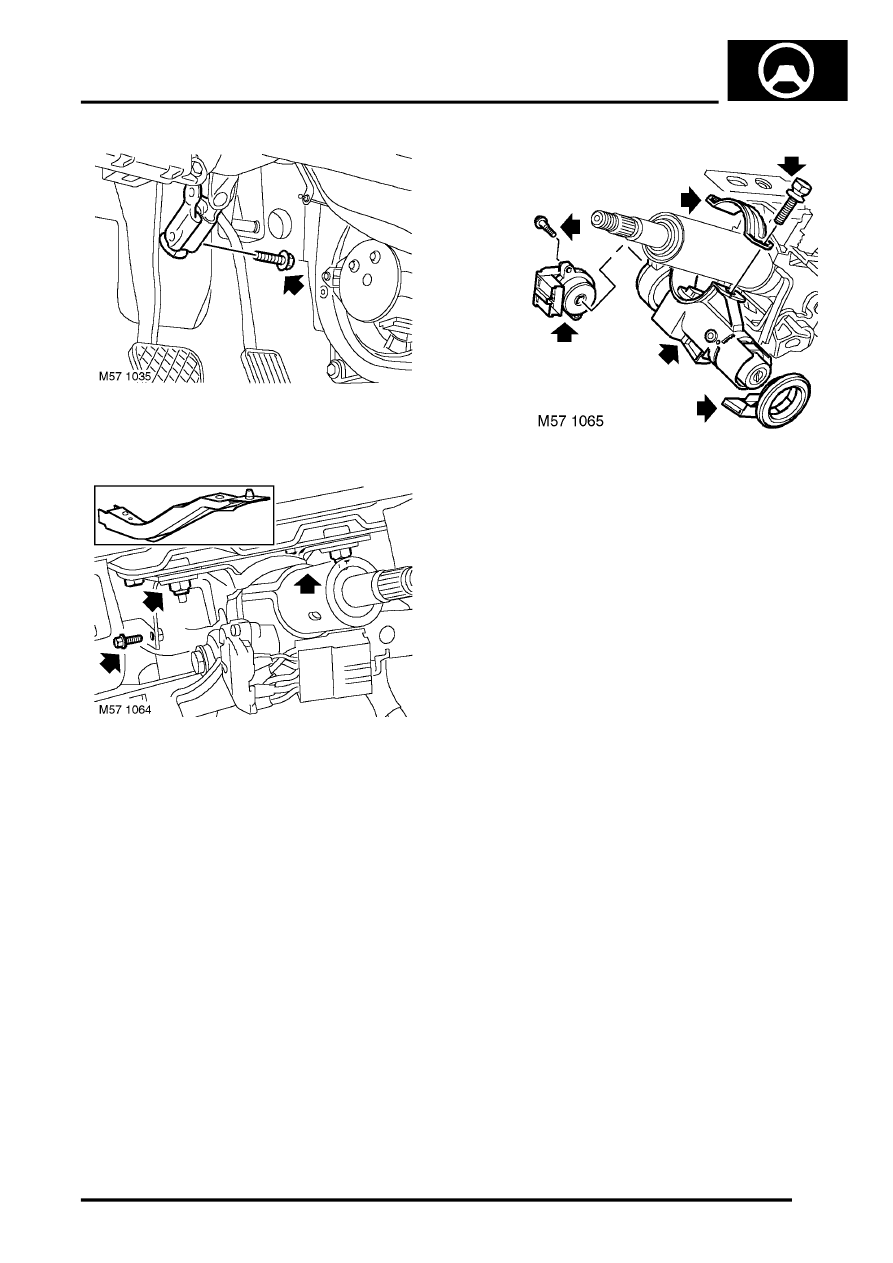
14. Remove pinch bolt securing steering column to
PAS rack pinion.
15. Remove bolt securing steering column to
fusebox support bracket.
16. Remove 2 nuts and 2 bolts securing steering
column to fascia support rail.
17. Collect snubber.
18. Release steering column from support bracket
and PAS rack pinion.
19. Remove steering column assembly.
20. Remove 2 cable ties from steering column.
21. Remove key interlock cable clip.
22. Remove 2 screws securing ignition switch and
remove ignition switch.
23. Remove passive coil.
24. Position steering column assembly in a vice.
25. Centre punch or drill out steering lock shear
bolts.
CAUTION: If steering column is to be re-
used, take care not to deform or damage
column in vice.
26. Remove steering column lock.
CAUTION: Take care not to damage steering
lock body if the lock is to be refitted.
Parts & tools for this job Staging For Land Rover Freelander
- TOOLTie rod end toolSearch: tie rod end puller
- TOOLBall joint separatorSearch: ball joint separator
- FLUIDPower steering fluidSearch: Land Rover power steering fluid
Links open Amazon search results in a new tab. As an Amazon Associate I earn from qualifying purchases.