
Rotary coupler - (SRS) air bag system
- Make
- Land Rover
- Model
- Freelander Service Procedures
- Section
- REPAIRS › Rotary coupler - (SRS) air bag system
RESTRAINT SYSTEMS
REPAIRS
75-19
Rotary coupler - (SRS) air bag system
$% 76.74.20
Remove
WARNING: It is imperative that before any
work is undertaken on the SRS system the
appropriate information is read thoroughly.
1. Make the SRS system safe.
Supplementary restraint system
precautions.
CAUTION: Before disconnecting any part of
the steering linkage, ensure the road wheels
are positioned straight ahead and the
steering wheel is prevented from turning.
Unrestricted turning of the steering wheel
will damage the SRS rotary coupler.
CAUTION: Use adhesive tape to prevent
rotation of the rotary coupler once the
steering wheel is removed.
3. Remove steering column nacelle.
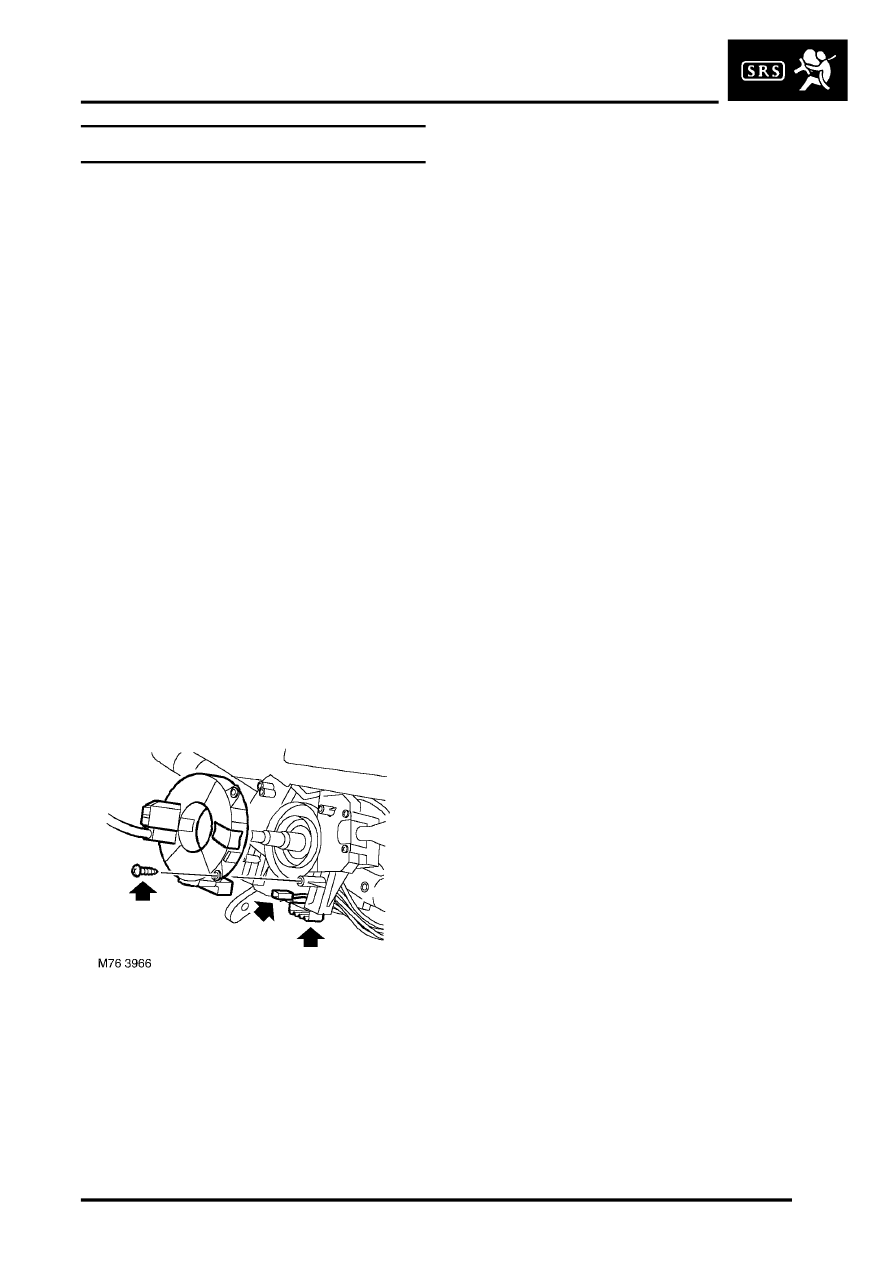
4. Disconnect 2 multiplugs from rotary coupler.
5. Remove 4 screws and remove rotary coupler.
CAUTION: Do not dismantle the rotary
coupler, it has no serviceable parts and
must be replaced as a complete assembly.
Refit
1. Ensure the rotary coupler is installed in its
centred position. To obtain centre position,
rotate coupler gently clockwise and
anticlockwise until the white segment appears
on the indicator wheel.
CAUTION: Ensure front road wheels are in
the straight ahead position.
2. Fit rotary coupler and secure with screws.
3. Connect multiplugs to rotary coupler.
4. Fit steering column nacelle.
5. Fit steering wheel.
6. Connect battery leads, earth lead last.
Parts & tools for this job Staging For Land Rover Freelander
- TOOLOBD2 scanner with SRSSearch: OBD2 scanner ABS SRS
- TOOLTrim removal tool kitSearch: trim removal tool kit
Links open Amazon search results in a new tab. As an Amazon Associate I earn from qualifying purchases.