
Seal - pinion gear housing - K1.8
- Make
- Land Rover
- Model
- Freelander Service Procedures
- Section
- REPAIRS › Seal - pinion gear housing - K1.8
INTERMEDIATE REDUCTION DRIVE
REPAIRS
41-27
Seal - pinion gear housing - K1.8
$% 41.29.11
Remove
1. Remove underbelly panel.
2. Drain fluid from IRD.
DRIVE, ADJUSTMENTS, Intermediate
reduction drive (IRD) fluid - drain & refill -
Non NAS.
3. Raise one rear wheel for rotation of propeller
shaft to access bolts.
4. Reference mark front propeller shaft for
reassembly.
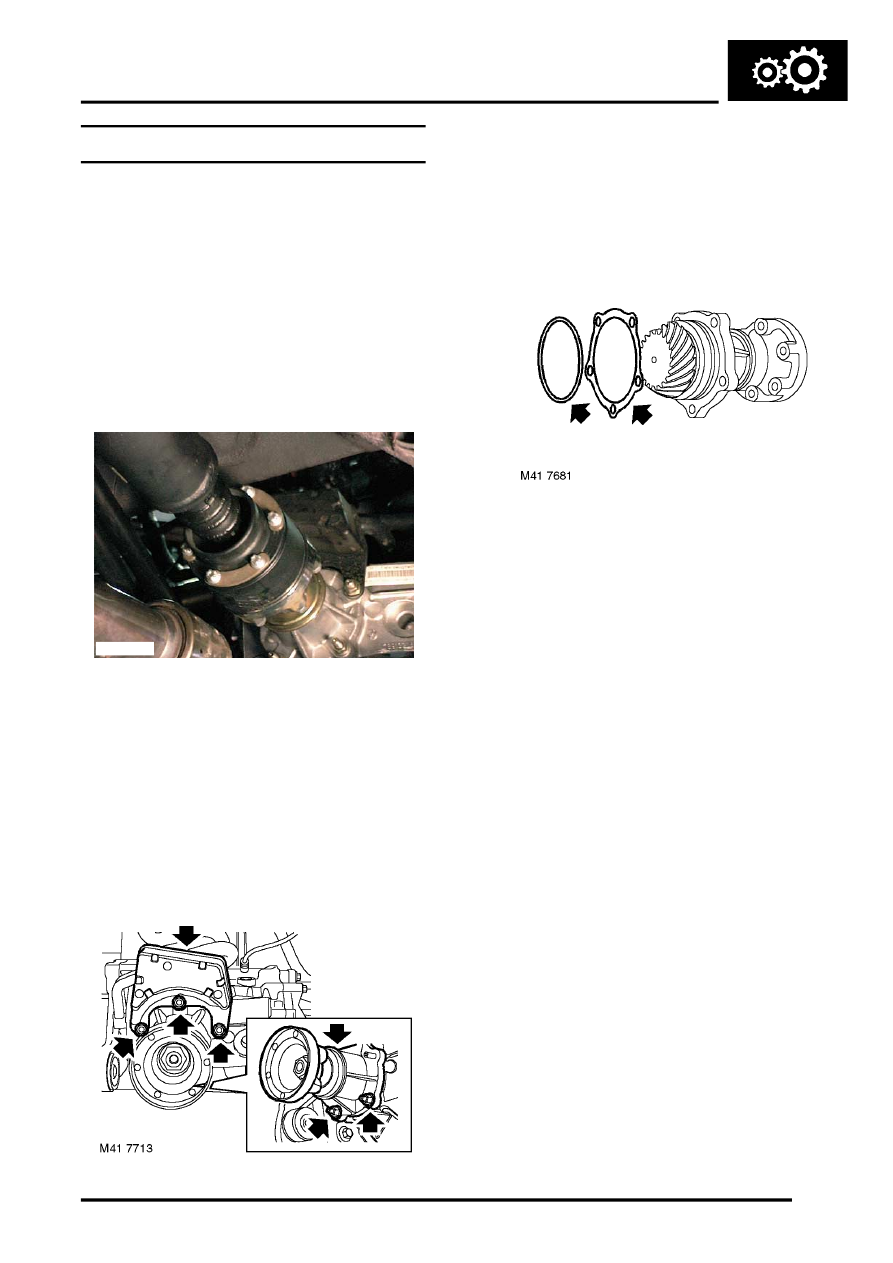
5. Remove 6 nuts and bolts securing propeller
shaft to IRD drive flange.
6. Release propeller shaft from IRD drive flange
and tie shaft aside.
CAUTION: Care must be taken to support
the Tripode joint when removed from the
IRD unit. To avoid damage to gaiter or steel
can, the joint should not be allowed to fully
extend or be dropped.
7. Remove 3 nuts securing mass damper to
pinion housing.
8. Remove mass damper.
9. Remove 2 remaining nuts securing pinion
housing.
10. Remove pinion housing.
11. Remove and discard 'O' ring.
12. Remove and retain spacing washer.
Refit
1. Clean pinion housing and mating face on IRD
casing.
2. Clean spacing washer.
3. Fit spacing washer to IRD.
4. Lubricate new 'O' ring with IRD fluid and fit to
groove in pinion housing.
5. Fit pinion housing.
6. Fit mass damper and fit nuts finger tight.
7. Fit remaining nuts securing pinion housing and
tighten all nuts to 25 Nm (18 lbf.ft).
8. Ensure mating face of propeller shaft and IRD
drive flange are clean.
9. Fit propeller shaft to IRD flange and align
marks. Tighten nuts and bolts to 40 Nm (30
lbf.ft).
10. Fill IRD to correct level with fluid.
DRIVE, ADJUSTMENTS, Intermediate
reduction drive (IRD) fluid - drain & refill -
Non NAS.
11. Lower axle and remove jack.
12. Fit underbelly panel.
M12 7142
Parts & tools for this job Staging For Land Rover Freelander
- TOOLTorque wrenchSearch: 3/8 inch torque wrench
- TOOLSocket setSearch: socket set metric
- BOOKHaynes manualSearch: Haynes manual Land Rover Freelander
Links open Amazon search results in a new tab. As an Amazon Associate I earn from qualifying purchases.