
Viscous coupling assembly
- Make
- Land Rover
- Model
- Freelander Service Procedures
- Section
- REPAIRS › Viscous coupling assembly
DRIVESHAFTS
REPAIRS
47-15
Refit
1. Clean grease from joint body and shaft.
2. Fit new clip and gaiter to shaft. Do not secure
clip.
3. With shaft stub held in vice, fit inner part of joint
to shaft and fit circlip.
4. Add supplied grease to joint body.
5. Smear grease to recess in joint body and fit
new seal ensuring bolt holes are aligned.
6. Fit shaft to joint body, align gaiter can bolt holes
and fit 6 nuts and bolts to seal joint.
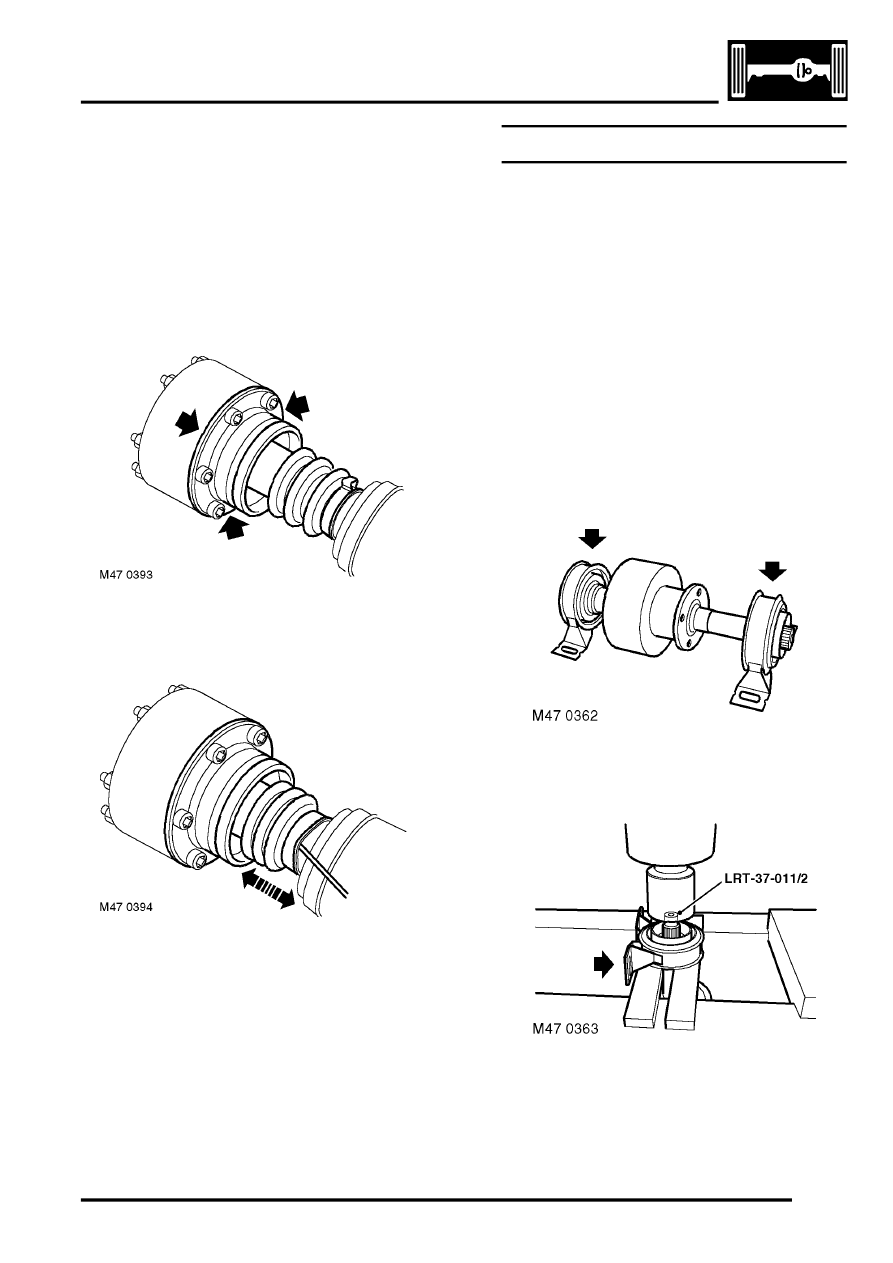
7. Crimp gaiter can at three points as shown to
secure to body.
8. Raise edge of gaiter and plunge joint to expel
air.
9. Tighten clip to secure gaiter and remove nuts
and bolts from joint body.
10. Fit front propeller shaft.
DRIVESHAFTS, REPAIRS, Propeller
Viscous coupling assembly
$% 47.20.01
Remove
1. Remove front propeller shaft.
DRIVESHAFTS, REPAIRS, Propeller
2. Remove rear propeller shaft.
DRIVESHAFTS, REPAIRS, Propeller
CAUTION: When removing and refitting any
components to viscous unit, full support
must be given using the flange adjacent to
the splines. Under no circumstances should
any load be applied through the viscous
unit bearings.
3. Note the fitted position of the support bearing
on the viscous coupling.
4. Position press bars to support bearing as
shown, taking care that the press bars are not
positioned on the steel flinger.
5. With assistance, position viscous coupling
assembly onto press bed.
Parts & tools for this job Staging For Land Rover Freelander
- PARTWheel bearingSearch: Land Rover Freelander wheel bearing
- TOOLBearing puller kitSearch: wheel bearing puller kit
- PARTCV boot kitSearch: Land Rover Freelander cv boot kit
Links open Amazon search results in a new tab. As an Amazon Associate I earn from qualifying purchases.