
Condenser (page 2 of 2)
- Make
- Land Rover
- Model
- Freelander Service Procedures
- Section
- REPAIRS
AIR CONDITIONING
REPAIRS
82-11
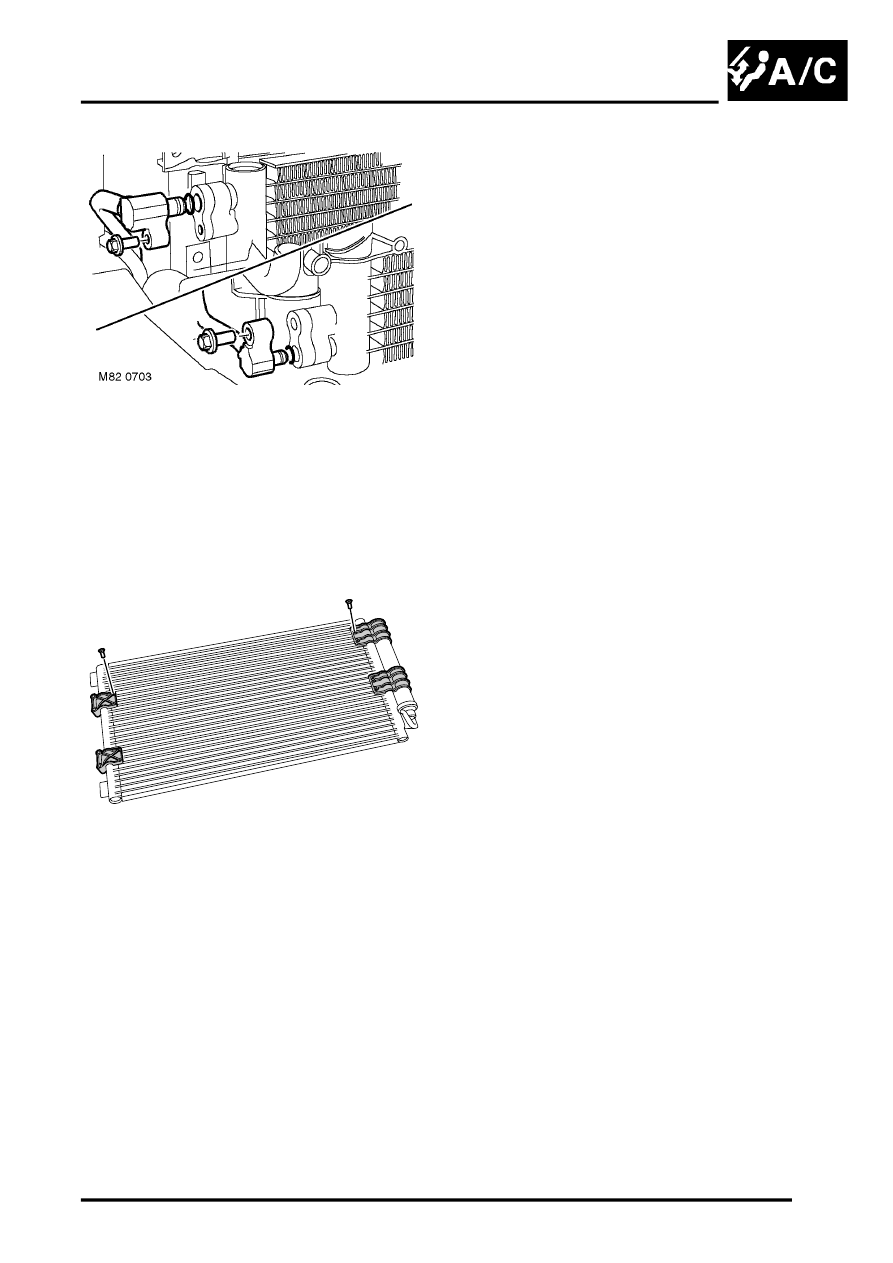
11. Remove 2 bolts securing A/C pipes to
condenser and release pipes from condenser.
CAUTION: Before disconnecting or
removing components, ensure the
immediate area around joint faces and
connections are clean. Plug open
connections to prevent contamination.
12. Remove and discard 'O' rings from A/C pipes.
13. Remove condenser.
14. Remove 8 screws, securing 4 mounting
brackets to condenser and move aside.
15. Remove and discard receiver drier, plug
connections.
Refit
1. Fit condenser mounting brackets, fully tighten
LH screws. Leave RH screws loose until
receiver drier is fitted.
CAUTION: Ensure that bolts of the correct
length are used on refit.
2. Lubricate new 'O' rings with clean refrigerant
oil, fit one seal to each condenser pipe.
3. Position A/C pipes to condenser, fit bolts and
tighten to 8 Nm (6 lbf.ft).
4. Fit bolts securing condenser to radiator and
tighten to 8 Nm (6 lbf.ft).
5. Fit receiver drier assembly to condenser.
6. Fit air deflectors and secure with scrivets.
7. Up to 04MY: Position armature, fit and tighten
4 nuts and bolts securing armature to body to
25 Nm (18 lbf.ft).
8. 04MY on: Position armature, fit bolts securing
armature to crash cans and tighten to 25 Nm
(18 lbf.ft).
9. KV6 models:Align PAS fluid cooler and tighten
bolts to 8 Nm (6 lbf.ft).
10. Fit bumper valance.
Bumper - assembly - front - up to 04MY.
11. Td4 models: Fit intercooler.
FUEL DELIVERY SYSTEM - DIESEL,
12. Recharge A/C system.
RECOVERY, RECYCLING AND
RECHARGING, Refrigerant recovery -
recycling and recharge.
13. Connect battery earth lead.
M82 0706
Parts & tools for this job Staging For Land Rover Freelander
- TOOLA/C manifold gauge setSearch: AC manifold gauge set
- TOOLUV leak detection kitSearch: AC UV leak detection kit
- PARTCabin filterSearch: Land Rover Freelander cabin filter
Links open Amazon search results in a new tab. As an Amazon Associate I earn from qualifying purchases.