
Cover - tank module - LH
- Make
- Land Rover
- Model
- Range Rover L322 Range Rover Service Procedures
- Section
- REPAIRS › Cover - tank module - LH
FUEL DELIVERY SYSTEM - V8
REPAIRS 19-2-15
Cover - tank module - LH
$% 19.55.41
Before disconnecting the battery, ensure all text and
cautions in the battery disconnection section are
observed.
GENERAL INFORMATION, Electrical
Remove
1. Disconnect battery earth lead.
WARNING: Fuel vapour is highly flammable
and in confined spaces is also explosive
and toxic. Always have a fire extinguisher
containing foam, CO
2
, gas or powder close
at hand when handling or draining fuel.
2. Remove 'D' post trim casing.
Trim finisher - 'D' post - lower.
3. Remove opposite 'D' post trim.
4. Remove 2 Allen bolts securing spare wheel
removal straps to cross member and move
straps aside.
5. Release carpet, fold forward and tie aside.
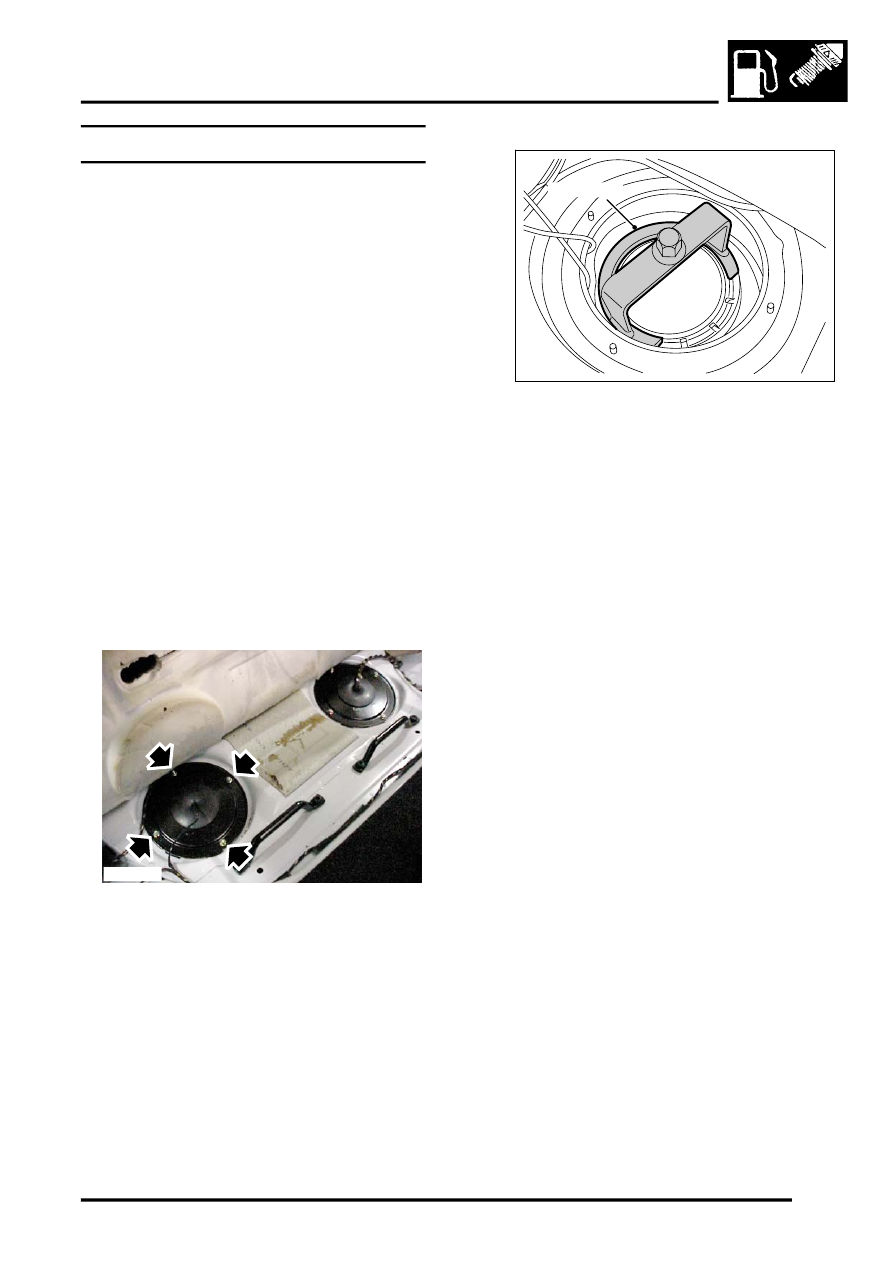
6. Remove 4 nuts and remove fuel tank LH
access cover.
7. Clean area surrounding locking ring.
8. Using tool LRT-19-009, remove locking ring
from fuel tank.
CAUTION: Before disconnecting or
removing components, ensure the
immediate area around joint faces and
connections are clean. Plug open
connections to prevent contamination.
9. Remove access plug and discard fuel tank
seal.
Refit
1. Clean area surrounding fuel tank access.
2. Clean fuel tank access plug and fit new tank
seal.
3. Position fuel tank access plug, align timing and
push fully home. Ensure seal is correctly fitted.
4. Using LRT-19-009 , fit locking ring and tighten
to 35 Nm (26 lbf.ft).
5. Fit carpet.
6. Position spare wheel release straps fit bolts
and tighten to 25 Nm (18 lbf.ft).
7. Fit 'D' post trim casings.
Trim finisher - 'D' post - lower.
8. Connect battery earth lead.
M19 3380
M19 3381
LRT-19-009
Parts & tools for this job Staging For Land Rover Range Rover
- TOOLOBD2 scannerSearch: OBD2 scanner
- TOOLDigital multimeterSearch: automotive digital multimeter
- TOOLBack-probe test leadsSearch: back probe test leads
Links open Amazon search results in a new tab. As an Amazon Associate I earn from qualifying purchases.