
Quarter light - fixed - rear door (page 2 of 2)
- Make
- Land Rover
- Model
- Range Rover L322 Range Rover Service Procedures
- Section
- REPAIRS
DOORS
REPAIRS
76-1-5
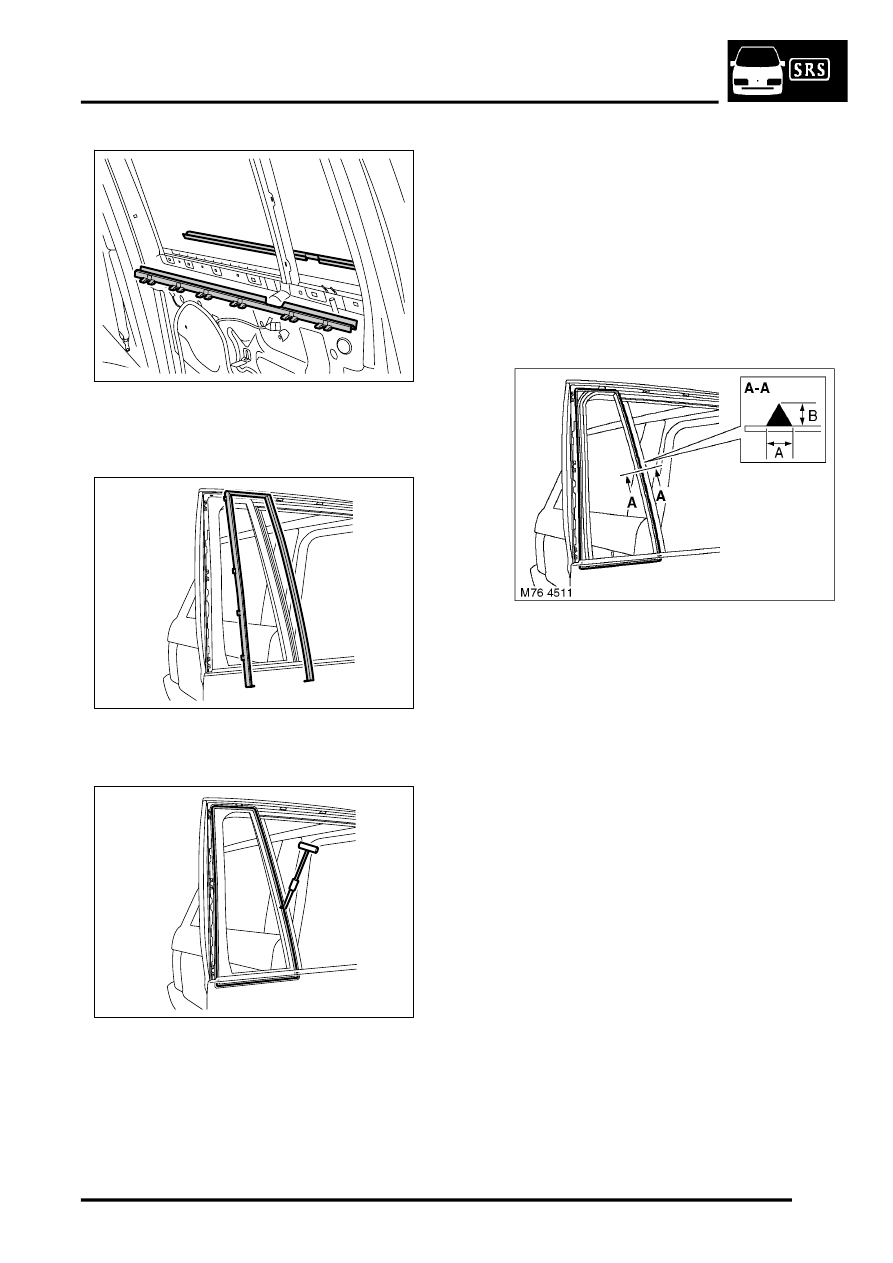
5. Remove outer waist seal.
6. Remove inner waist seal.
7. Remove quarter light outer trim.
8. Use a Kent knife and carefully cut through
sealant securing glass to door frame.
9. Remove quarter light.
Refit
1. Carefully remove sealant from door frame to
leave a smooth surface.
2. Original quarter light: Carefully cut back
sealant to obtain a smooth surface without
damage to obscuration band.
3. Clean sealant face on door frame and quarter
light with solvent.
4. Apply etch primer to any bare metal on door
frame.
5. Apply primer over etch primer.
6. Fit pre-cut nozzle to sealer cartridge, remove
lid, shake out crystals and fit cartridge to
applicator gun. If necessary modify the nozzle
to achieve required bead section.
7. Apply a continuous bead of sealant to door
frame. Dimension A = 7 mm (0.28 in).
Dimension B = 11 mm (0.44 in).
8. Fit and centralise quarter light to door frame.
Lightly press quarter light to seat sealer.
9. Fit quarter light trim.
10. Fit inner waist seal to door.
11. Fit outer waist seal to door.
12. Fit door, top finisher.
13. Fit rear finisher retaining clips to door frame.
14. Fit and secure rear finisher to frame.
15. Fit rear door glass.
16. Test sealer for leaks, apply additional sealer if
necessary. If water is used, allow sealer to dry
before testing. Spray water around glass and
check for leaks. Mark any area that leaks. Dry
glass and sealer then apply additional sealer.
M76 4499
M76 4500
M76 4510
Parts & tools for this job Staging For Land Rover Range Rover
- TOOLTrim removal tool kitSearch: trim removal tool kit
- PARTTouch-up paintSearch: Land Rover touch up paint
- PARTPanel clip assortmentSearch: Land Rover panel clips assortment
Links open Amazon search results in a new tab. As an Amazon Associate I earn from qualifying purchases.