
Tensioner - ancillary drive belt - V8 (page 2 of 2)
- Make
- Land Rover
- Model
- Range Rover L322 Range Rover Service Procedures
- Section
- REPAIRS
CHARGING AND STARTING
86-1-8
REPAIRS
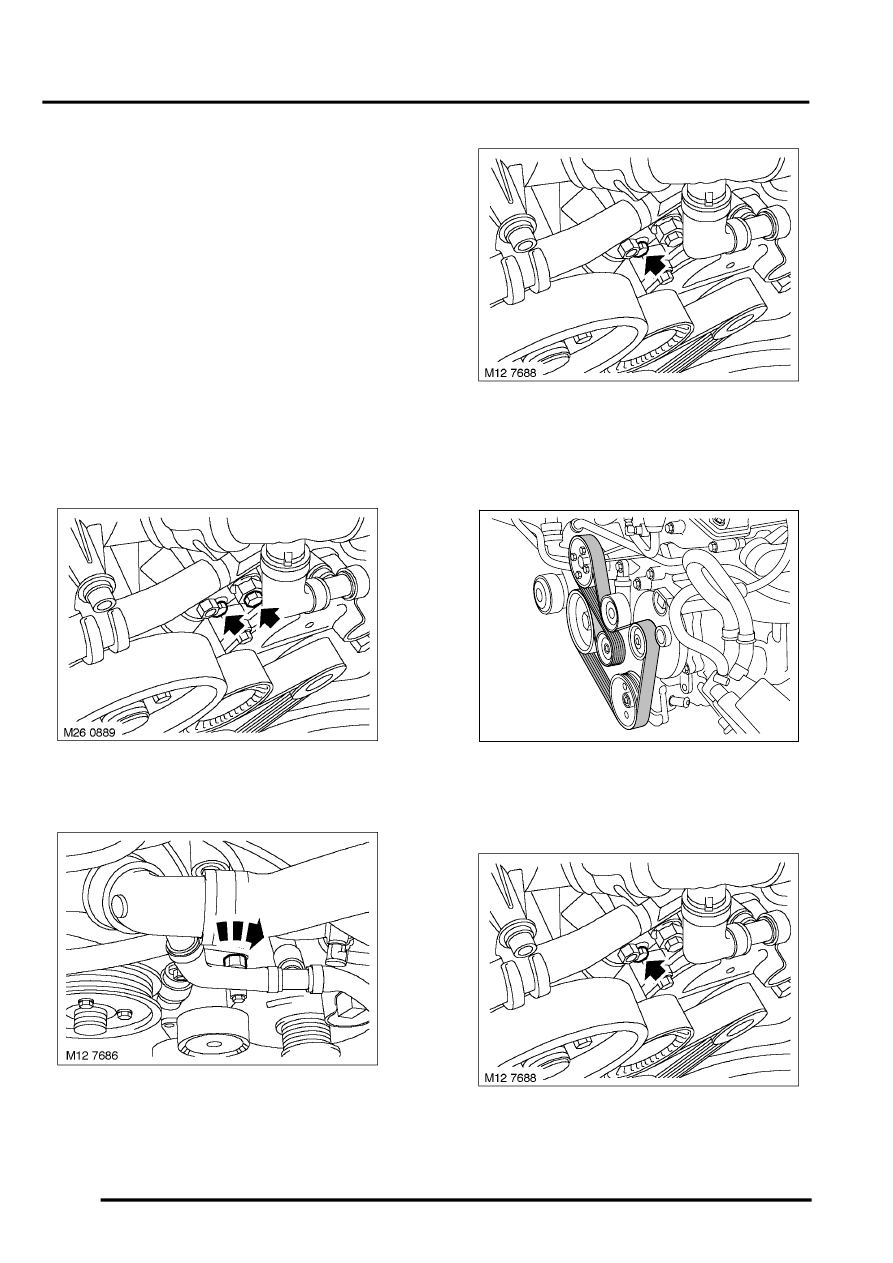
9. Remove dust cap from ancillary drive belt
tensioner idler pulley and remove Torx bolt
securing ancillary drive belt tensioner idler
pulley.
10. Remove ancillary drive belt tensioner
assembly.
11. Remove bolt and tensioner from pulley
mounting.
12. Remove tensioner from tensioner adjusting
bracket.
Refit
1. Fit tensioner to tensioner adjusting bracket, fit
securing nut but do not fully tighten at this
stage.
2. Fit tensioner to pulley mounting and tighten
securing bolt.
3. Fit pulley and tensioner mounting to timing gear
cover and tighten securing bolt.
4. Fit dust cap to tensioner pulley.
5. Fit tensioner to upper timing gear cover, fit 2
securing bolts but do not tighten at this stage.
6. Using a 17 mm (11/16 in) spanner, rotate belt
tensioner fully clockwise.
7. Hold tensioner in retracted position and tighten
tensioner clamping bolt.
8. Fit ancillary drive belt to all pulleys except
tensioner pulley.
9. Fit ancillary drive belt to tensioner pulley.
Ensure ancillary drive belt is aligned to all
pulleys.
10. Undo tensioner clamping bolt to release
tensioner
M01 0305
Parts & tools for this job Staging For Land Rover Range Rover
- TOOLTorque wrenchSearch: 3/8 inch torque wrench
- TOOLSocket setSearch: socket set metric
- BOOKHaynes manualSearch: Haynes manual Land Rover Range Rover
Links open Amazon search results in a new tab. As an Amazon Associate I earn from qualifying purchases.