
Bumper - assembly - front - from 04MY (page 2 of 2)
- Make
- Land Rover
- Model
- Freelander Service Procedures
- Section
- REPAIRS
EXTERIOR FITTINGS
76-2-12 REPAIRS
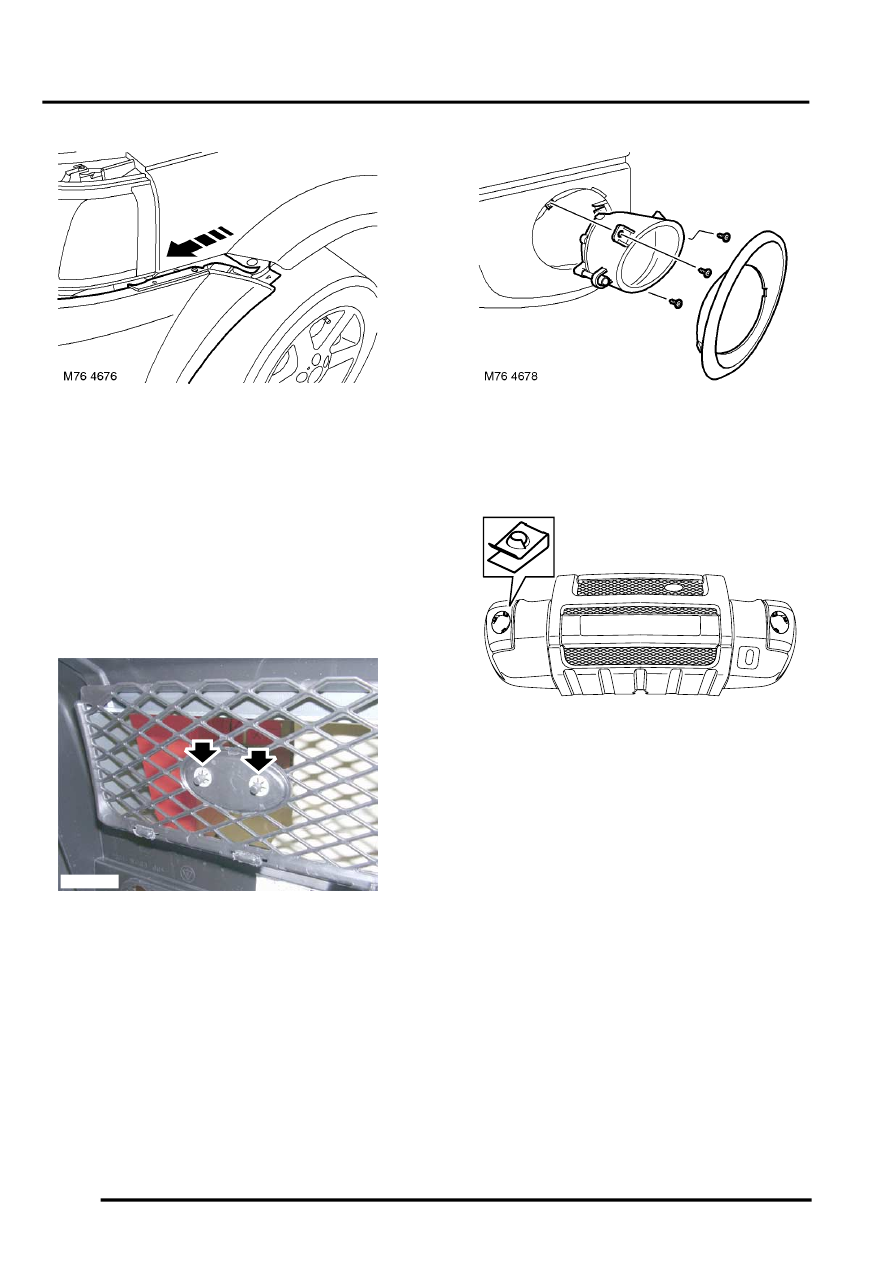
8. With assistance, carefully pull each side of
bumper forward to release it from its
mountings.
CAUTION: Always protect paintwork when
removing or refitting any body trims or
bumpers.
9. Remove front bumper.
NOTE: Do not carry out further dismantling if
component is removed for access only.
10. Remove front number plate.
11. Remove clips securing badge to grille, remove
badge and discard clips.
12. Release and remove fog/driving lamp finisher
from bumper.
13. Remove 6 screws securing fog/driving lamps to
bumper.
14. Remove 6 speed nuts from bumper.
Refit
1. Fit 6 speed nuts to bumper.
2. Fit fog/driving lamps to bumper and secure with
screws.
3. Fit fog/driving lamp finishers to bumper.
4. Fit badge to grille.
5. Fit number plate.
6. With assistance, fit bumper assembly to body.
7. Ensure bumper locating pegs are correctly
aligned.
8. Fit and tighten bolts securing bumper to wings.
9. Connect multiplugs to fog/driving lamps.
10. Fit screws securing bumper to bonnet locking
platform.
11. Fit scrivets to armature.
12. Fit screws securing bumper to underbelly
panel.
13. Fit and align wheel arch liners and tighten
screws.
14. Close bonnet.
M76 4677
M76 4679
Parts & tools for this job Staging For Land Rover Freelander
- TOOLTrim removal tool kitSearch: trim removal tool kit
- PARTTouch-up paintSearch: Land Rover touch up paint
- PARTPanel clip assortmentSearch: Land Rover panel clips assortment
Links open Amazon search results in a new tab. As an Amazon Associate I earn from qualifying purchases.