
Brake Shoes - rear set (page 2 of 2)
- Make
- Land Rover
- Model
- Freelander Service Procedures
- Section
- REPAIRS
BRAKES
70-16
REPAIRS
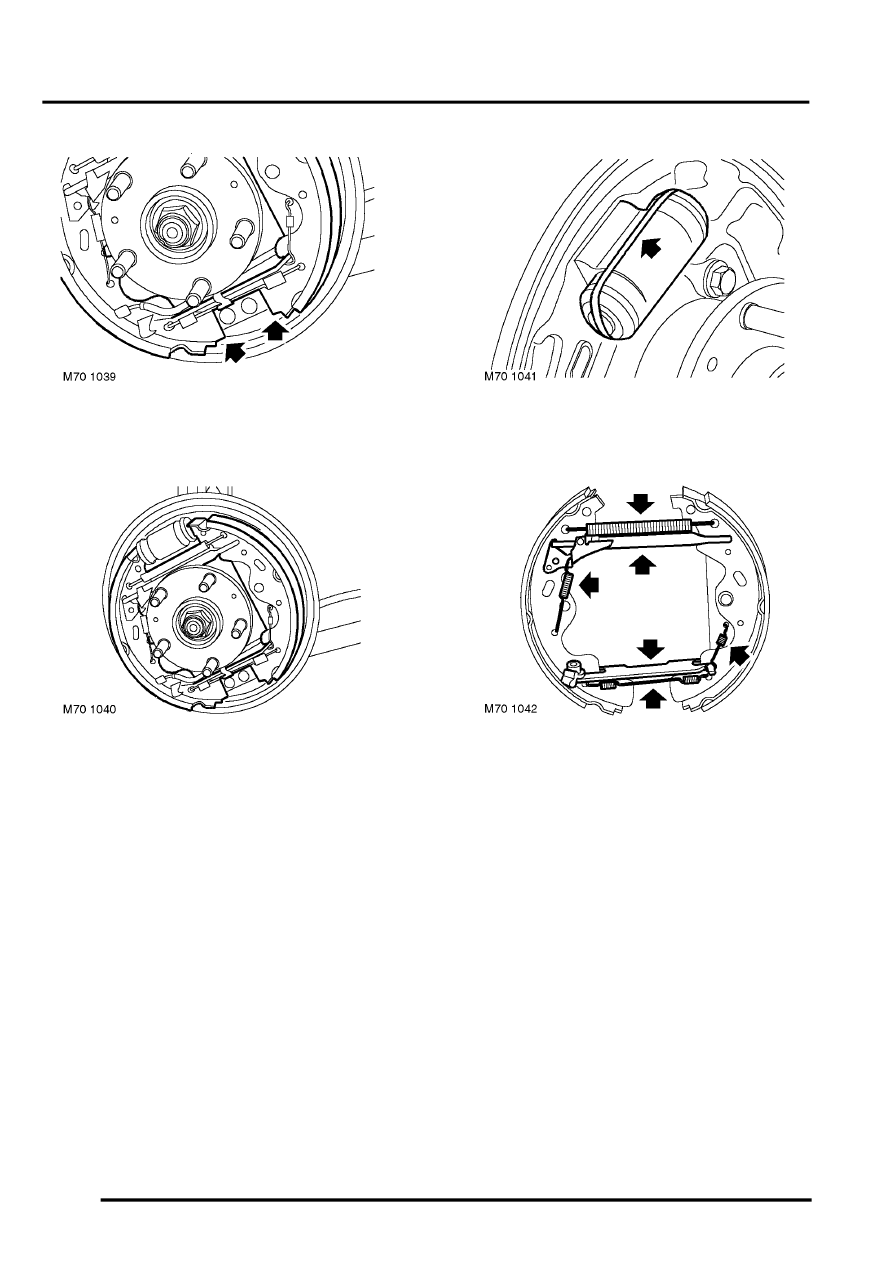
6. Ease one brake shoe out of retaining groove in
abutment followed by the other shoe.
7. Manoeuvre brake shoe assembly around wheel
cylinder and rear hub and remove brake shoe
assembly.
CAUTION: Ensure edges of brake shoes do
not damage wheel cylinder dust covers.
8. Fit an elastic band around wheel cylinder to
retain pistons.
9. Noting their fitted position, release and remove
return springs. Collect adjuster and expander.
10. Clean backplate and drum with brake cleaning
fluid.
WARNING: Do not use petroleum based
fluid as damage will occur to rubber
components
11. Use a wire brush to remove any corrosion, take
care not to damage wheel cylinder covers.
WARNING: Do not use compressed air to
clean brake components. Dust from friction
materials can be harmful if inhaled.
12. Inspect all parts for wear or damage.
13. Examine wheel cylinder dust seals for signs of
brake fluid leakage, a certain amount of
dampness is usual. However, if excessive fluid
is apparent, lift dust seals and check for
leakage. Renew wheel cylinders and brake
shoes if linings are contaminated.
Parts & tools for this job Staging For Land Rover Freelander
- PARTRear brake padsSearch: Land Rover Freelander rear brake pads
- TOOLCaliper piston rewind toolSearch: brake caliper piston rewind tool
- FLUIDBrake fluidSearch: brake fluid
Links open Amazon search results in a new tab. As an Amazon Associate I earn from qualifying purchases.