
Liner - front wheel arch
- Make
- Land Rover
- Model
- Freelander Service Procedures
- Section
- REPAIRS › Liner - front wheel arch
EXTERIOR FITTINGS
76-2-2
REPAIRS
Refit
1. Fit side repeater lamp to front wing.
2. Position front wing to body.
3. Connect repeater lamp multiplug.
4. Align front wing to body.
5. Fit bolts securing rear wing to 'A' post, top of
wing and front of wing, but do not tighten at this
stage.
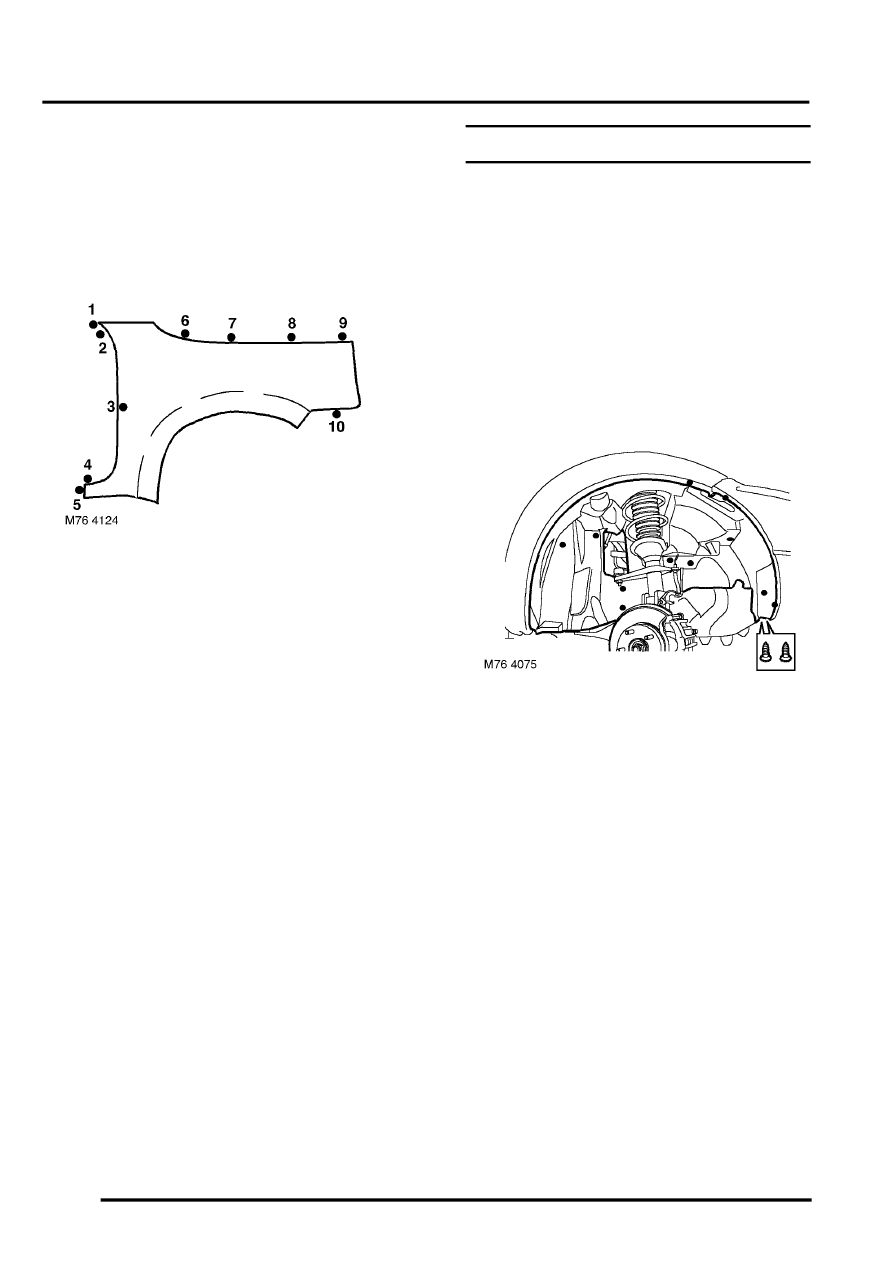
6. Align wing and tighten bolts in sequence shown
to 5 Nm (3.5 lbf.ft).
7. Align wheel arch liner to rear of wing.
8. Fit screw securing wheel arch liner to under
side of wing.
9. Fit lower sill finisher.
10. Fit front mud flap.
Liner - front wheel arch
$% 76.10.48
Remove
1. Raise front of vehicle.
WARNING: Do not work on or under a
vehicle supported only by a jack. Always
support the vehicle on safety stands.
2. Remove road wheel.
3. Remove front mud flap.
4. Remove 3 screws securing wheel arch liner to
wing and bumper.
5. Remove 8 retaining studs securing wheel arch
liner to inner wing.
6. Release and remove wheel arch liner.
Refit
1. Fit wheel arch liner.
2. Fit retaining studs securing wheel arch liner to
inner wing.
3. Fit and tighten screws securing wheel arch liner
to wing and bumper.
4. Fit front mud flap.
5. Fit road wheel(s) and tighten nuts to 115 Nm
(85 lbf.ft).
6. Remove stand and lower vehicle.
Parts & tools for this job Staging For Land Rover Freelander
- TOOLTorque wrenchSearch: 3/8 inch torque wrench
- TOOLSocket setSearch: socket set metric
- BOOKHaynes manualSearch: Haynes manual Land Rover Freelander
Links open Amazon search results in a new tab. As an Amazon Associate I earn from qualifying purchases.