
Arm assembly - engine mounting RH
- Make
- Land Rover
- Model
- Freelander Service Procedures
- Section
- REPAIRS › Arm assembly - engine mounting RH
ENGINE - K SERIES KV6
REPAIRS 12-3-45
Arm assembly - engine mounting RH
$% 12.45.06
Remove
1. Remove underbelly panel.
2. Remove engine acoustic cover.
ENGINE - K SERIES KV6, REPAIRS,
3. Remove bolt securing upper RH engine steady
to top arm.
4. Loosen bolt securing upper RH engine steady
to body, pivot engine steady away from top
arm.
5. Fit wooden block to jack, position jack under
engine sump to support engine.
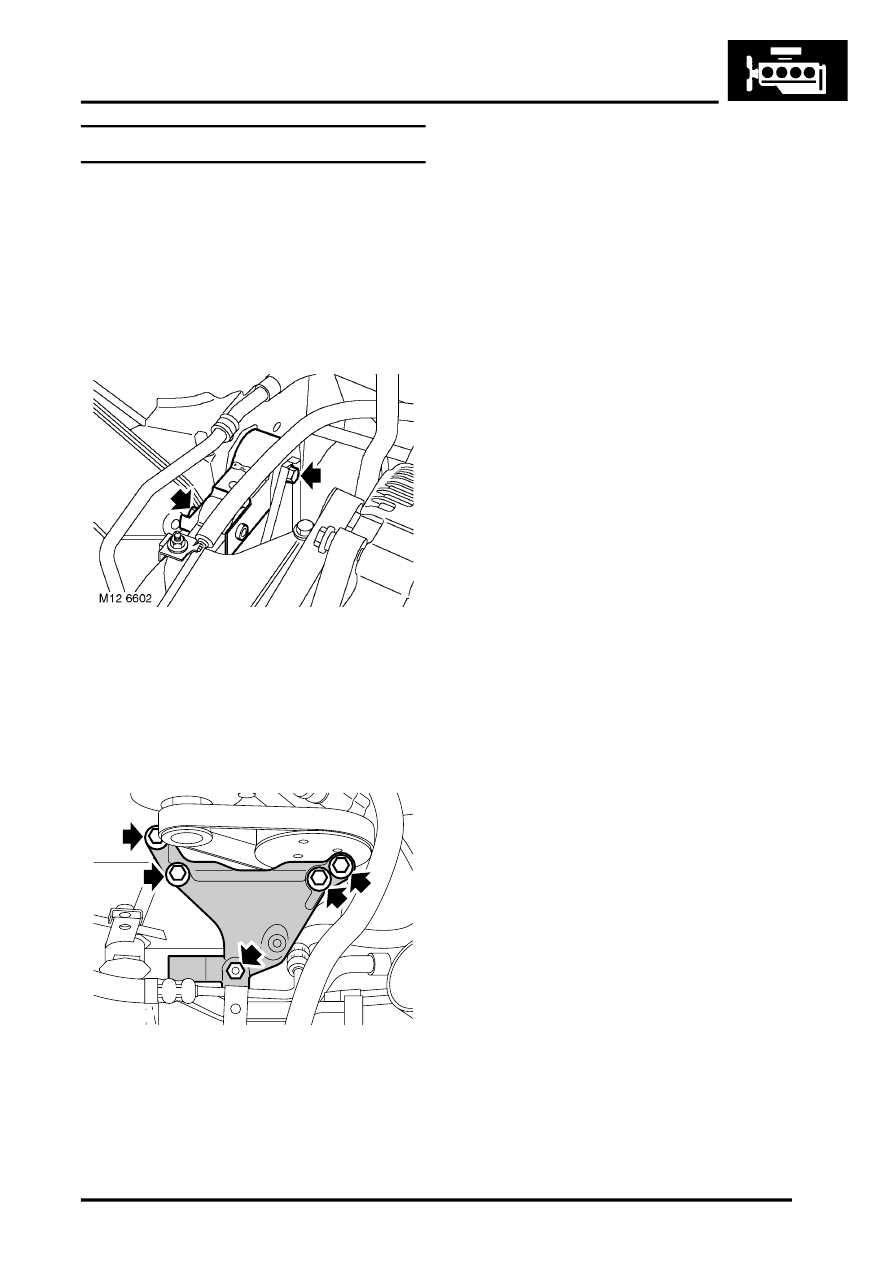
6. Remove nut and 4 bolts securing engine top
arm bracket to RH hydramount and to engine
front mounting bracket.
7. Release PAS pipe support bracket from
hydramount and position pipe aside.
8. Remove top arm.
Refit
1. Position top arm to front engine mounting
bracket, fit and tighten bolts to 100 Nm (74
lbf.ft).
2. Lower and remove jack supporting engine.
3. Position PAS pipe support bracket to
hydramount.
4. Fit nut securing top arm to RH hydramount and
tighten to 85 Nm (63 lbf.ft).
5. Position upper RH engine steady to top arm, fit
and tighten bolt to 100 Nm (74 lbf.ft).
6. Tighten bolt securing upper RH engine steady
to body to 100 Nm (74 lbf.ft).
7. Fit underbelly panel.
8. Fit engine acoustic cover.
ENGINE - K SERIES KV6, REPAIRS,
M12 6605
Parts & tools for this job Staging For Land Rover Freelander
- PARTEngine gasket setSearch: Land Rover Freelander engine gasket set
- TOOLTorque wrenchSearch: 3/8 inch torque wrench
- TOOLFeeler gauge setSearch: feeler gauge set
Links open Amazon search results in a new tab. As an Amazon Associate I earn from qualifying purchases.