
Selector cable
- Make
- Land Rover
- Model
- Freelander Service Procedures
- Section
- REPAIRS › Selector cable
AUTOMATIC GEARBOX - JATCO
REPAIRS
44-7
Selector cable
$% 44.15.08
Remove
1. Remove front console.
REPAIRS, Console - front - up to 04MY.
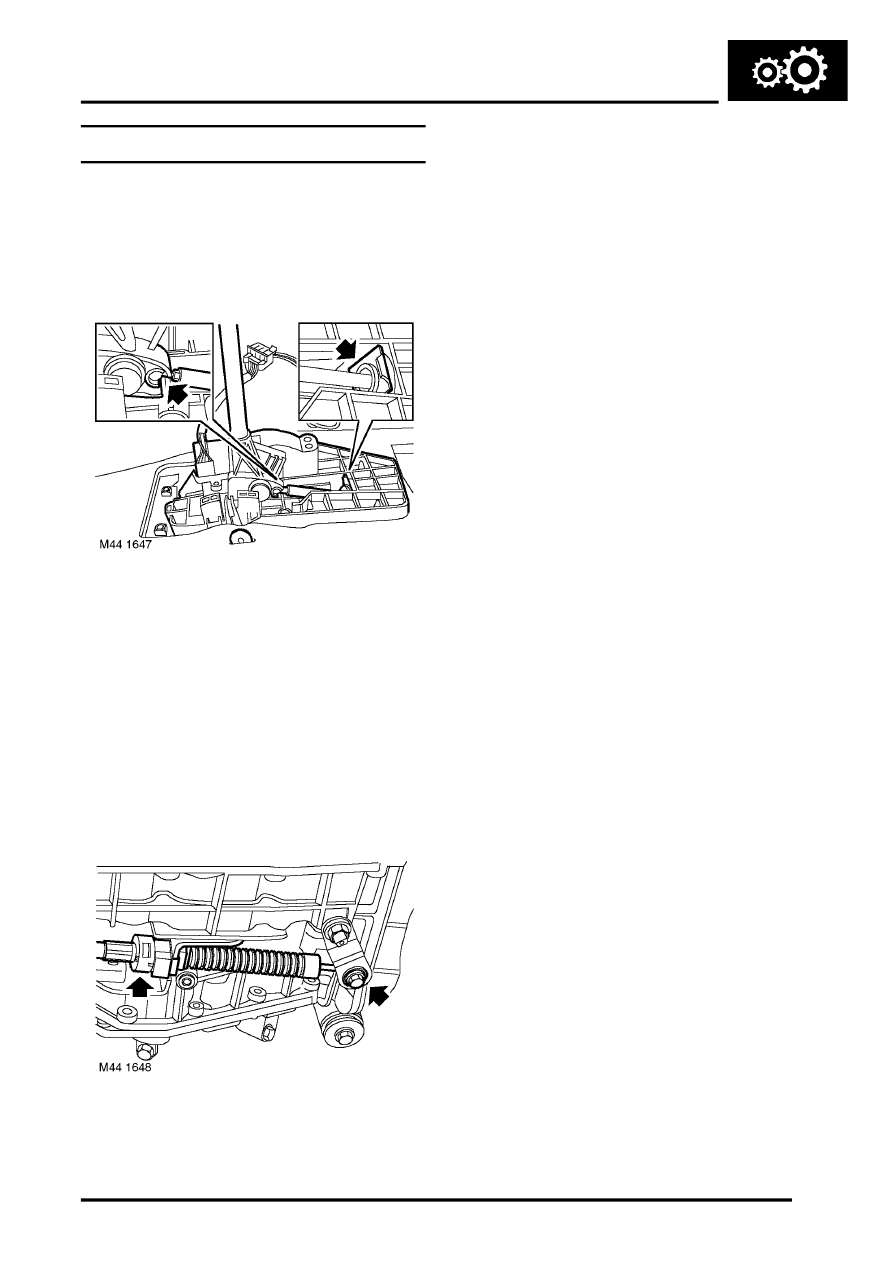
2. Release inner cable from selector lever.
3. Remove 'C' clip securing outer cable to selector
housing.
4. Raise front of vehicle.
WARNING: Do not work on or under a
vehicle supported only by a jack. Always
support the vehicle on safety stands.
5. Remove underbelly panel.
6. Remove cable tie and release gear selector
cable from clip on body.
7. Loosen selector cable trunnion nut.
8. Release clip securing selector cable to gearbox
bracket, remove selector cable and collect
trunnion from selector lever.
Refit
1. Position trunnion to selector lever, locate inner
cable through trunnion, do not tighten nut at this
stage.
2. Position selector cable to gearbox bracket and
secure with clip.
3. Locate cable in selector housing and secure
outer cable in clip.
4. Secure outer cable to selector housing with 'C'
clip.
5. Secure inner cable to selector lever.
6. Fit front console.
REPAIRS, Console - front - up to 04MY.
7. Check and adjust selector cable.
ADJUSTMENTS, Selector cable - adjust.
8. Fit underbelly panel.
9. Remove stands and lower vehicle.
Parts & tools for this job Staging For Land Rover Freelander
- PARTTransmission filter kitSearch: Land Rover Freelander transmission filter kit
- FLUIDAutomatic transmission fluidSearch: Land Rover automatic transmission fluid
- TOOLFluid transfer pumpSearch: fluid transfer pump
Links open Amazon search results in a new tab. As an Amazon Associate I earn from qualifying purchases.