
HEATER AND COOLER UNIT
- Make
- Land Rover
- Model
- Discovery 300Tdi Discovery
- Section
- REPAIR › HEATER AND COOLER UNIT
82
AIR CONDITIONING
8
REPAIR
HEATER AND COOLER UNIT
Service repair no - 86.25.21
WARNING: All work involving the service
and maintenance of air conditioning
requires special equipment, knowledge,
experience and a full awareness and adherence to
safety precautions.
Remove
1. Disconnect battery negative lead.
2. Drain engine coolant.
See COOLING SYSTEM,
Adjustment, Coolant
3. Recover refrigerant from air conditioning system.
See Adjustment, Refrigerant Recovery
Recycling Recharging
4. Remove fascia panel assembly.
See CHASSIS
AND BODY, Repair, Dash Panel Assembly
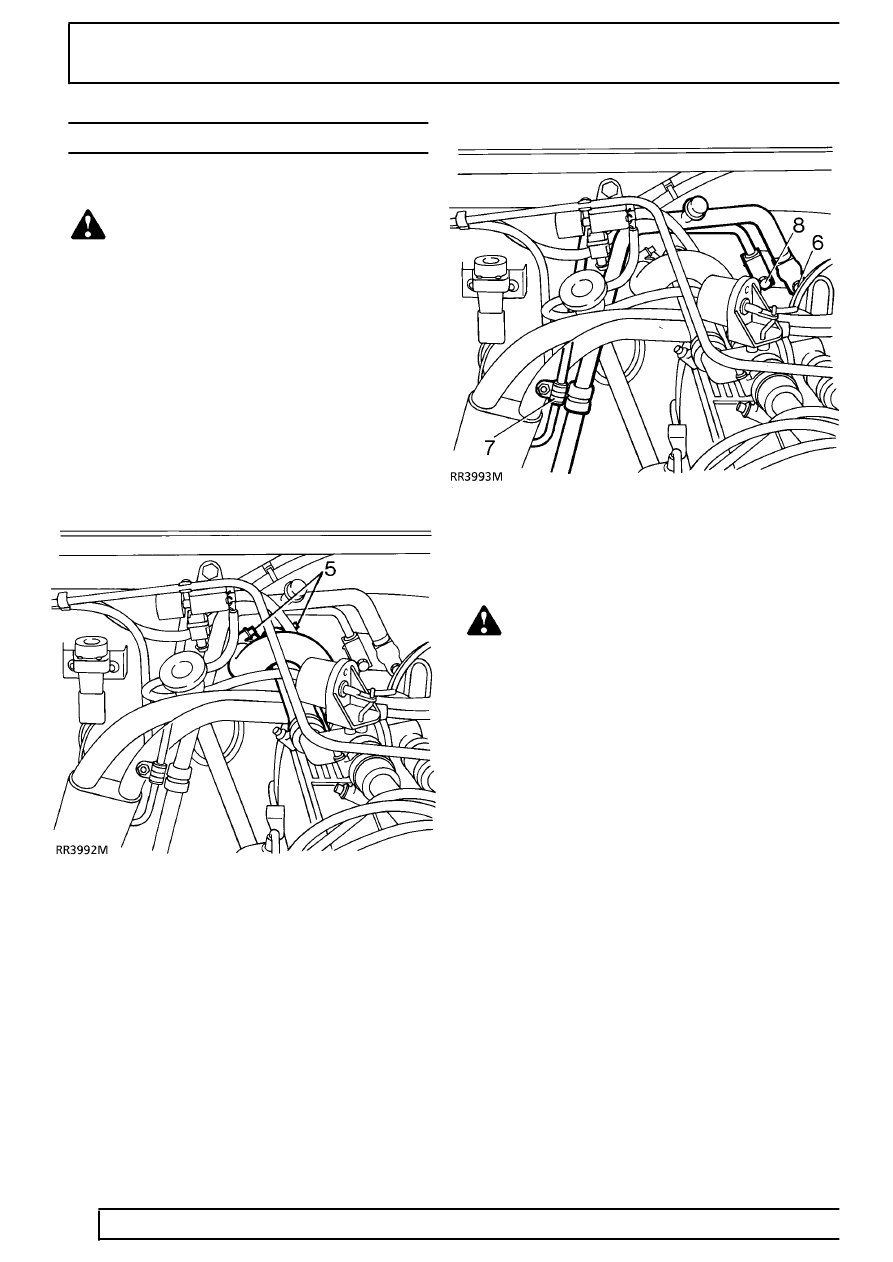
5. Release clips and disconnect coolant hoses
from heater pipes.
6. Remove securing bolt and disconnect low
pressure pipe from evaporator.
WARNING: Wear eye and hand protection
when disconnecting components
containing refrigerant. Plug all exposed
connections immediately.
7. Release ’P’ clip retaining high and low pressure
pipes.
8. Remove securing bolt and disconnect high
pressure pipe from evaporator.
9. Discard ’O’ ring seals.
Parts & tools for this job Staging For Land Rover Discovery
- TOOLA/C manifold gauge setSearch: AC manifold gauge set
- TOOLUV leak detection kitSearch: AC UV leak detection kit
- PARTCabin filterSearch: Land Rover Discovery cabin filter
Links open Amazon search results in a new tab. As an Amazon Associate I earn from qualifying purchases.