
FRONT DOOR
- Make
- Land Rover
- Model
- Discovery 300Tdi Discovery
- Section
- REPAIR › FRONT DOOR
CHASSIS AND BODY
1
REPAIR
FRONT DOOR
Service repair no - 76.28.01
Remove
1. Disconnect battery negative lead.
2. Detach the door seal at the lower section of the
’A’ post.
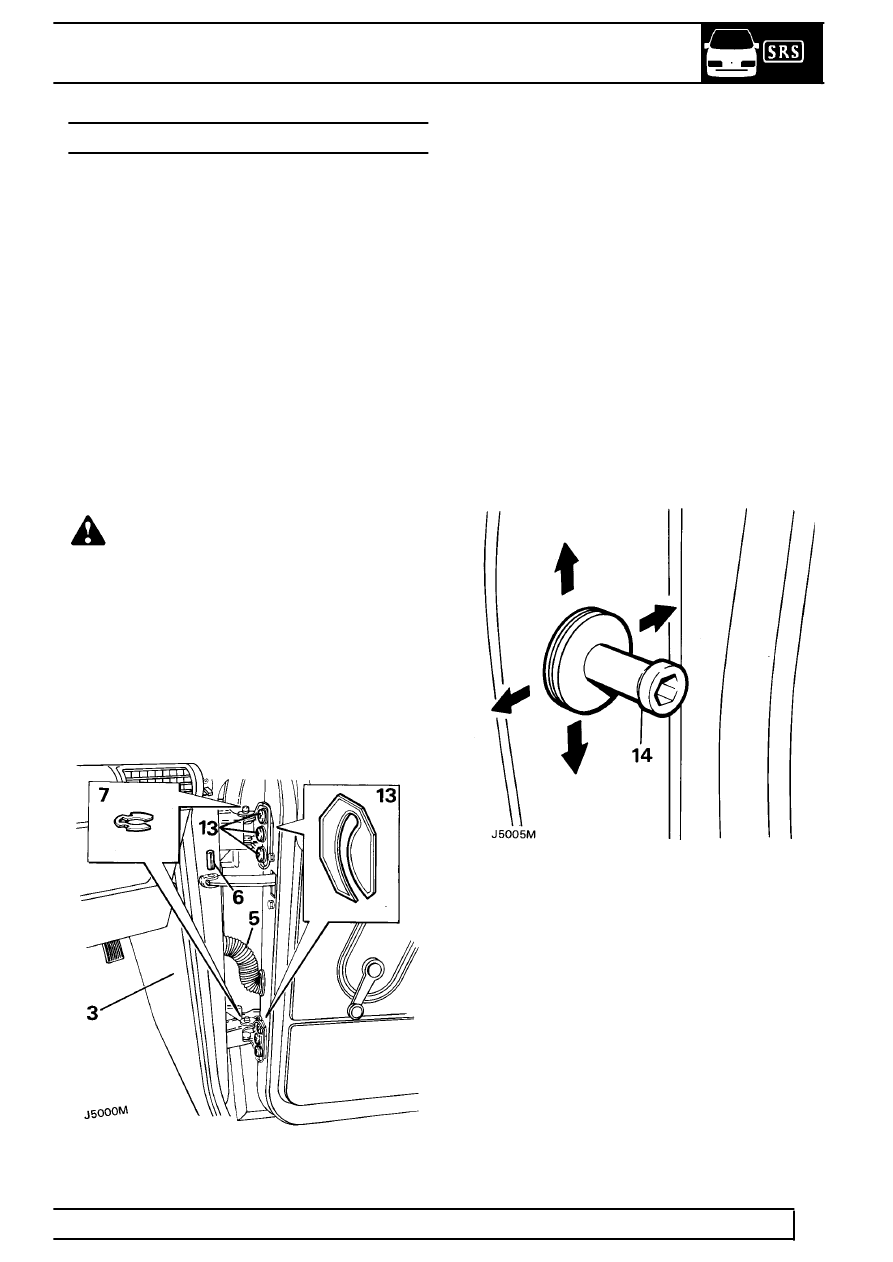
3. Carefully remove the two retaining buttons from
the trim panel on the side of the footwell and
ease out the panel.
4. Disconnect the three multiplugs connecting the
door harness and speaker leads.
5. Detach the convoluted grommet from the ’A’ post
and withdraw the door harness and speaker
leads.
6. Set the door in the open position without
engaging the check stay; then remove the roll
pin securing the check stay at the ’A’ post.
WARNING: Instruction 7 MUST BE carried
out with assistance.
7. Remove the door hinge ’C’ clips from the hinge
posts and with assistance carefully lift the door
from the vehicle.
Refit
8. Refit the door and secure the hinge posts with
the ’C’ clips.
9. Locate the check stay to the bracket on the ’A’
post and secure with a new roll pin.
10. Feed the door harness and speaker leads
through the aperture in the ’A’ post, fully open
the door and reconnect the multiplugs in the
footwell, take up the slack and refit the
convoluted grommet to the ’A’ post.
11. Refit the footwell side panel.
12. Check the location of the door and the operation
of the door lock. If necessary, adjust the door
and striker.
13. The door can be adjusted up and down or in and
out of the opening by loosening the six screws
securing the hinges to the door, and by the
addition or removal of shims between the hinge
and door.
14. The door lock striker can be adjusted by
loosening the striker and moving it in the
appropriate direction or by adding and removing
spacing washers between the striker and ’B’
post.
Parts & tools for this job Staging For Land Rover Discovery
- TOOLTrim removal tool kitSearch: trim removal tool kit
- PARTTouch-up paintSearch: Land Rover touch up paint
- PARTPanel clip assortmentSearch: Land Rover panel clips assortment
Links open Amazon search results in a new tab. As an Amazon Associate I earn from qualifying purchases.