
SPLIT REAR SEAT LOCKING MECHANISM
- Make
- Land Rover
- Model
- Discovery 300Tdi Discovery
- Section
- REPAIR › SPLIT REAR SEAT LOCKING MECHANISM
CHASSIS AND BODY
27
REPAIR
REAR SEAT CUSHION COVER
Service repair no - 76.70.88/89
Remove
NOTE: The procedure for removing both
left and right hand seat cushions is the
same.
1. Remove the rear seat assembly from the
vehicle.
2. Remove the seat squab.
3. Remove the seat cushion.
4. Remove the cushion base cover retaining
screws and withdraw the cover.
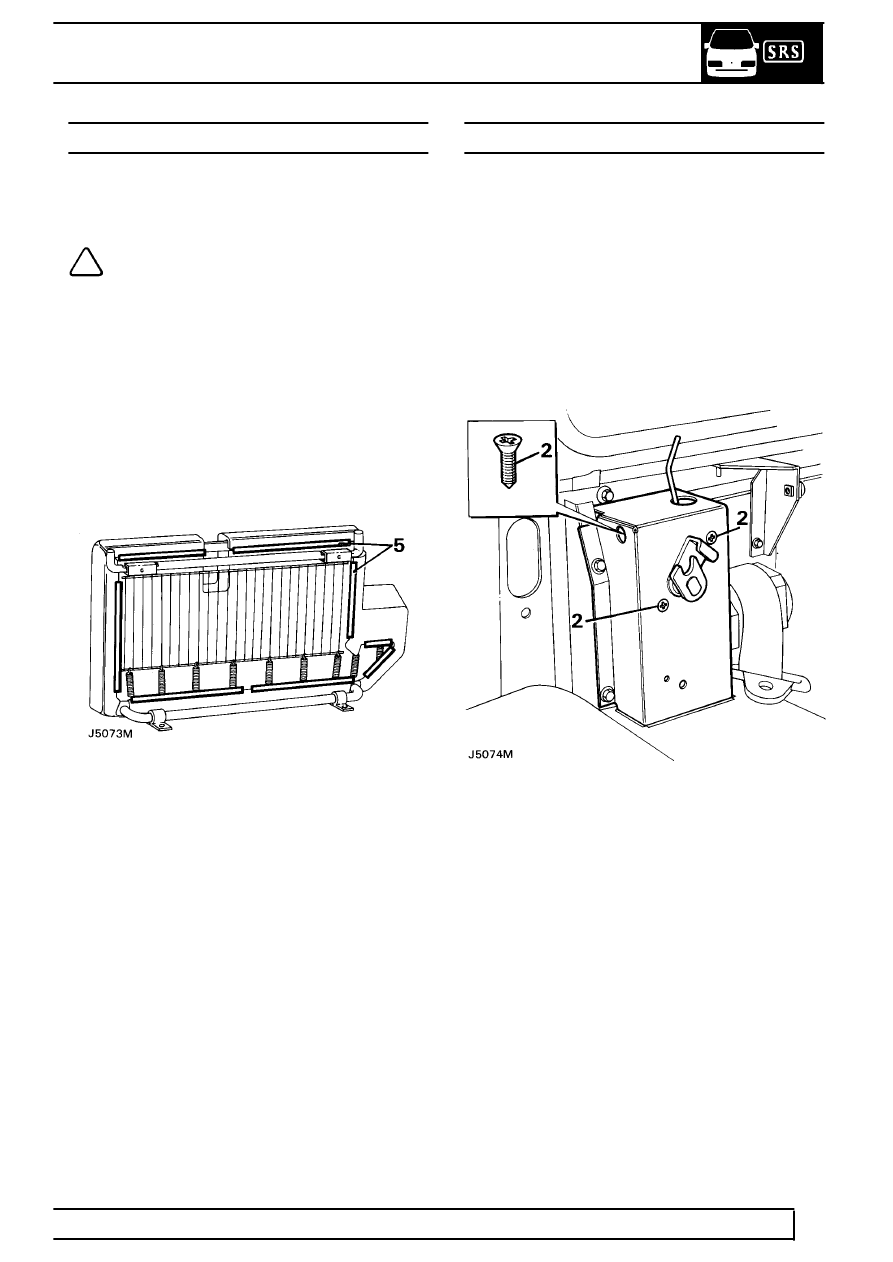
5. Release the seat cover securing clips at the
frame and at the seat belt aperture.
6. Remove the cover from the cushion.
Refit
7. Reverse removal procedure.
SPLIT REAR SEAT LOCKING MECHANISM
Service repair no - 76.70.51
Remove
1. Remove the front body side trim casing.
See
front body side trim casing.
2. Remove the three screws securing the latch to
the tower, noting that access to the single screw
is gained through the hole in the front of the
tower.
3. Retrieve the latch from the opening at the rear of
the tower. If necessary retrieve the single screw.
4. The operating rod can be removed from the latch
by releasing it at the plastic clip.
Refit
5. Reverse removal procedure. Setting the release
button to achieve a gap of 5 - 8 mm (3/16 - 5/16
in).
Parts & tools for this job Staging For Land Rover Discovery
- TOOLTrim removal tool kitSearch: trim removal tool kit
- PARTTouch-up paintSearch: Land Rover touch up paint
- PARTPanel clip assortmentSearch: Land Rover panel clips assortment
Links open Amazon search results in a new tab. As an Amazon Associate I earn from qualifying purchases.