
BODY SIDE OPENING WINDOWS
- Make
- Land Rover
- Model
- Discovery 300Tdi Discovery
- Section
- REPAIR › BODY SIDE OPENING WINDOWS
CHASSIS AND BODY
19
REPAIR
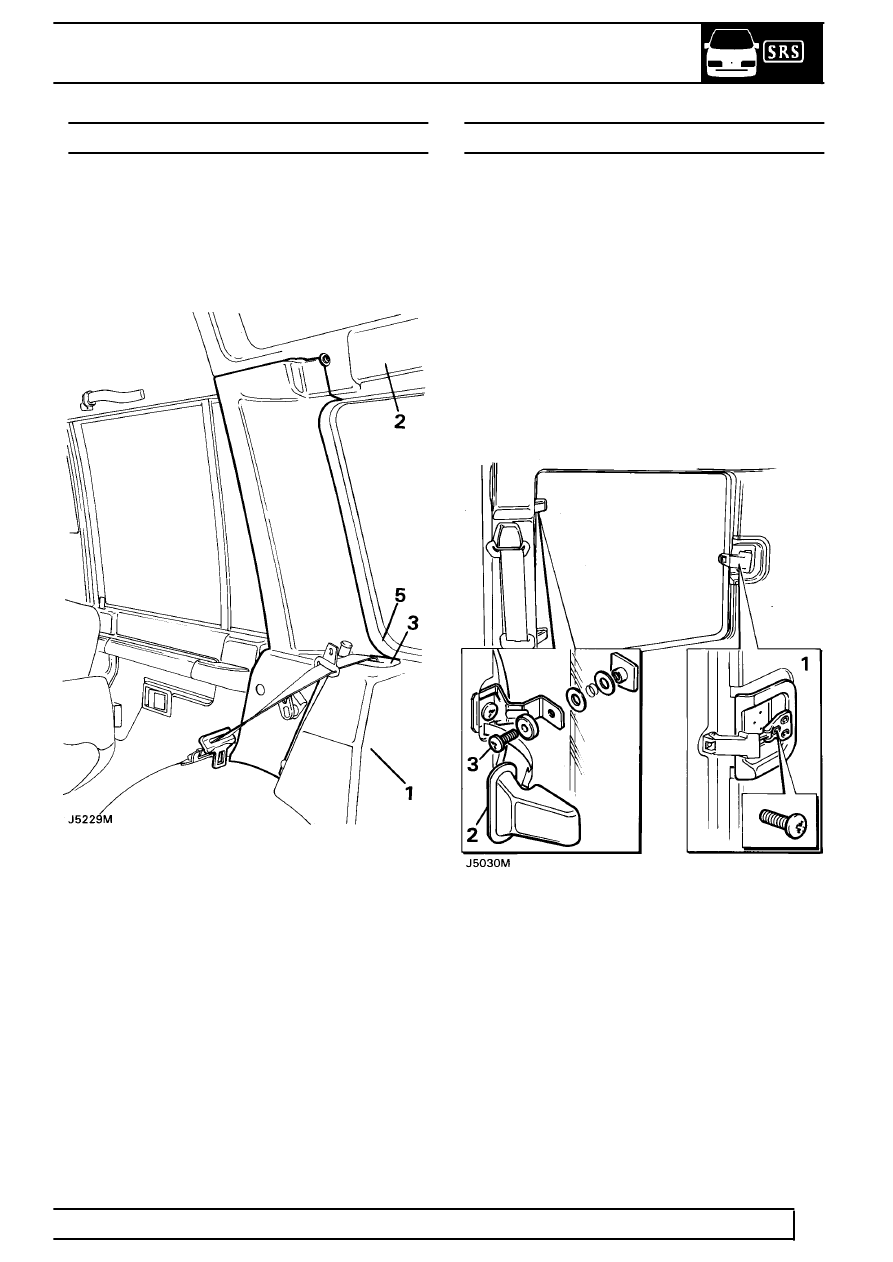
’D’ POST TRIM CASING
Service repair no - 76.13.73
Remove
1. Remove the rear compartment lower trim panel.
See rear compartment lower trim panels.
2. Remove the alpine light trim casing.
See alpine
light trim casing.
3. Release the rear seat belt from the guide
attached to the casing.
4. Fold down the rear seats.
5. Release the D’ post casing from the rear side
window seal and carefully ease the casing from
the fasteners.
Refit
6. Reverse removal procedure.
BODY SIDE OPENING WINDOWS
Service repair no - 76.81.18
Remove
1. Remove the screws securing the catch to the
body and detach the catch trim.
2. Remove the hinge finishers from the hinges.
3. Remove the screws securing the glass to the
hinges, withdraw the glass and fixings taking
care not to lose the joint washers.
Refit
4. Reverse removal procedure.
Parts & tools for this job Staging For Land Rover Discovery
- TOOLTrim removal tool kitSearch: trim removal tool kit
- PARTTouch-up paintSearch: Land Rover touch up paint
- PARTPanel clip assortmentSearch: Land Rover panel clips assortment
Links open Amazon search results in a new tab. As an Amazon Associate I earn from qualifying purchases.