
SHIFTLOCK SOLENOID/NEUTRAL SWITCH
- Make
- Land Rover
- Model
- Discovery 300Tdi Discovery
- Section
- REPAIR › SHIFTLOCK SOLENOID/NEUTRAL SWITCH
41
TRANSFER GEARBOX
4
REPAIR
SHIFTLOCK SOLENOID/NEUTRAL SWITCH
Service repair no - 41.10.63/64
This is sited on top of the transfer gearbox. Access to
the component is gained through the transmission
tunnel aperture.
Remove
1. Disconnect battery negative lead.
2. Remove centre console.
See CHASSIS AND
BODY, Repair, Centre Console
3. Remove rear passenger heater air ducts.
4. Remove insulation pad.
5. Remove four screws and remove main gear
lever assembly.
6. Drill out rivets and remove tunnel blanking plate.
7. Disconnect solenoid multiplug.
8. Remove four retaining bolts and remove shiftlock
solenoid cover.
9. Remove solenoid and spring washer.
10. Clean joint sealant from mating faces.
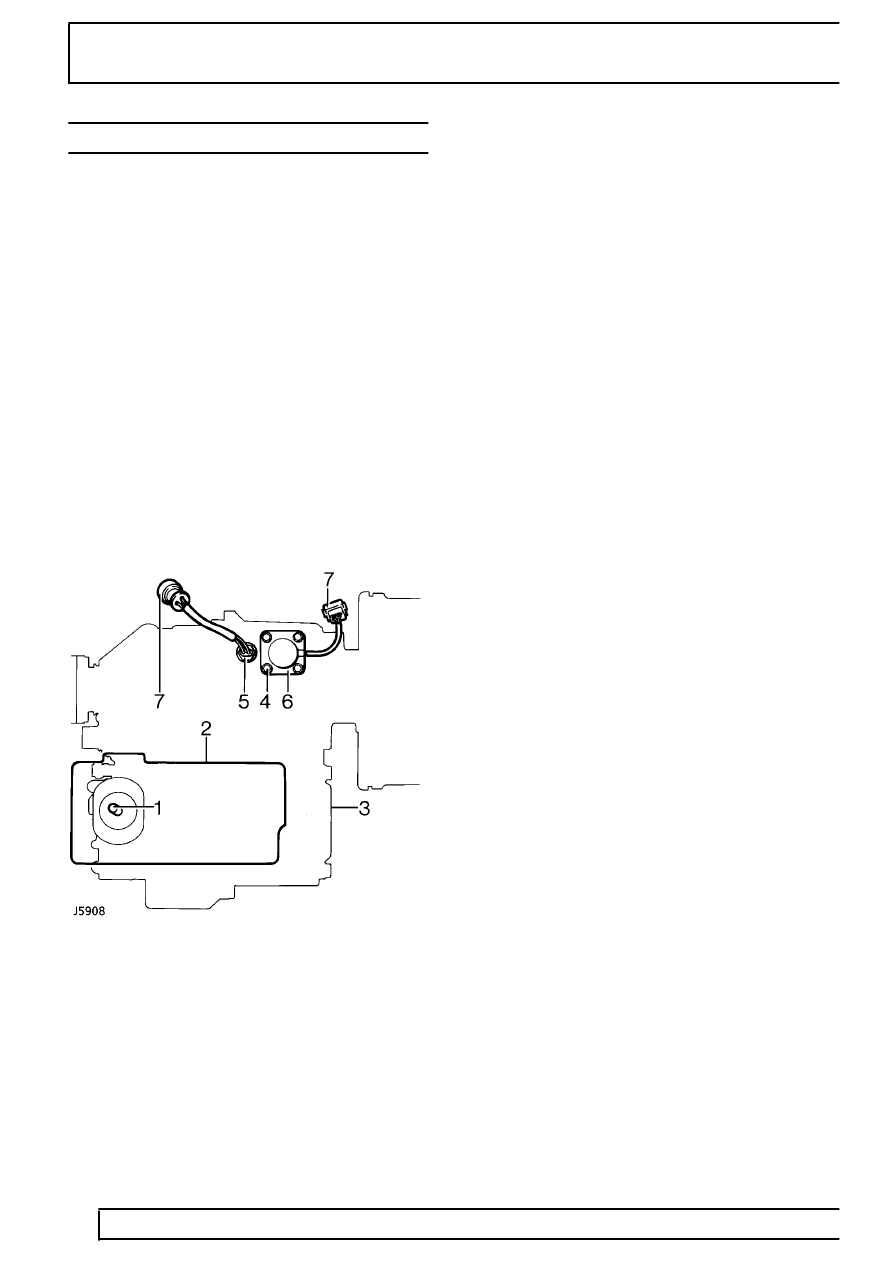
KEY
1. Gearlever
2. Transmission tunnel aperture
3. Transfer gearbox
4. Bolt
5. Switch
6. Solenoid
7. Electrical connections
Refit
1. Apply Hylosil or equivalent sealant to mating
faces.
2. Ensure solenoid plug lead is located in cover
recess.
3. Reverse removal procedure.
4. Fit four solenoid bolts. Tighten to
9Nm.
Neutral switch, audible alarm
1. Disconnect neutral switch electrical plug.
2. Remove neutral switch from transfer box.
Refit
3. Apply Hylomar PL32/L20 or SL500 sealant to
neutral switch.
4. Reverse removal procedure.
5. Switch - Tighten to
25Nm.
Parts & tools for this job Staging For Land Rover Discovery
- TOOLOBD2 scannerSearch: OBD2 scanner
- TOOLDigital multimeterSearch: automotive digital multimeter
- TOOLBack-probe test leadsSearch: back probe test leads
Links open Amazon search results in a new tab. As an Amazon Associate I earn from qualifying purchases.