
ENGINE CONTROL MODULE (ECM)-14 CUX
- Make
- Land Rover
- Model
- Discovery 300Tdi Discovery
- Section
- REPAIR › ENGINE CONTROL MODULE (ECM)-14 CUX
19
FUEL SYSTEM
4
REPAIR
MULTIPORT FUEL INJECTION RELAYS
Service repair no - 19.22.08
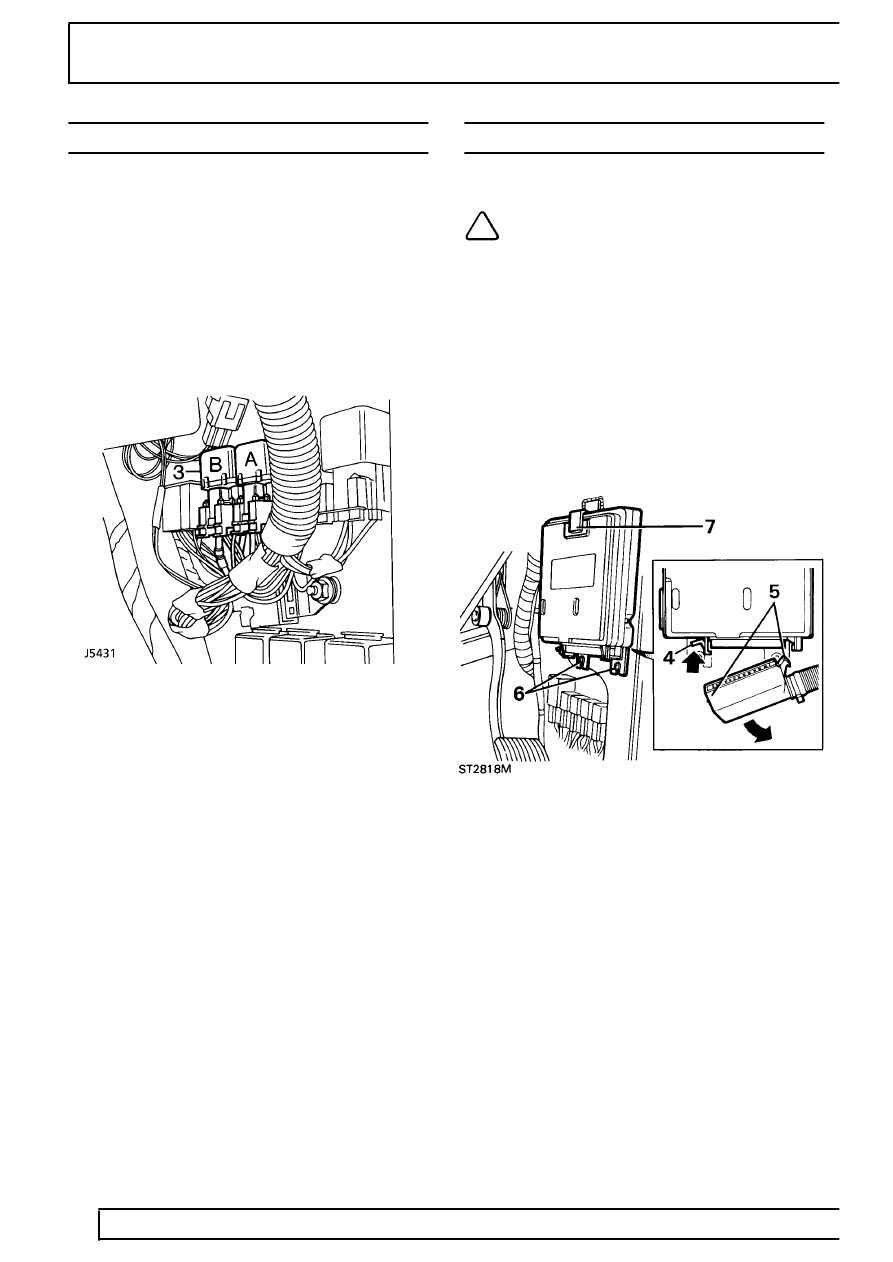
The two Multiport fuel injection relays are located in
the RH footwell area behind the ’A’ post trim panel.
The fuel injection relays can be identified as follows:
A. Fuel pump relay - Blue base
B. Main relay - Black base
Remove
1. Release front door seal from ’A’ post.
2. Remove lower ’A’ post trim panel.
3. Pull relay from base.
Refit
4. Reverse removal procedure.
ENGINE CONTROL MODULE (ECM)-14 CUX
Service repair no - 19.22.34
NOTE: The ECM is not serviceable, in
event of unit failure it must be replaced.
Remove
1. Remove the fascia right-hand closing panel.
2. Remove the right-hand footwell side panel trim.
3. Disconnect battery negative lead.
4. Release ECM plug retaining clip.
5. Maneouvre the front of the plug (in the direction
of the bold arrow) and detach the other end of
the plug from the retaining peg.
6. Release the two screws securing the ECM to the
right-hand footwell side panel.
7. Withdraw the ECM from the clip.
Refit
8. Refit the ECM securely in the clip and fit the two
screws.
9. Reconnect the ECM harness plug. Ensure that
the plug is pushed firmly into its location and that
the retaining clip secures the plug in position.
10. Reverse removal procedure.
Parts & tools for this job Staging For Land Rover Discovery
- TOOLOBD2 scannerSearch: OBD2 scanner
- TOOLDigital multimeterSearch: automotive digital multimeter
- TOOLBack-probe test leadsSearch: back probe test leads
Links open Amazon search results in a new tab. As an Amazon Associate I earn from qualifying purchases.