
FLYWHEEL
- Make
- Land Rover
- Model
- Discovery 300Tdi Discovery
- Section
- REPAIR › FLYWHEEL
12
ENGINE
14
REPAIR
FLYWHEEL
Service repair no - 12.53.07
Remove
1. Disconnect battery negative lead.
2. Remove gearbox.
Repair, R380 Manual Gearbox
3. Remove clutch.
See CLUTCH, Repair, Clutch
Assembly
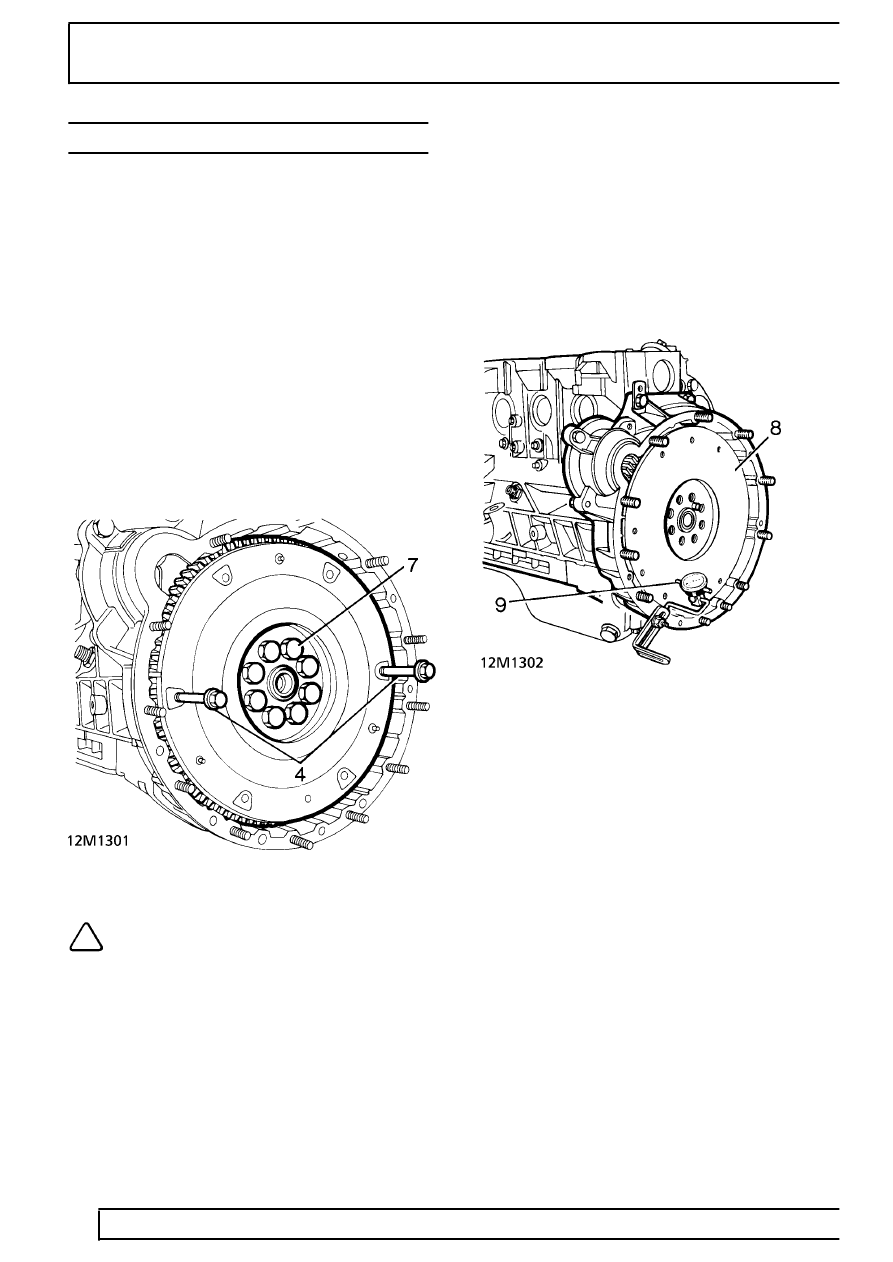
4. Fit two long 8mm bolts into the clutch bolt holes,
diametrically opposite, to use as handles when
lifting the flywheel off the crankshaft.
5. Remove fan cowl
6. Fit crankshaft pulley retainer LRT-12-080 and
secure with four bolts, to restrain crankshaft
while removing flywheel retaining bolts.
7. Remove the bolts and lift off flywheel.
NOTE: To prevent excessive flywheel
run-out, ensure that the mating faces of
the flywheel and crankshaft are clean.
Refit
8. Locate the flywheel on the crankshaft and
secure with new patched retaining bolts,
progressively tighten to
147 Nm.
9. Check the flywheel for possible run-out by
mounting a dial test indicator with the stylus in a
loaded condition resting on the flywheel face at a
radius of 114mm from the centre.
10. Turn the flywheel and check that run-out does
not exceed 0,05 to 0,07mm. Should run-out be
excessive, remove the flywheel and check again
for irregularities on the crankshaft and flywheel
mating faces and the dowel.
11. Reverse removal procedure. 1 to 6.
Parts & tools for this job Staging For Land Rover Discovery
- PARTGlow plugsSearch: Land Rover Discovery glow plugs
- TOOLGlow plug socketSearch: glow plug socket
- TOOLDiesel compression testerSearch: diesel compression tester
Links open Amazon search results in a new tab. As an Amazon Associate I earn from qualifying purchases.