
STARTER MOTOR - 4.0 V8 (page 2 of 2)
- Make
- Land Rover
- Model
- Discovery 300Tdi Discovery
- Section
- REPAIR
ELECTRICAL
47
REPAIR
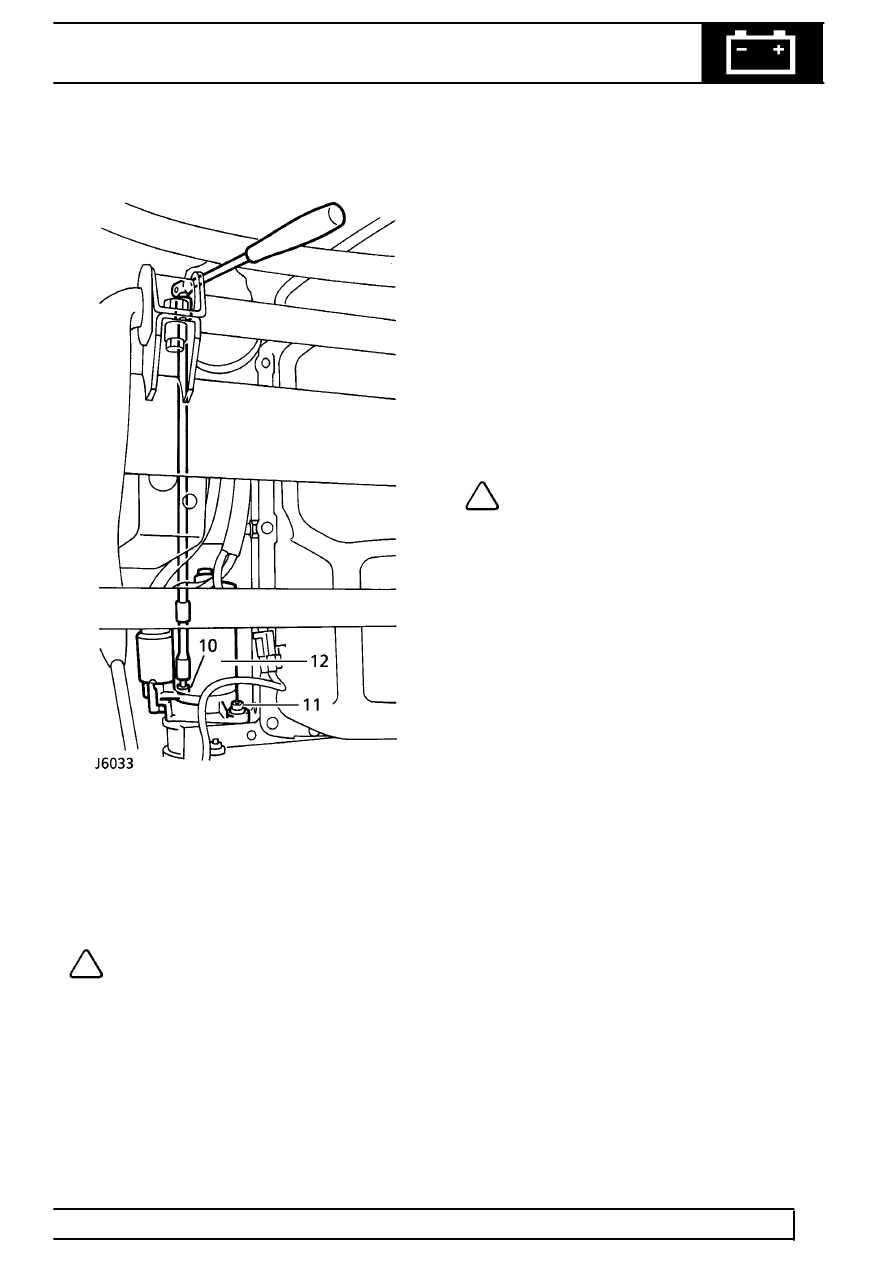
10. From above, remove top bolt securing starter
motor and position earth lead aside.
NOTE: To assist removal, use 230 mm
extension bar positioned between engine
mounting bracket and exhaust manifold.
11. Remove bottom bolt securing starter motor.
12. Remove starter motor.
Refit
13. Ensure mating faces are clean.
14. Locate starter motor in fitted position and fit
bottom bolt finger tight.
15. Fit top bolt. Tighten to
42 Nm.
16. Bottom bolt. Tighten to
42 Nm.
17. Connect feed wires to solenoid terminal. Secure
with nut.
18. Connect Lucar to starter solenoid.
19. Manoeuvre heat shield down and forward to
position bracket against engine mounting.
Engage clip on solenoid.
20. Align bracket to hole using suitable tool and fit
retaining bolt.
21. Clean flange mating surfaces, locate propeller
shaft and align reference marks.
22. Fit bolts and NEW nyloc nuts. Tighten to
48 Nm.
NOTE: Fit bolts with head towards transfer
box and away from differential.
23. Lower vehicle.
24. Reconnect battery negative lead.
Parts & tools for this job Staging For Land Rover Discovery
- TOOLBattery testerSearch: car battery tester
- TOOLDigital multimeterSearch: automotive digital multimeter
- TOOLBattery terminal cleanerSearch: battery terminal cleaner
Links open Amazon search results in a new tab. As an Amazon Associate I earn from qualifying purchases.