
ANTENNA AMPLIFIER - 97 MY
- Make
- Land Rover
- Model
- Discovery 300Tdi Discovery
- Section
- REPAIR › ANTENNA AMPLIFIER - 97 MY
86
ELECTRICAL
50
REPAIR
DIGITAL DIESEL SHUT-OFF VALVE (DDS) - 97 MY
Service repair no - 86.77.00
Remove
1. Remove fuel injection pump.
See FUEL
SYSTEM, Repair, fuel injection pump and
timing
2. Drill into 2 break-off screws to a depth of
approximately 5 mm using a 3.2 mm drill.
CAUTION: Use a drill bushing to guide the
drill during the above.
3. Using an ’Easy-out’ remove 2 valve retaining
screws and discard.
4. Release DDS valve from fuel shut-off solenoid.
5. Remove protective cap from fuel shut-off
solenoid electrical connection.
6. Remove fuel shut-off solenoid terminal nut and
remove DDS valve.
Refit
7. Position DDS terminal lead to fuel shut-off
solenoid and secure with nut tightened to
2 Nm .
8. Position DDS valve to fuel shut-off solenoid .
9. Position clamping plate to DDS valve and tighten
shear bolts simultaneously until heads shear.
10. Fit fuel injection pump.
See FUEL SYSTEM,
Repair, fuel injection pump and timing; Refit
ANTENNA AMPLIFIER - 97 MY
Service repair no - 86.50.29
Remove
1. Remove RH alpine light trim casing.
See
CHASSIS AND BODY, Repair, alpine light
trim casing
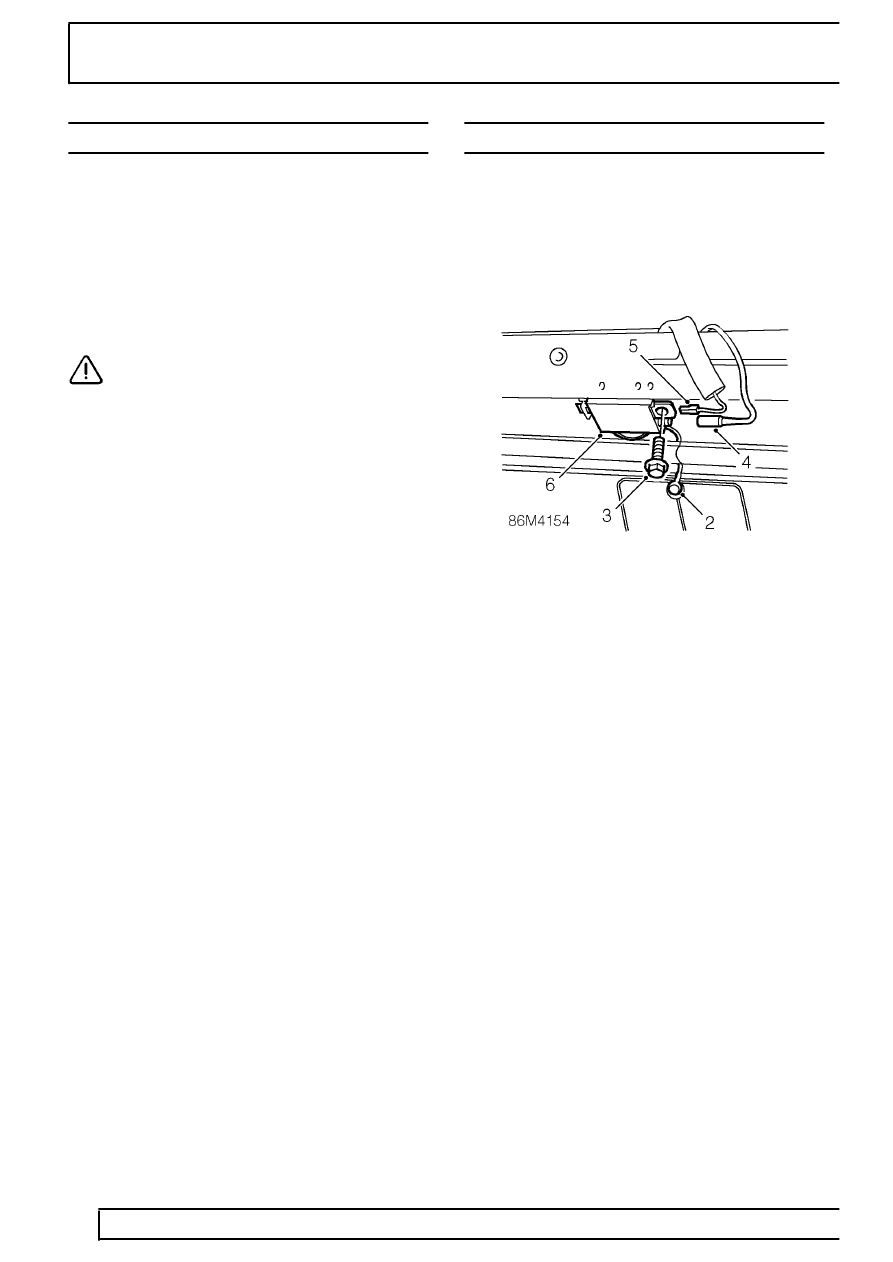
2. Release amplifier to sixth light connector and
seal finisher.
3. Remove screw securing amplifier to body and
release from location.
4. Disconnect co-axial cable from amplifier.
5. Disconnect Lucar from amplifier.
6. Remove amplifier.
Refit
7. Fit amplifier, connect co-axial cable and Lucar to
amplifier.
8. Position amplifier to location and secure with
screw.
9. Secure amplifier lead through seal finisher and
connect to sixth light.
10. Fit RH alpine light trim casing.
See CHASSIS
AND BODY, Repair, alpine light trim casing;
Refit
Parts & tools for this job Staging For Land Rover Discovery
- TOOLDigital multimeterSearch: automotive digital multimeter
- PARTAssorted fuse kitSearch: car fuse assortment kit
- TOOLWire crimper and connector kitSearch: wire crimper connector kit
Links open Amazon search results in a new tab. As an Amazon Associate I earn from qualifying purchases.