
ANTI-TRICKLE FILL VALVE - ADVANCED EVAPS
- Make
- Land Rover
- Model
- Discovery 300Tdi Discovery
- Section
- REPAIR › ANTI-TRICKLE FILL VALVE - ADVANCED EVAPS
SFI
29
REPAIR
ADD: 09/95
ANTI-TRICKLE FILL VALVE - ADVANCED EVAPS
Service repair no - 19.55.31
Remove
1. Remove the fuel filler neck.
See fuel filler neck
- advanced evaps
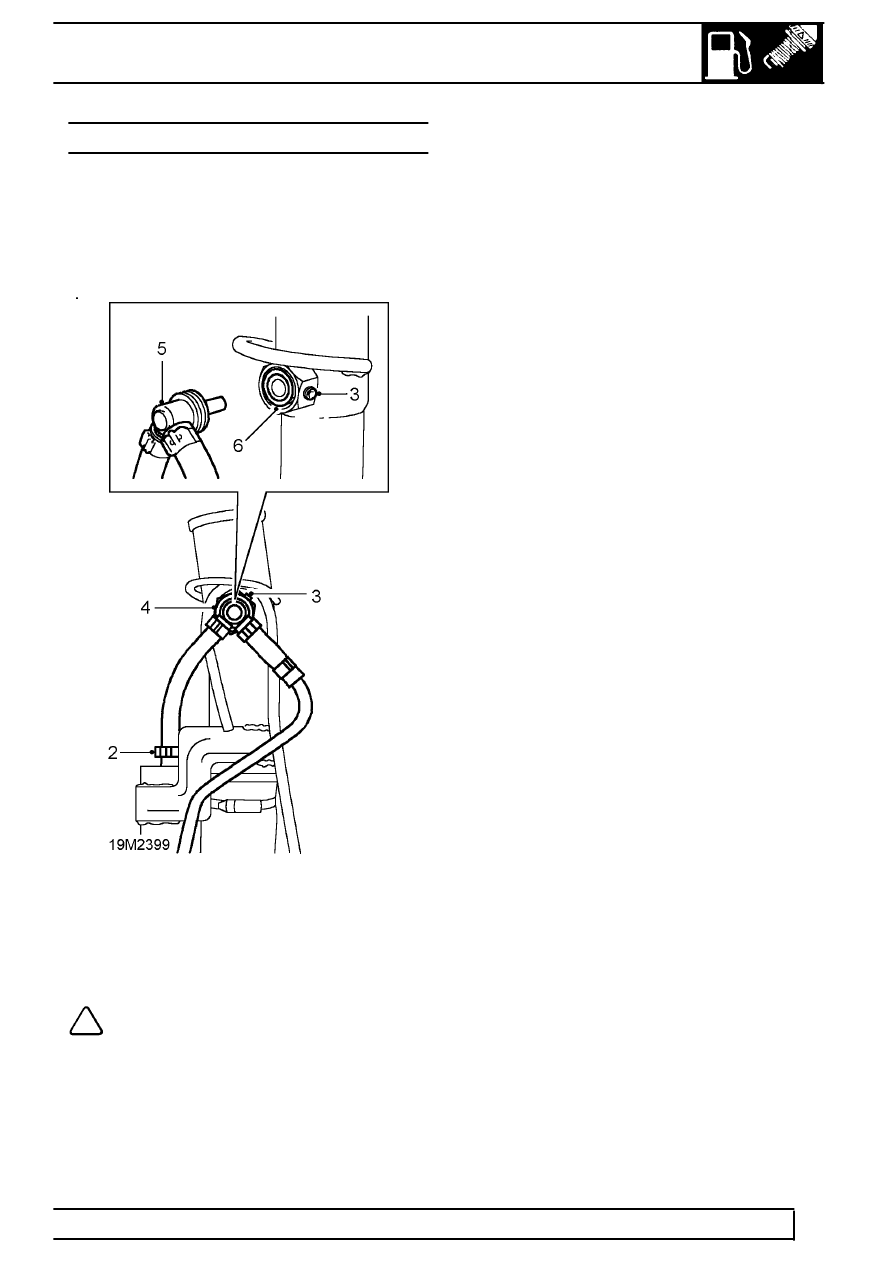
2. Release the cobra clip securing the hose to the
liquid/vapour separator and disconnect the hose.
3. Loosen the grub screw on the valve nut, two
complete turns.
4. Loosen the valve nut completely.
NOTE: The nut is held captive by the stub
pipe on the filler neck.
5. Carefully remove the valve and hose assembly
from the filler neck
Refit
6. Fit a new ’O’ ring to the recess in the stub pipe.
7. Fit the valve and hose assembly to the filler neck
stub pipe, ensuring that the ’O’ ring is fitted
around the body of the valve as it is pushed into
the filler neck stub pipe.
8. Hand tighten the nut, then tighten to
3 Nm.
9. Tighten the grub screw to
2 Nm.
10. Connect the hose to the liquid/vapour separator
and secure with the cobra clip.
11. Fit the fuel filler neck.
See fuel filler neck -
advanced evaps;refit
Parts & tools for this job Staging For Land Rover Discovery
- PARTEngine gasket setSearch: Land Rover Discovery engine gasket set
- TOOLTorque wrenchSearch: 3/8 inch torque wrench
- TOOLFeeler gauge setSearch: feeler gauge set
Links open Amazon search results in a new tab. As an Amazon Associate I earn from qualifying purchases.