
TRIM CASING - FRONT DOOR - FROM 02MY (page 2 of 2)
- Make
- Land Rover
- Model
- Defender TD5 Defender
CHASSIS AND BODYTRIM CASING - FRONT DOOR - FROM 02MY · page 2 of 2
76
CHASSIS AND BODY
32
REPAIR
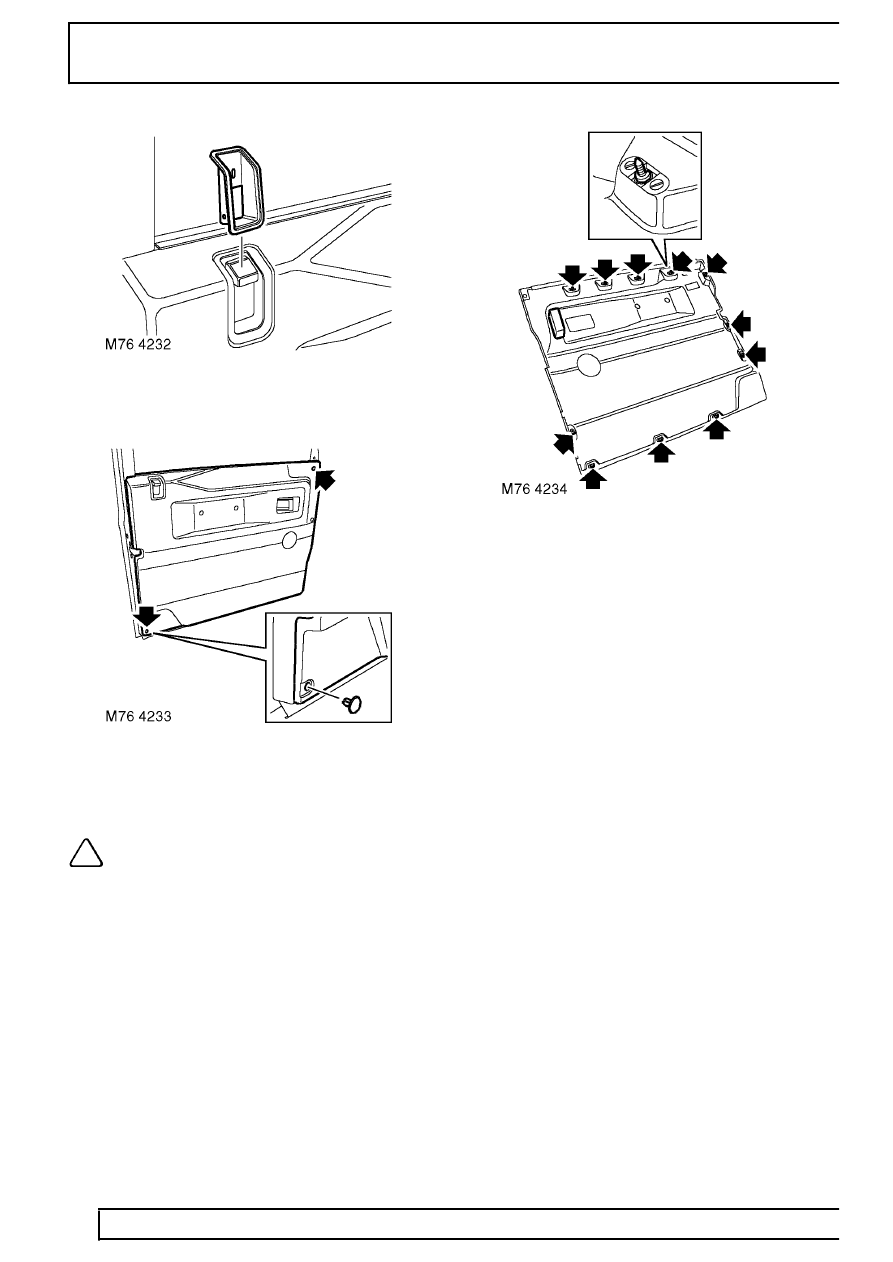
3. Remove sill button guide.
4. Remove 2 studs securing trim casing.
5. Using a trim removal tool, release 11 fasteners
and remove trim casing.
NOTE: Do not carry out further
dismantling if component is removed for
access only.
6. Remove fasteners and anti-vibration pad from
trim casing
Refit
7. Fit anti-vibration pad and fasteners to trim
casing.
8. Position trim casing, align fasteners with holes in
door and press firmly into position.
9. Fit trim studs to casing.
10. Fit sill button guide.
11. Fit escutcheon to door handle and secure with
screw.
12. Fit door pull and secure with screws.
Parts & tools for this job Staging For Land Rover Defender
- TOOLTrim removal tool kitSearch: trim removal tool kit
- PARTTouch-up paintSearch: Land Rover touch up paint
- PARTPanel clip assortmentSearch: Land Rover panel clips assortment
Links open Amazon search results in a new tab. As an Amazon Associate I earn from qualifying purchases.